Table of Contents
MECM Installation series
| The installation and configuration of a full MECM setup is a complex hence time consuming activity. I have slides these steps in multiple blog articles to create a better overview |
- Part 1 : Installation of MECM 2207 with CMG
- Part 2 : Installation of a Root Authority for MECM with CMG
- Part 3: Installation of Cloud Management Gateway (CMG) (this article)
- Part 4: Installation of ConfigMgr client yet to be posted (stay tuned 📻)
Prerequisites
Make sure before you start the following four Azure Resource Provider are enabled for your Azure subscription:
- Microsoft.KeyVault
- Microsoft.Storage
- Microsoft.Network
- Microsoft.Compute
If you forget about this, you will get (strange) error during the CMG Deployment task, see the appendix for these errors
Configuration of CMG
Azure Services
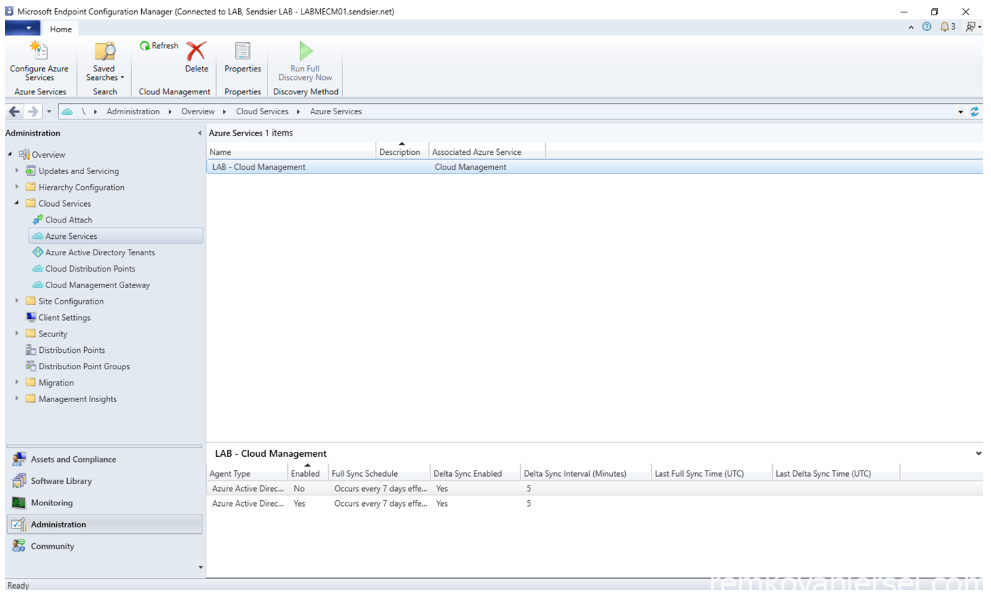
- In the MECM Console, navigate to Administration > Cloud Services > Azure Services
- Right mouse click on the node and select Configure Azure Services
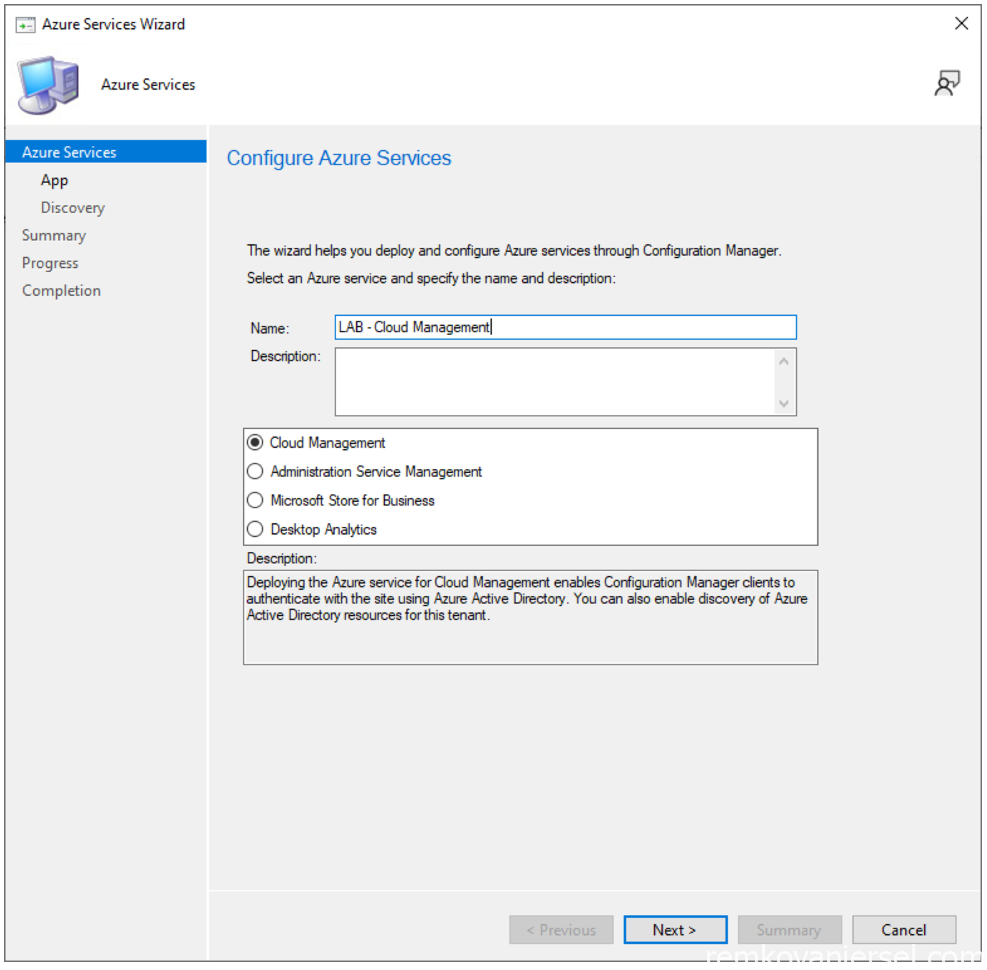
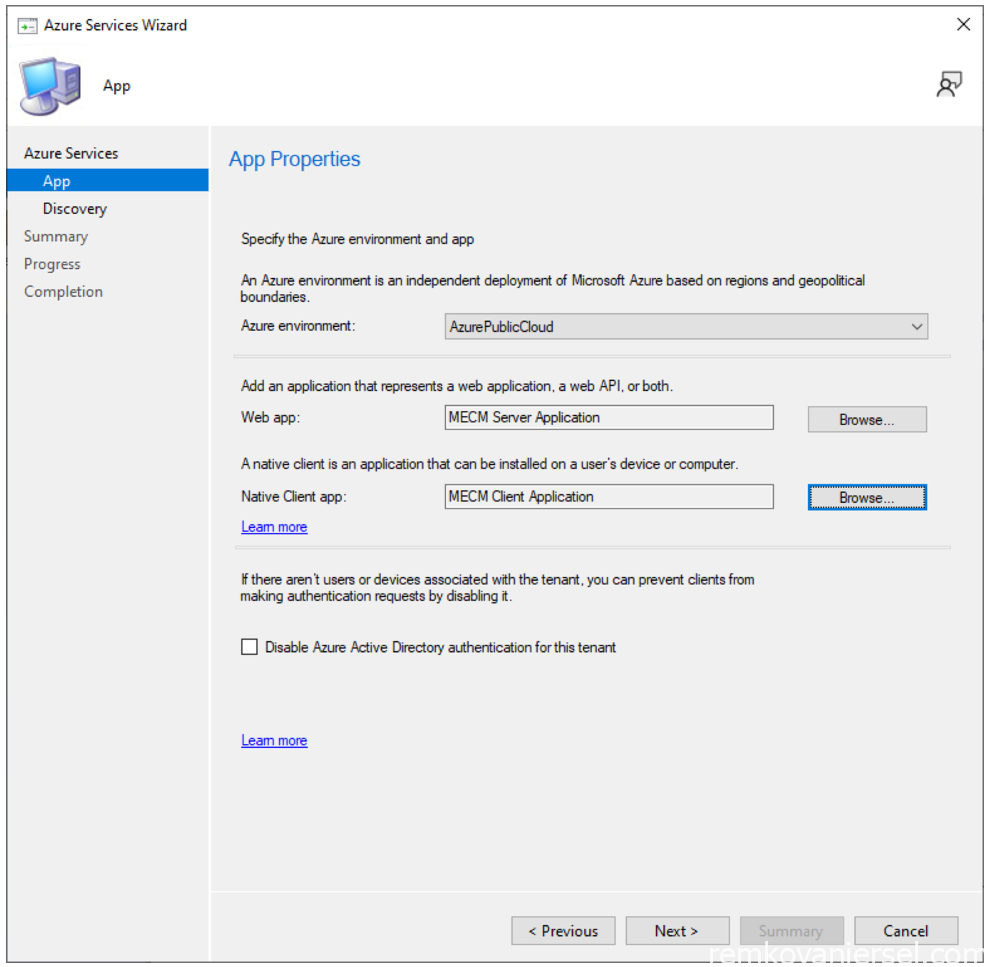
- Next
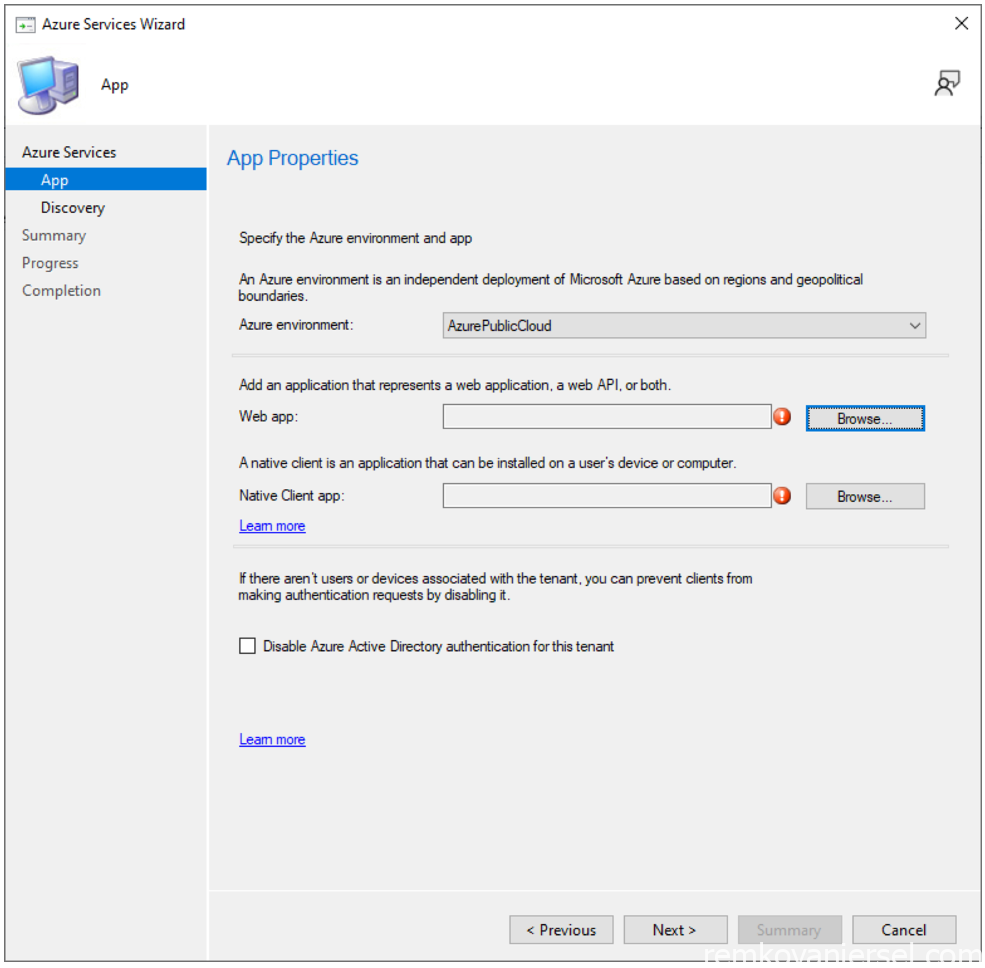
- Browse
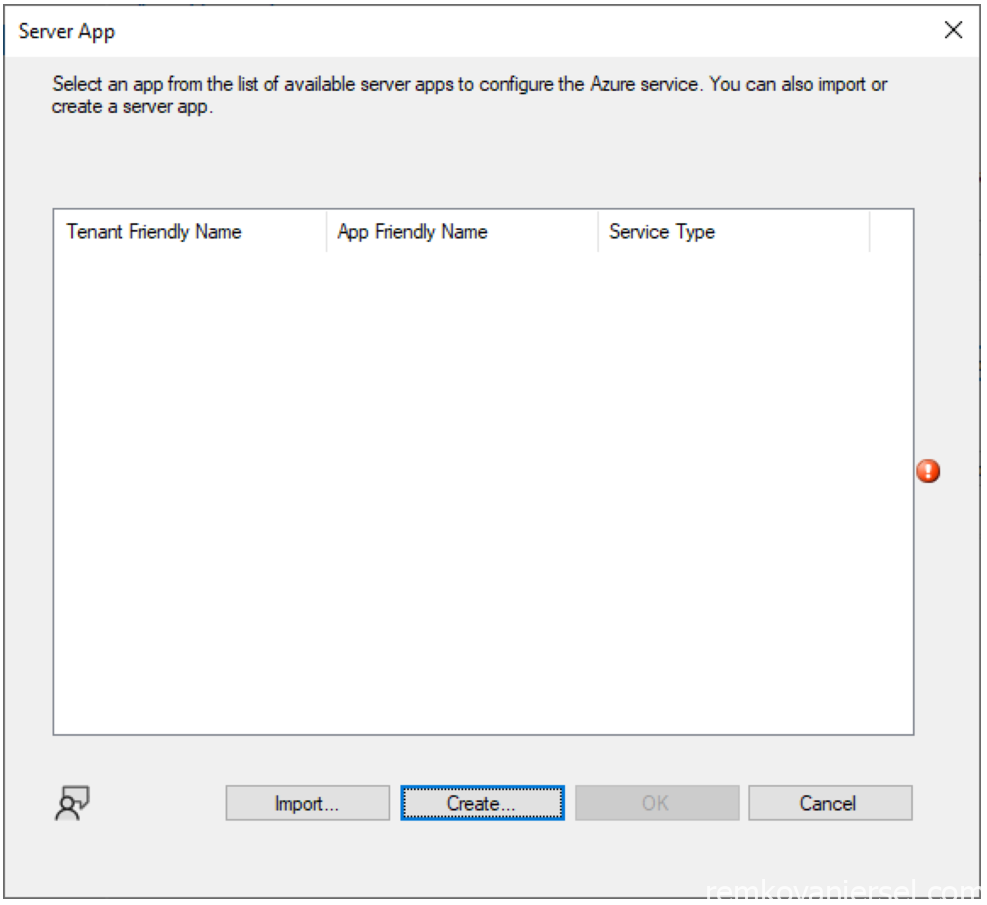
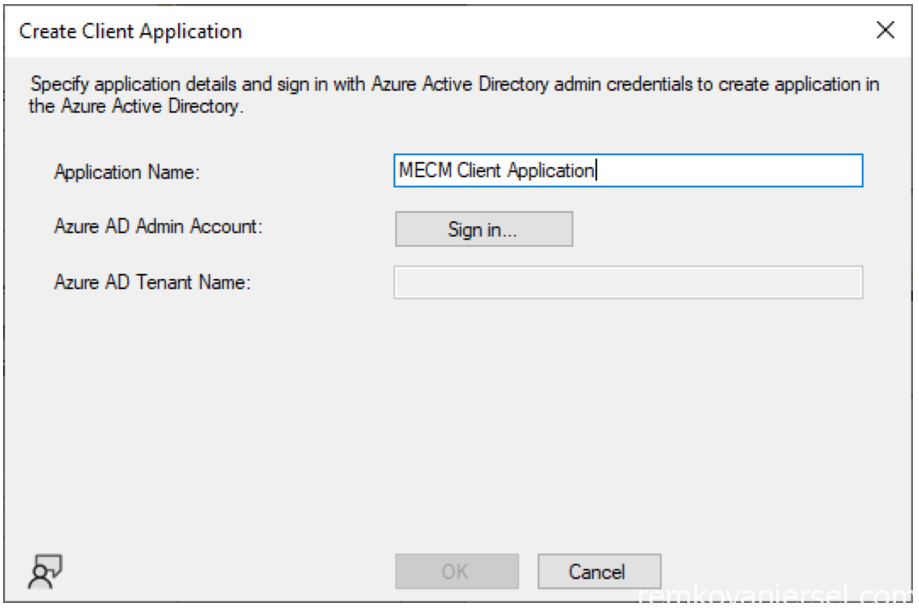
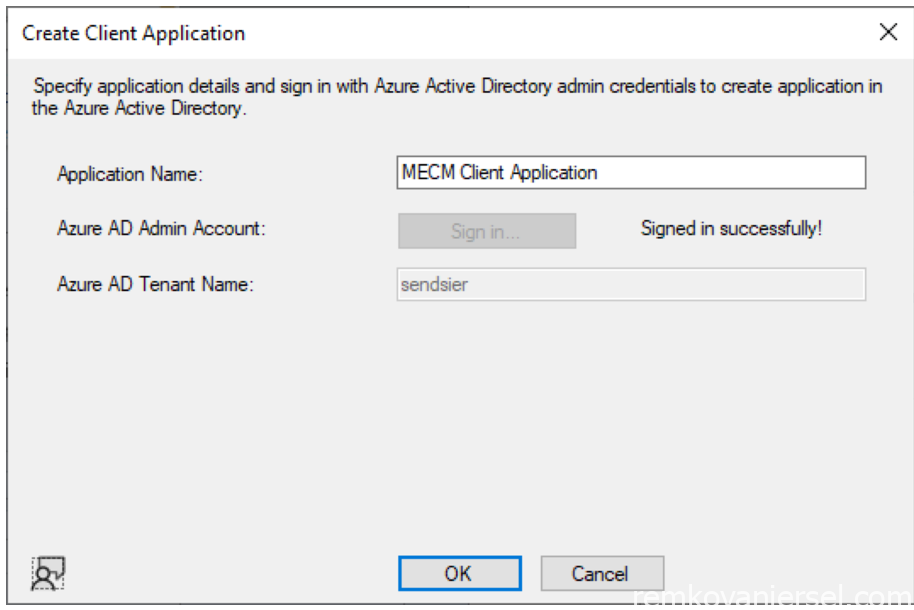
- Create
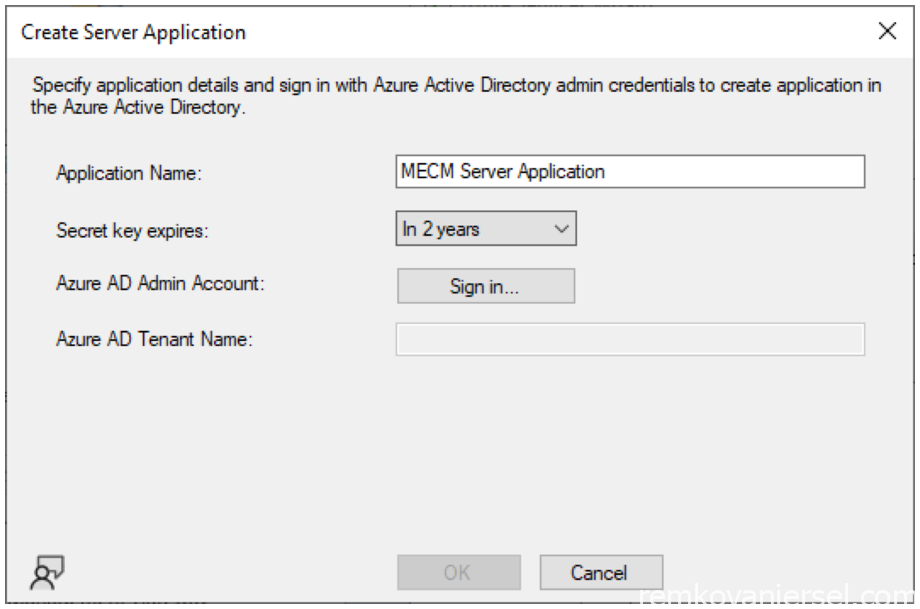
- Select “In 2 years” and sign in.
You probably will receive some Internet Explorer errors that the site is not trusted.
Add all the sites which popup to the IE Trusted Site window
Continue running the script if you receive a Script error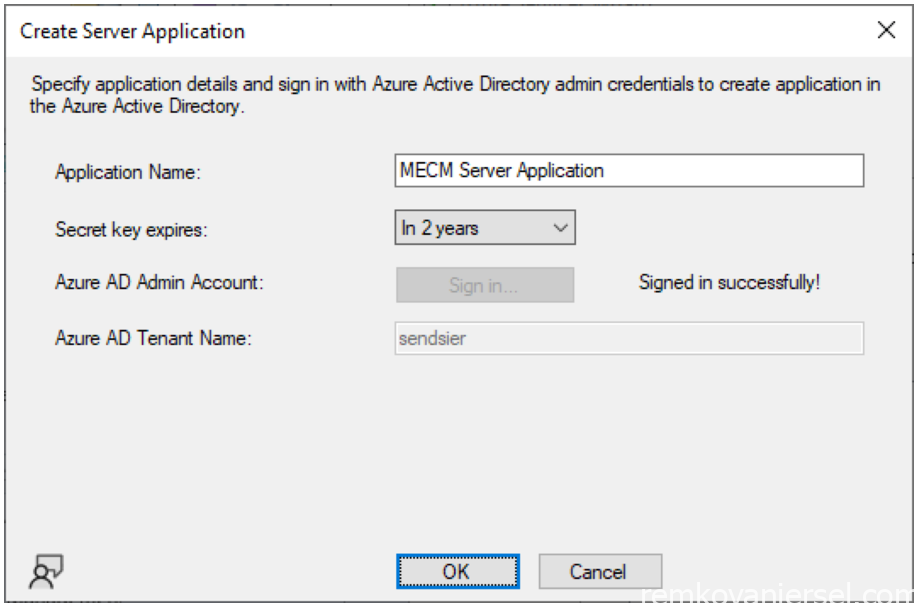
- OK
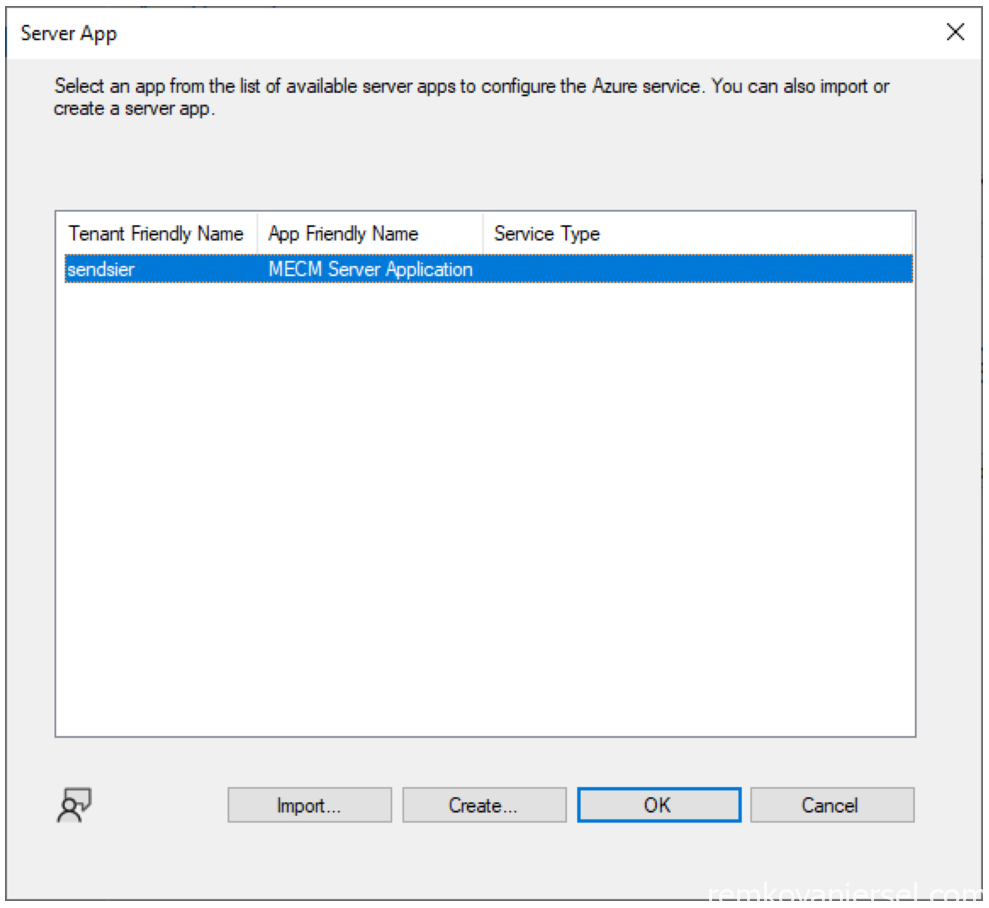
- OK
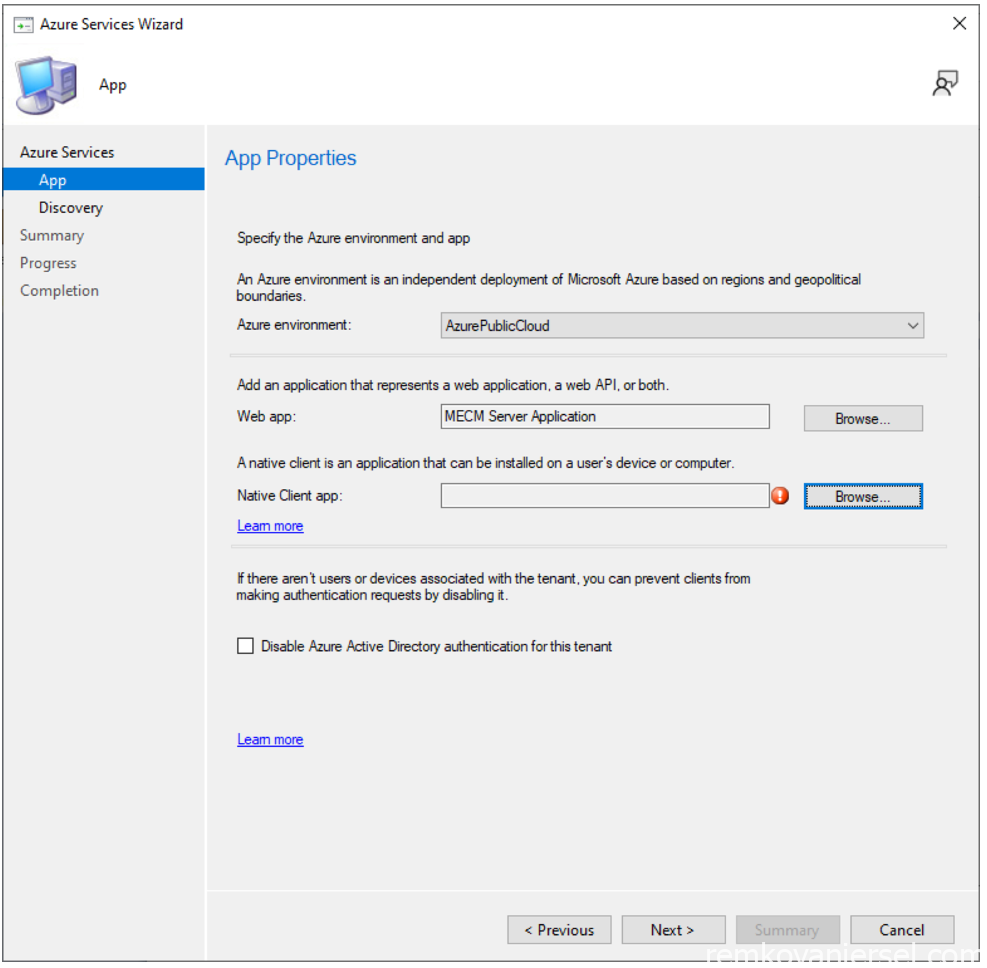
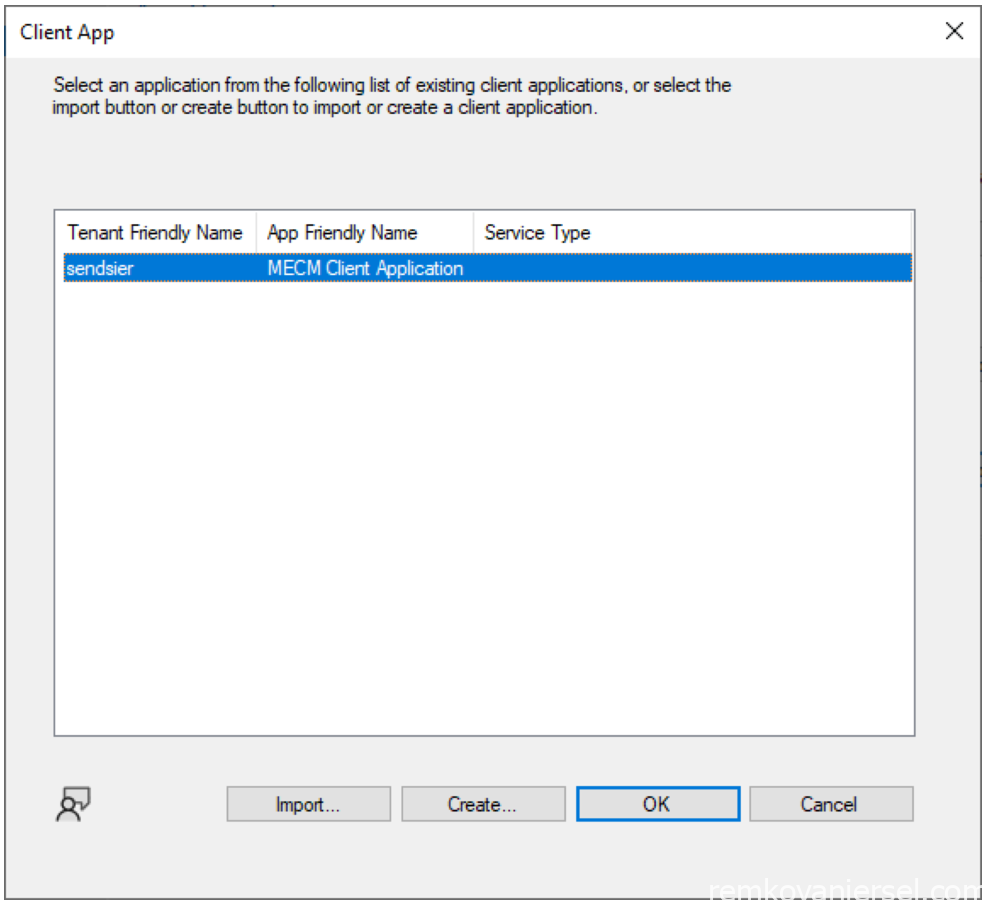
- Browse
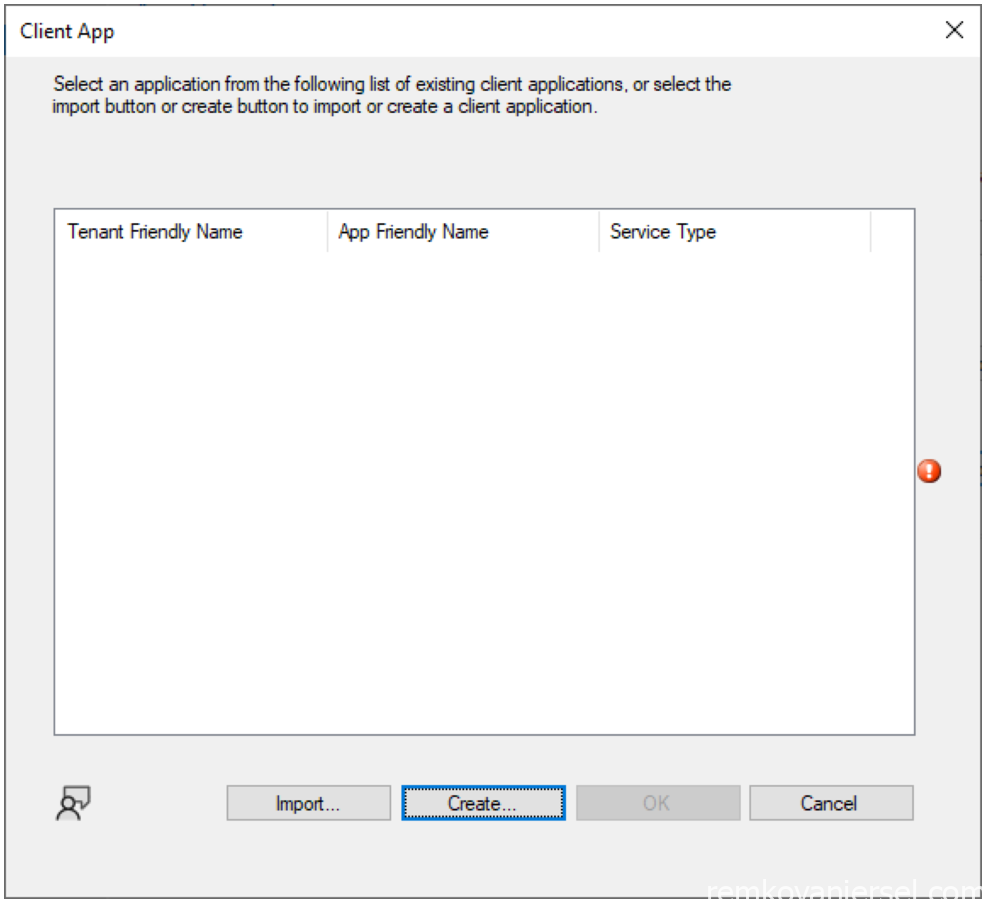
- Create
- Sign in
- OK
- OK
- Next
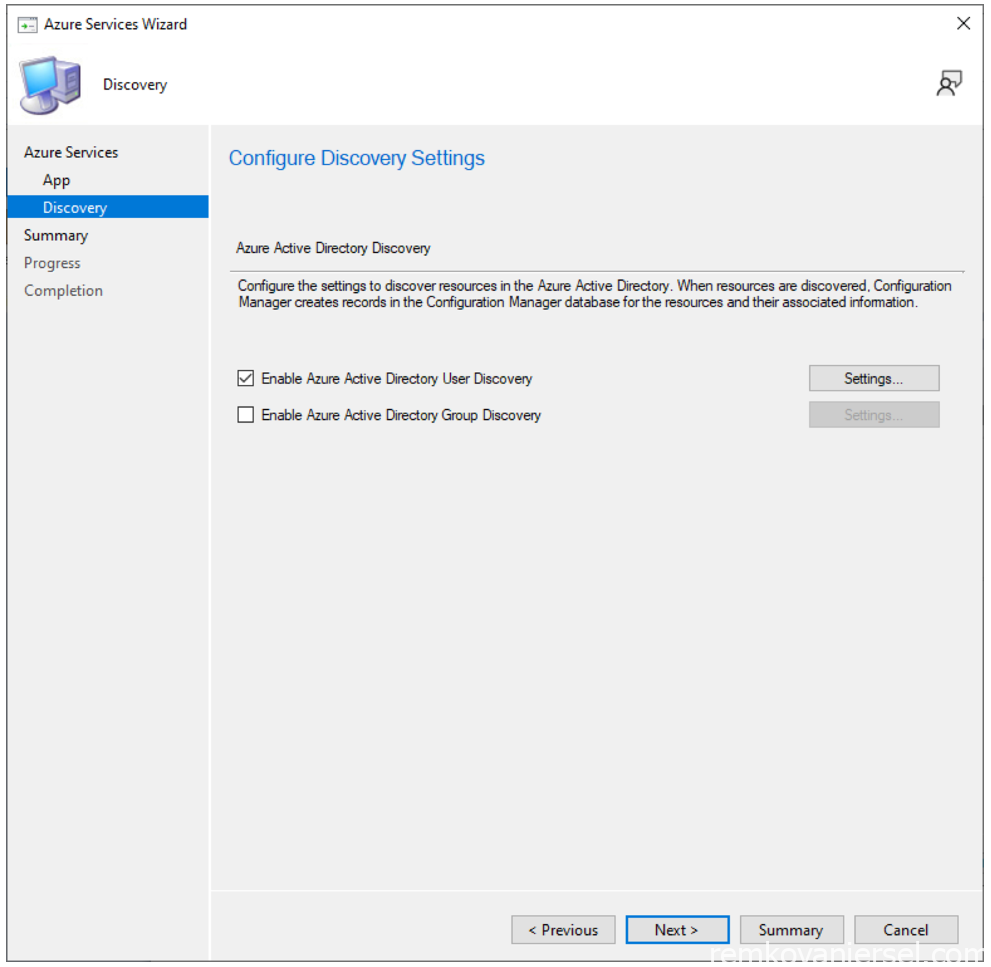
- Enable User Discovery, Next
- Next
- Close
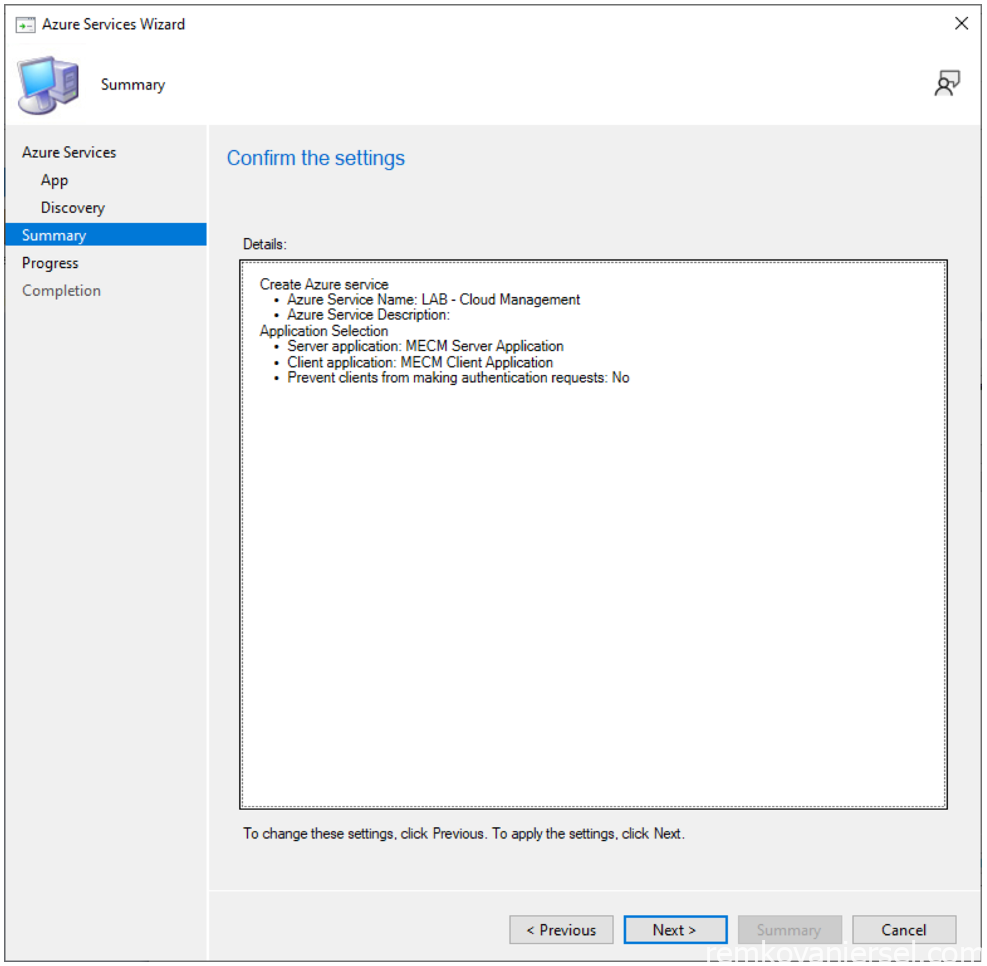
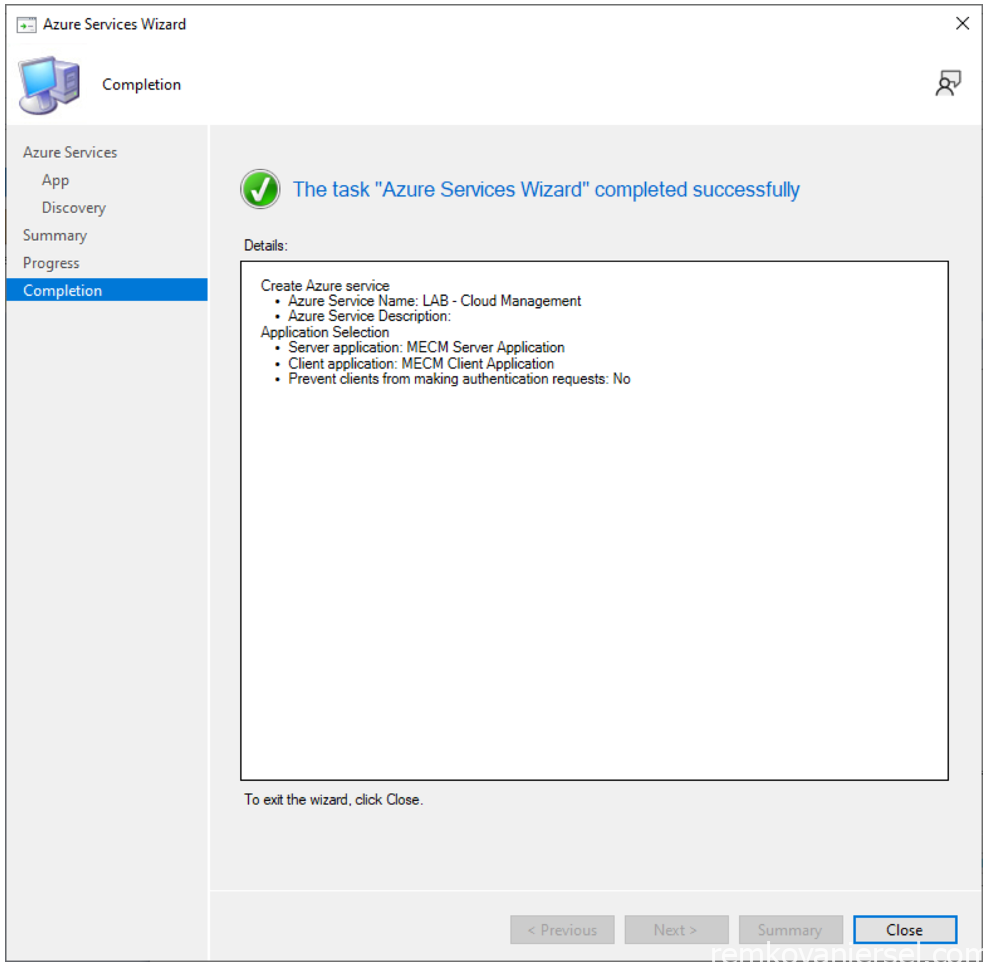
The Azure Service has now been created
Cloud Management Gateway
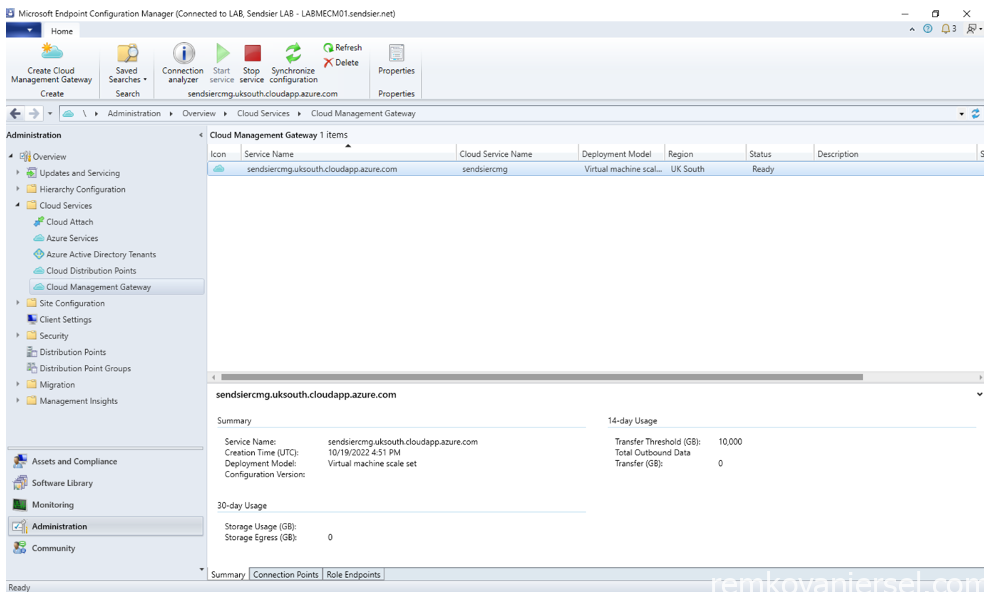
- In the MECM Console, navigate to Administration > Cloud Services > Cloud Management Gateway
- Right mouse click on the node and select Create Cloud Management Gateway
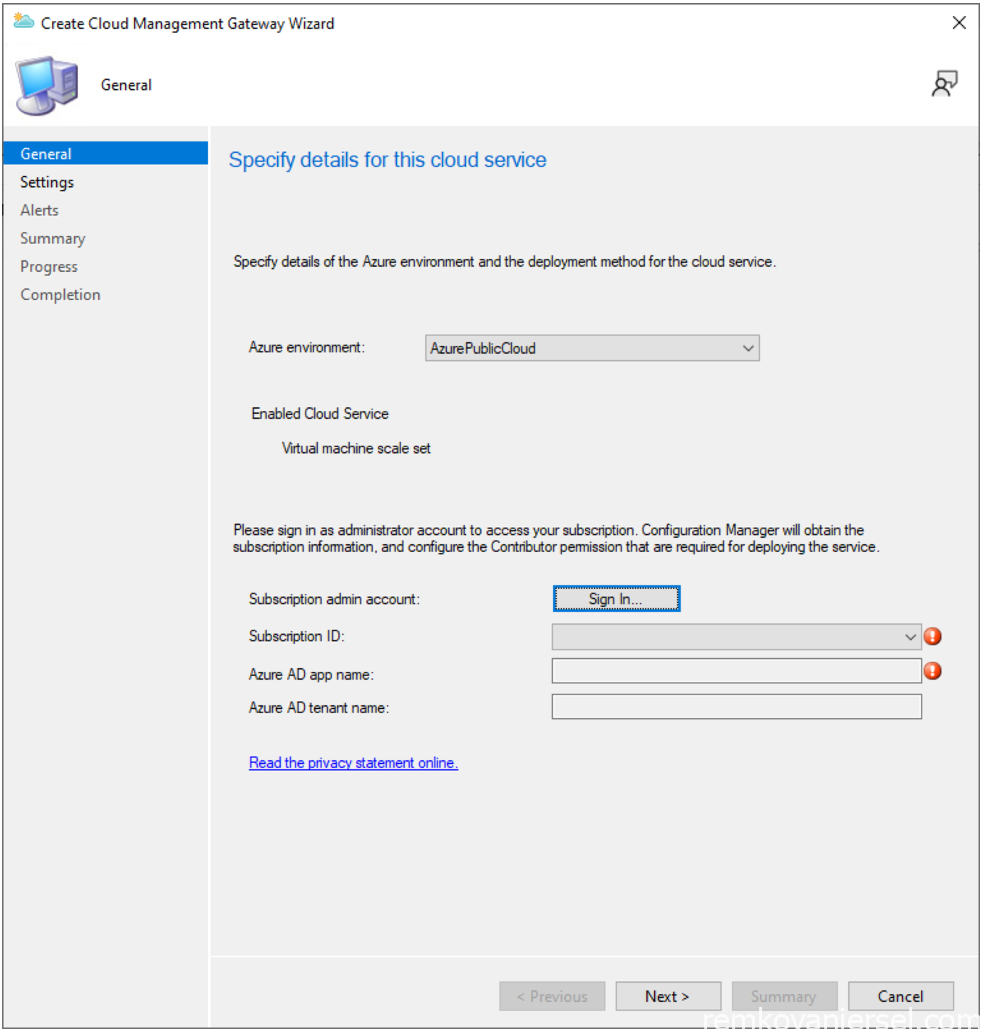
- Sign in
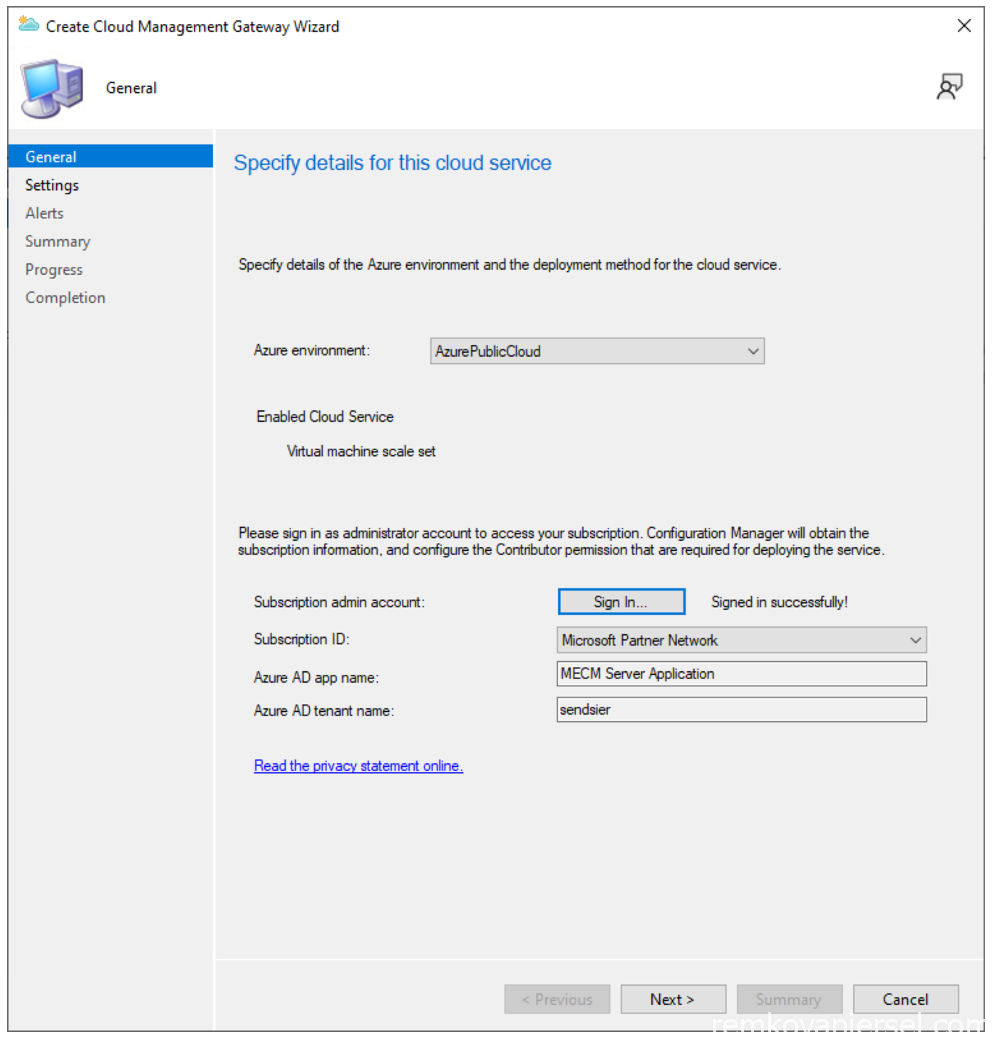
- Next
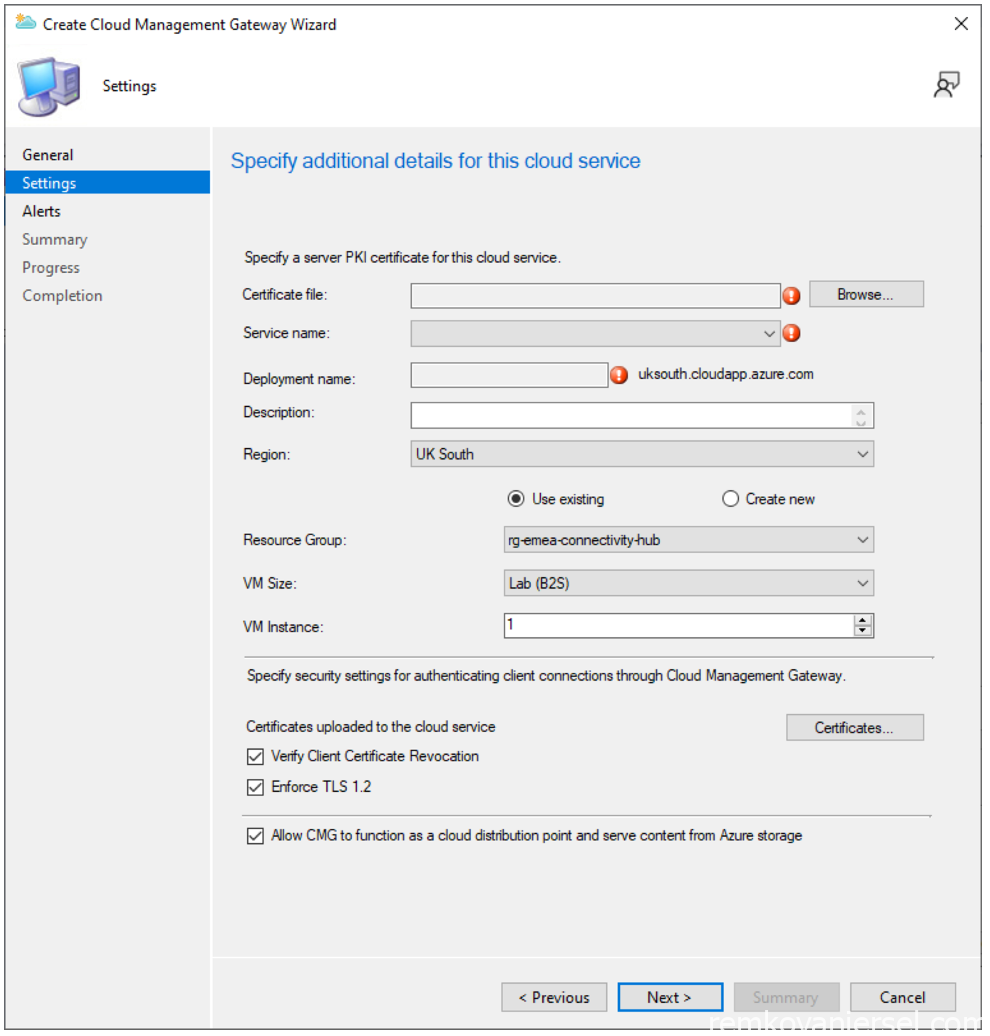
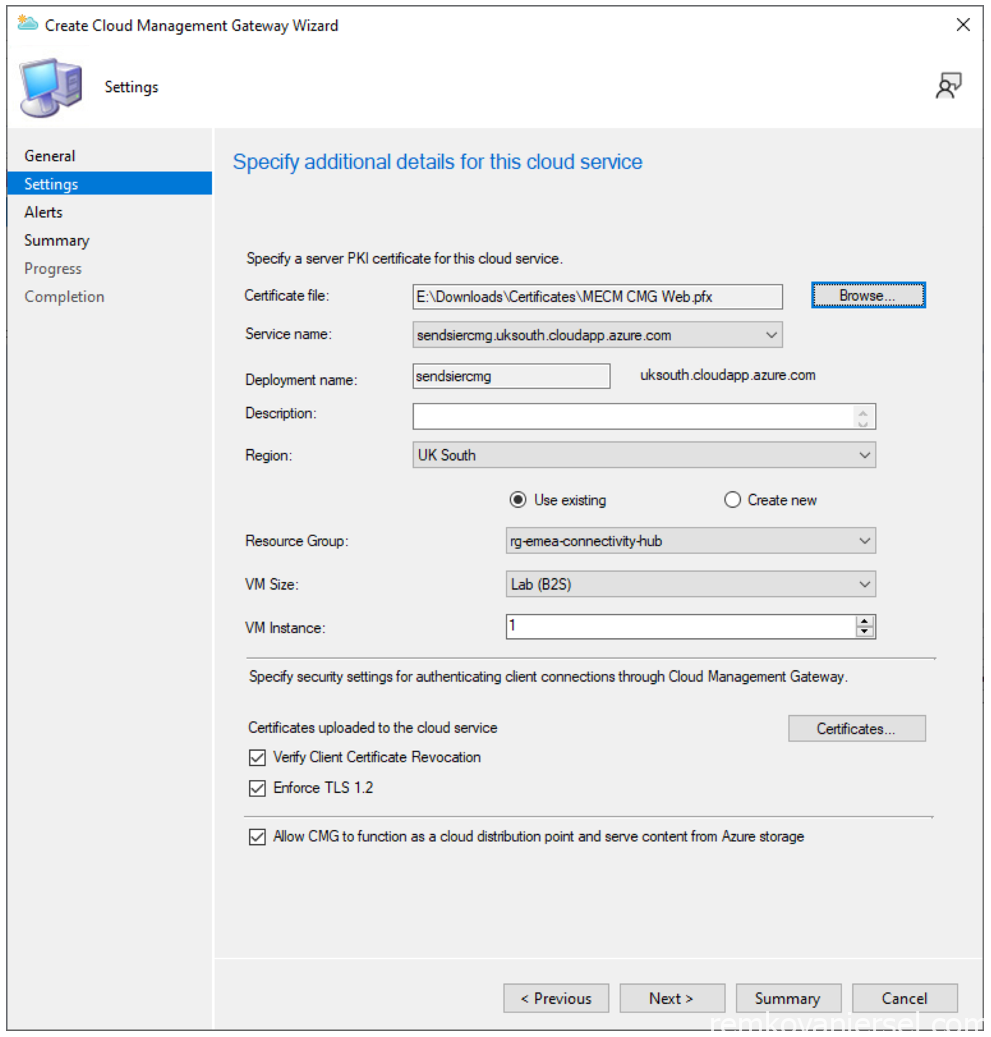
- We will use the following settings:
Region: UK South
VM Instance: 1
Click on [Browse] to upload the certificate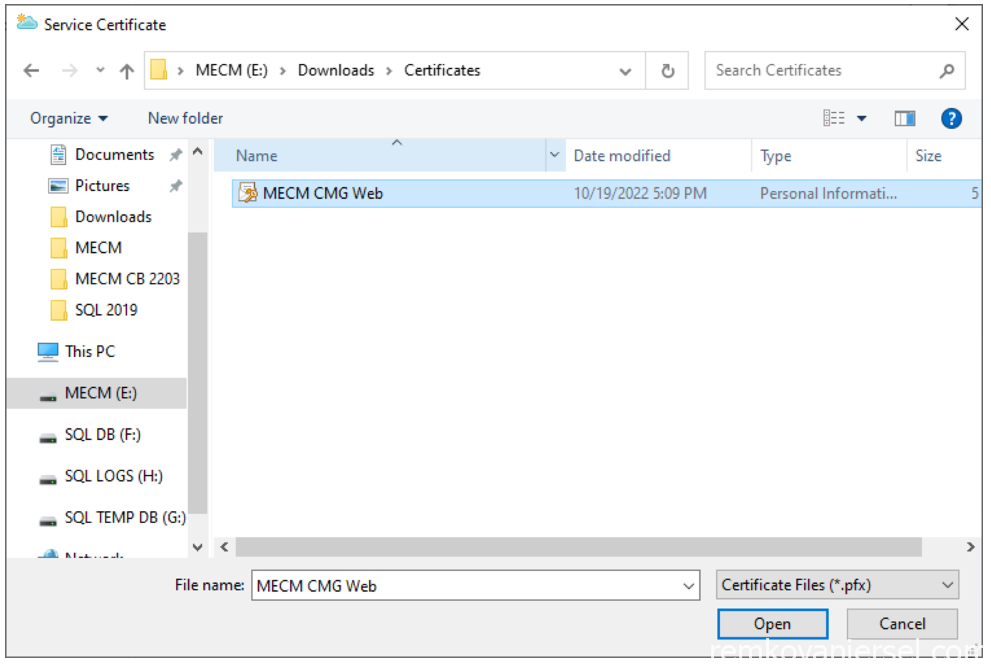
- Select the “MECM CMG Web” certificate
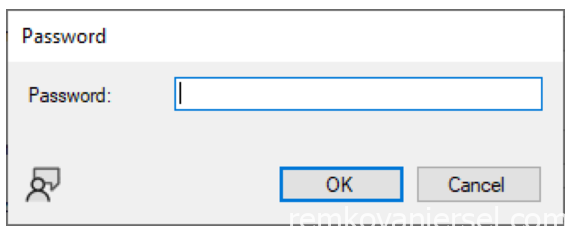
- Provide the password
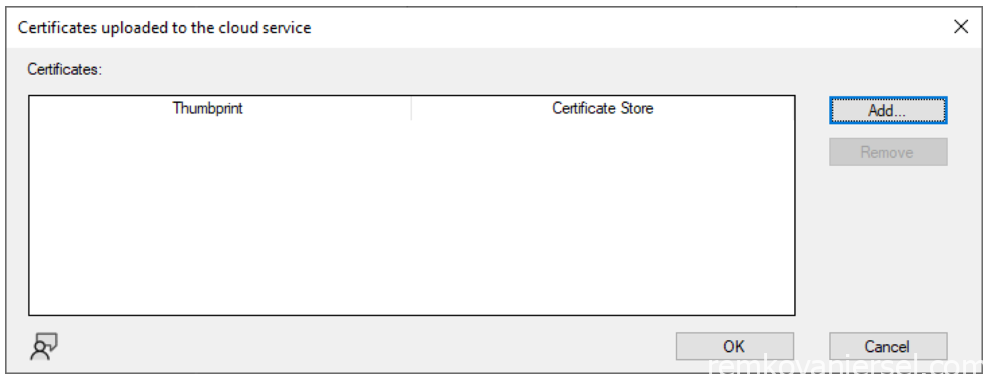
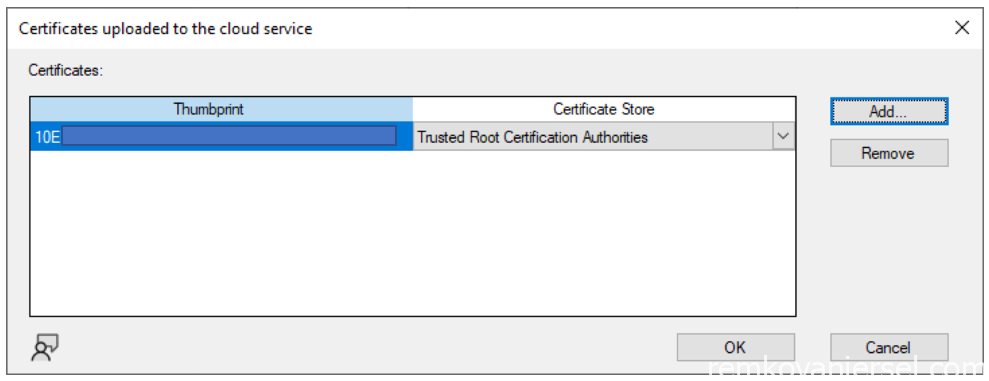
- Click on [Certificates] next to “Certificates uploaded to the cloud service” to upload the trusted root certificate
- Add
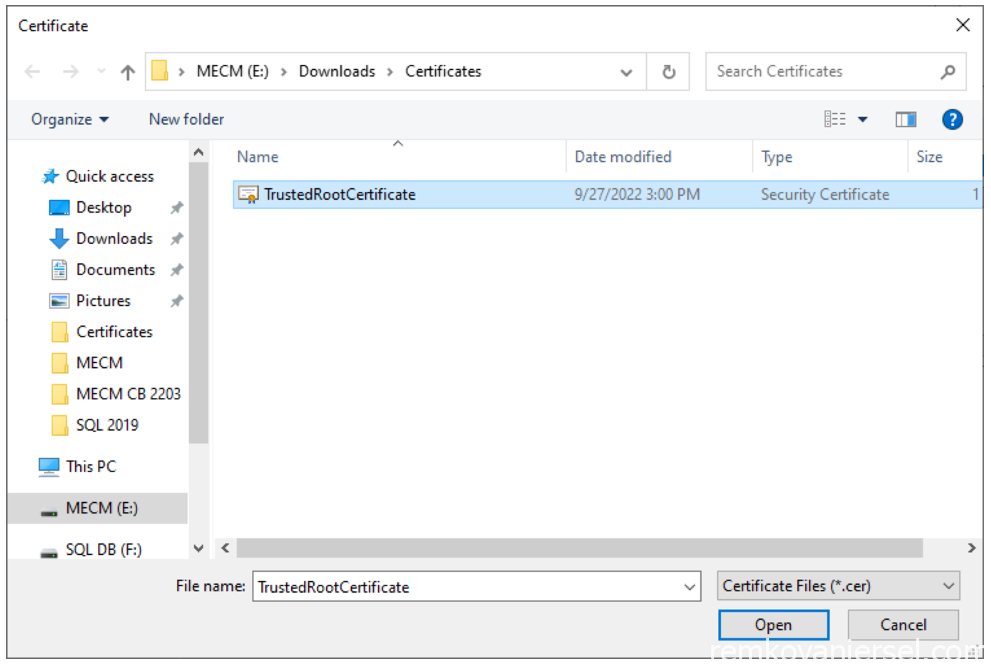
- Select the “TrustedRootCertificate” file
- OK and Next
- Next
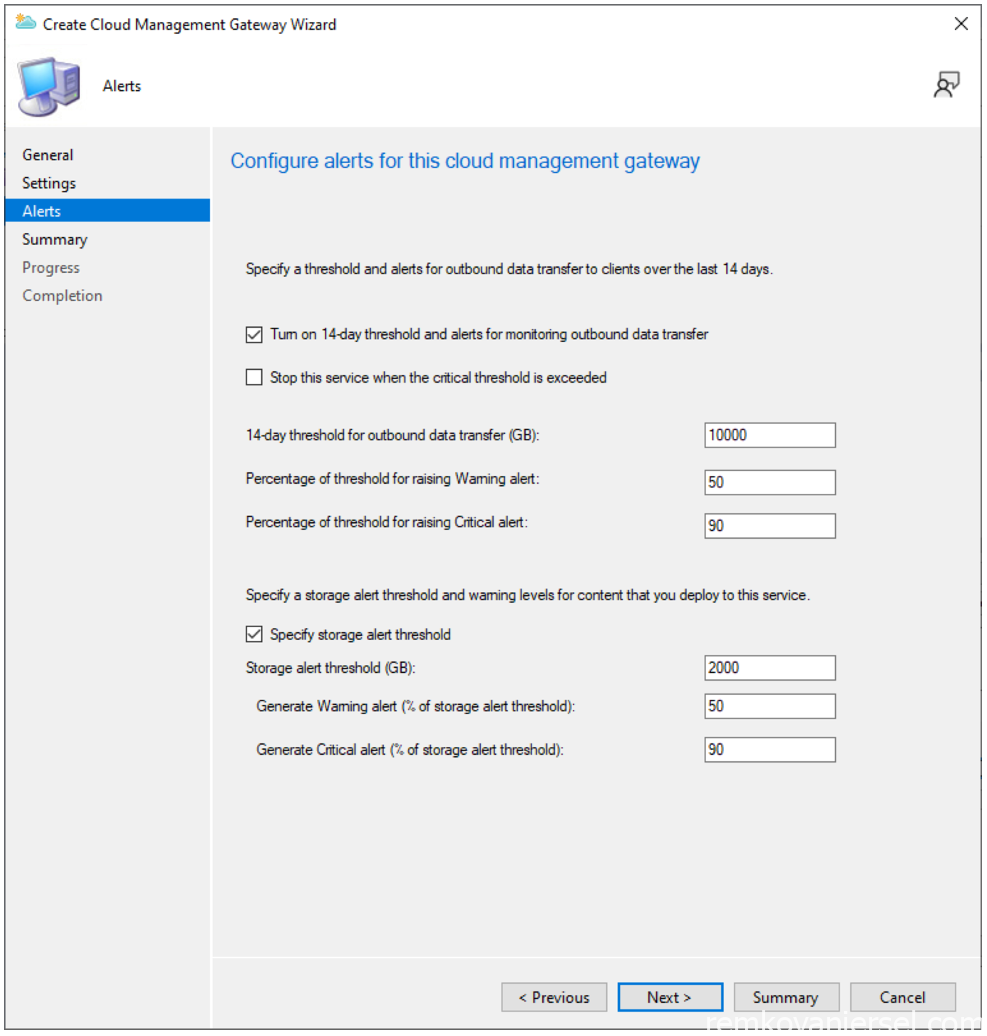
- Next

- Close
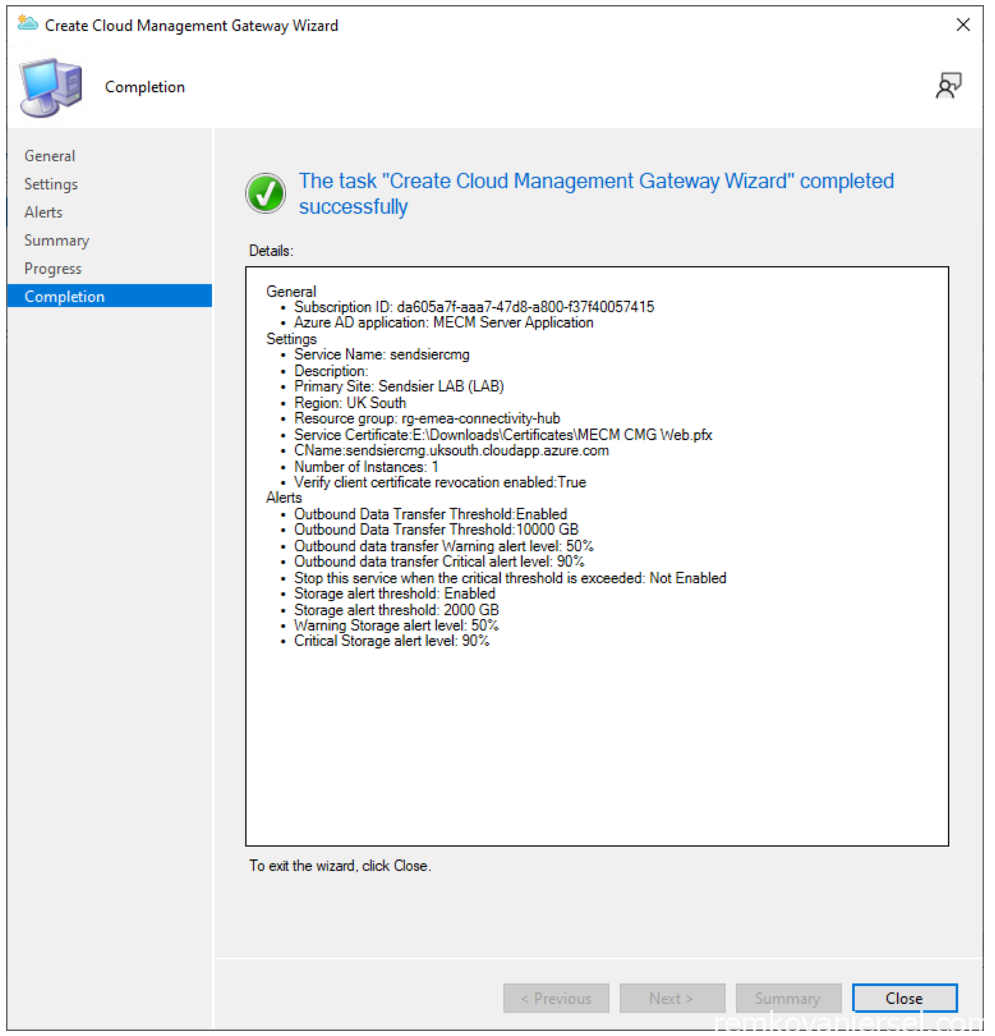
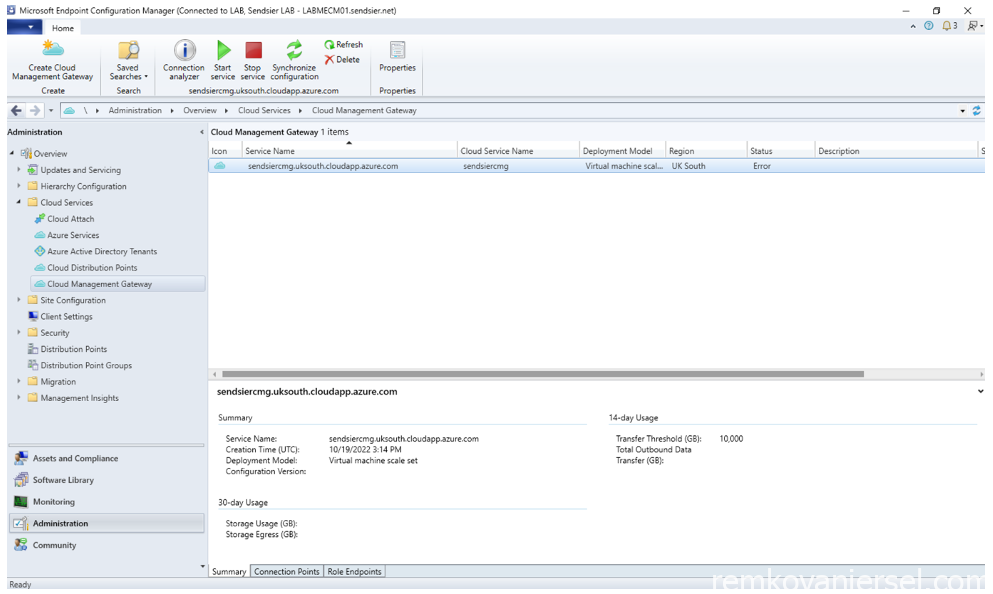
The Cloud Management Gateway is now being provision (this can take a while!)

If you receive a error, check during the CMG Deployment task, see the appendix for these errors
Site Communication Settings
- Goto Site Properties and [Communication Settings]
- Make sure HTTPS or HTTP (= enhanced HTTP) and “Use Configuration Manager-generated certificates for HTTP site systems” are both selected
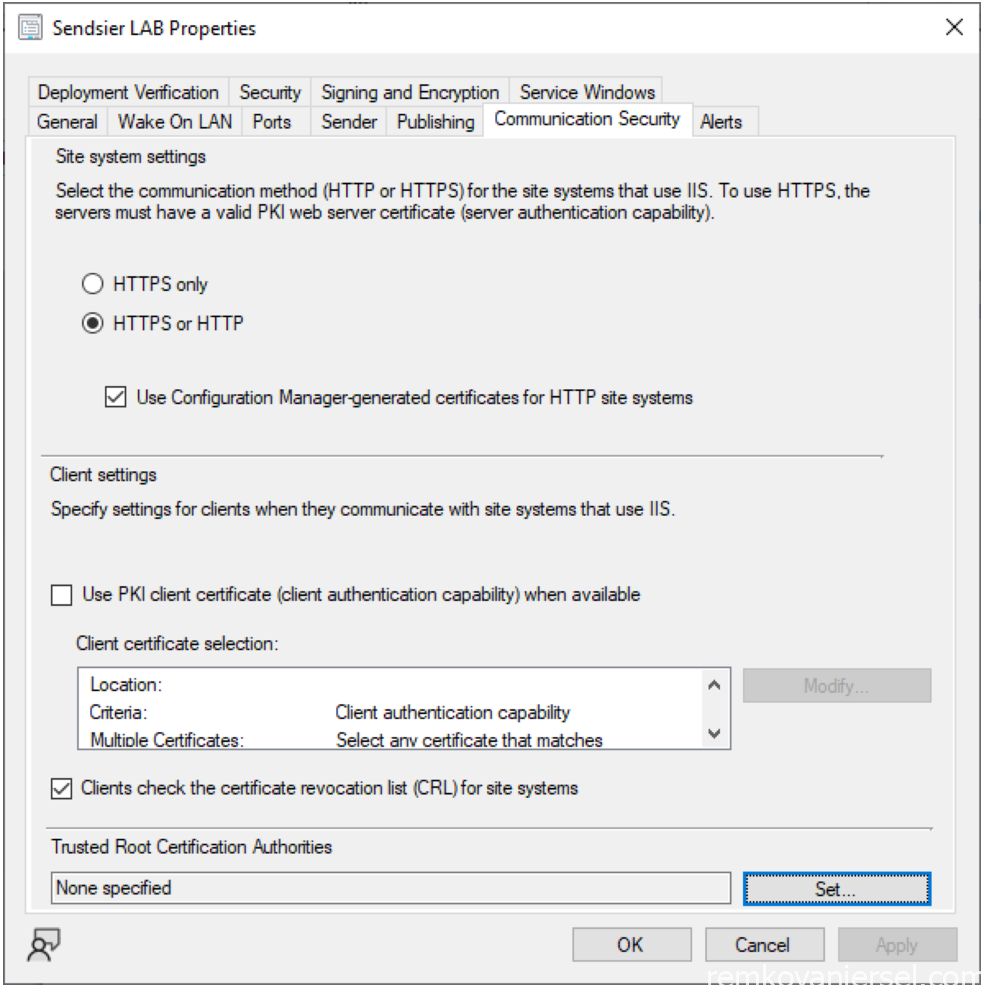
- Click on [Set] to upload the Root Certificate
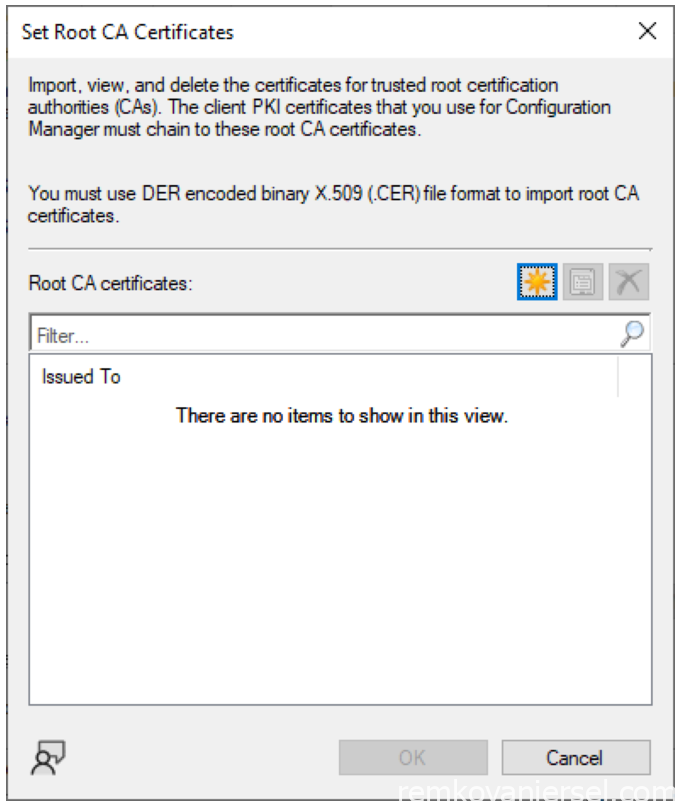
- Click on the new icon
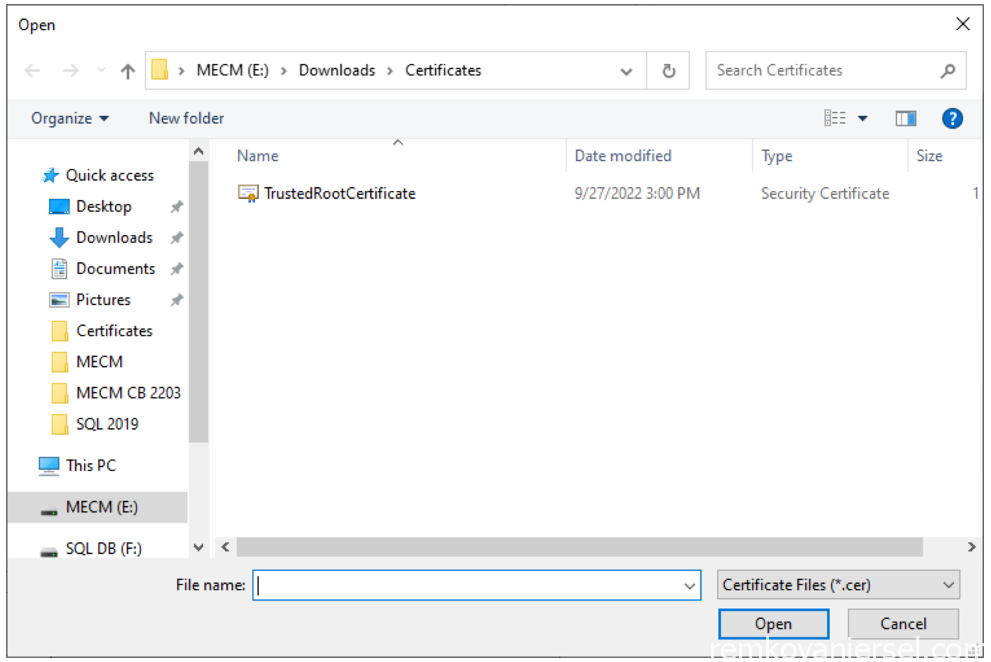
- Select the “TrustedRootCertificate” file

- OK
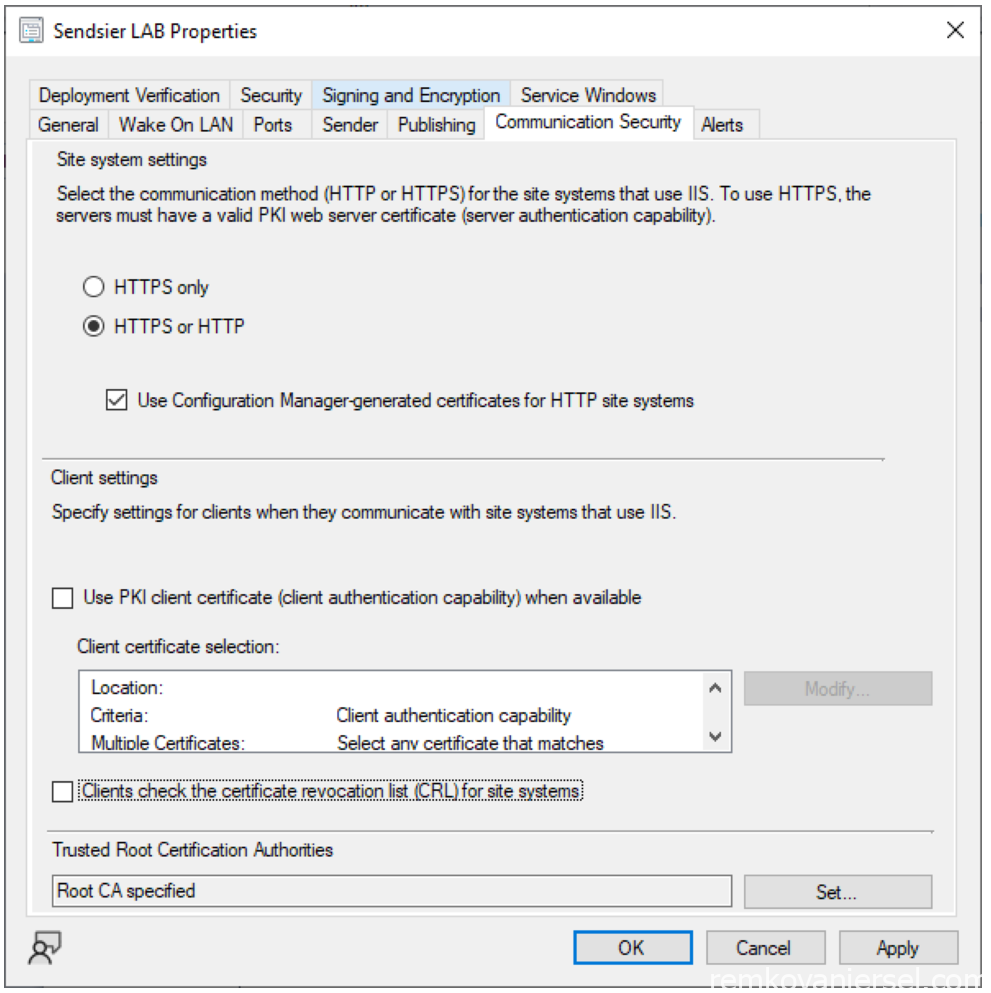
- Deselect the “Clients Check the certificate revocation list (CRL) for site system”
OK
CMG Connection Point
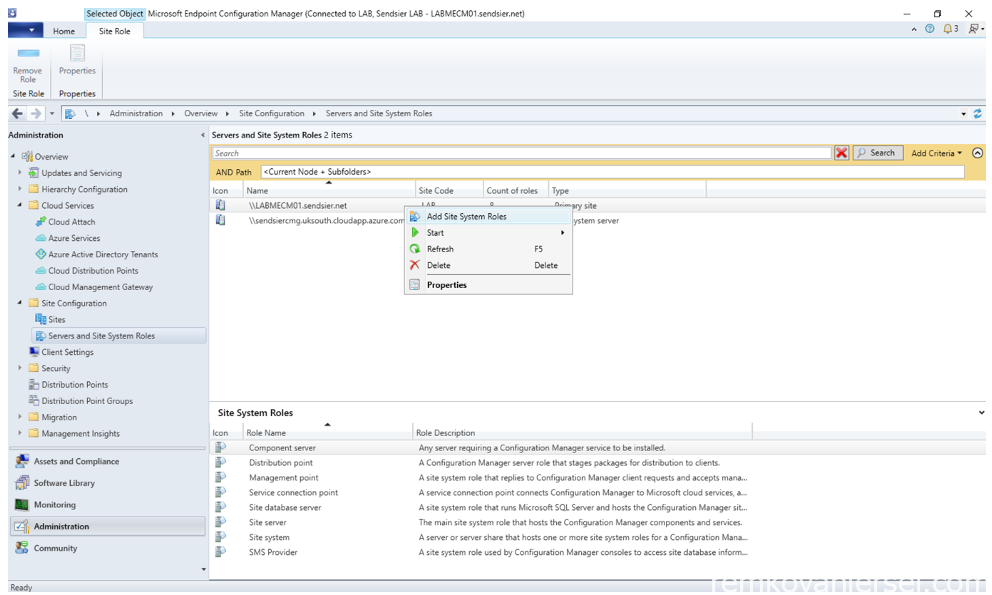
- In the MECM Console, navigate to Administration > Site Configuration > Site Sytems and Site Sytes Roles
- Right mouse click primary site server and select Add Site System Role
- Next
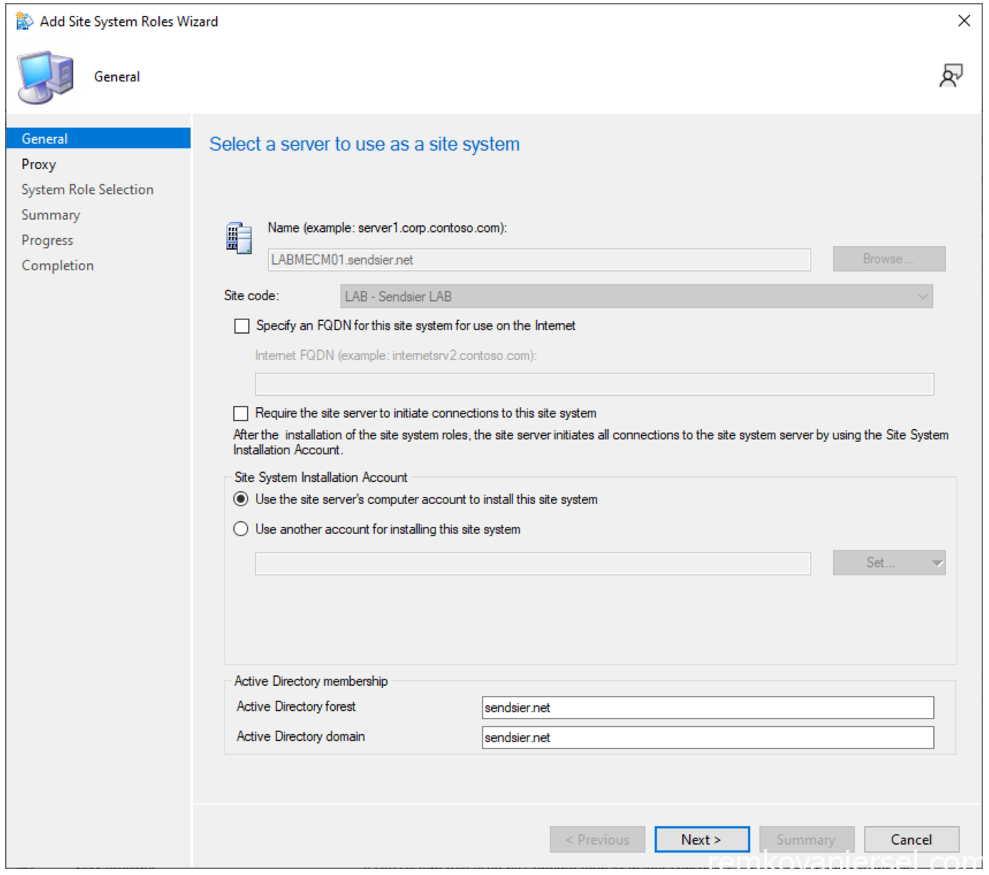
- Next
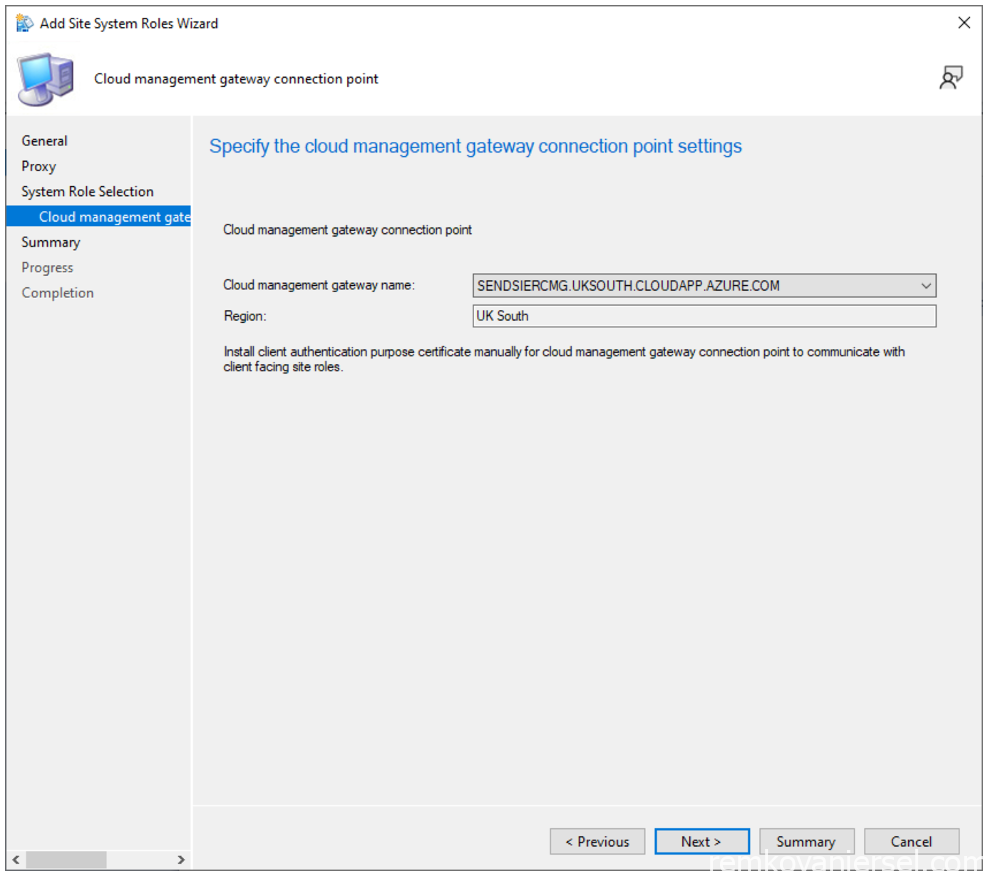
- Select “Cloud management gateway connection point”
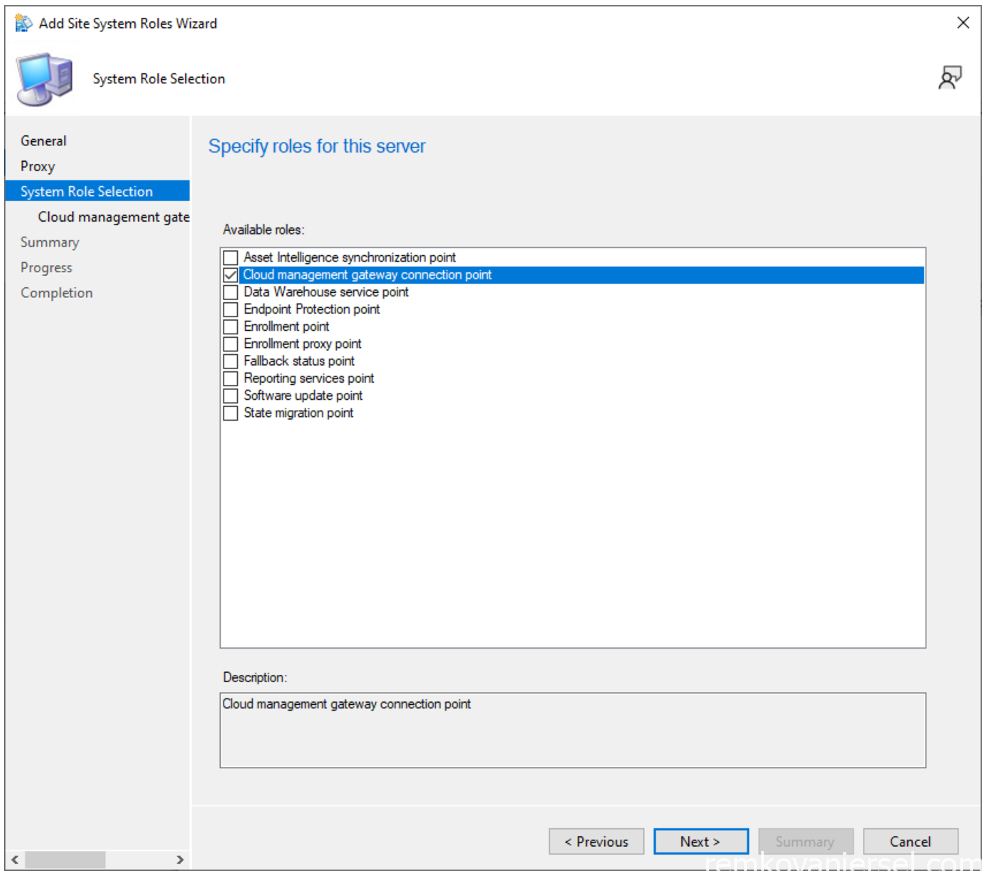
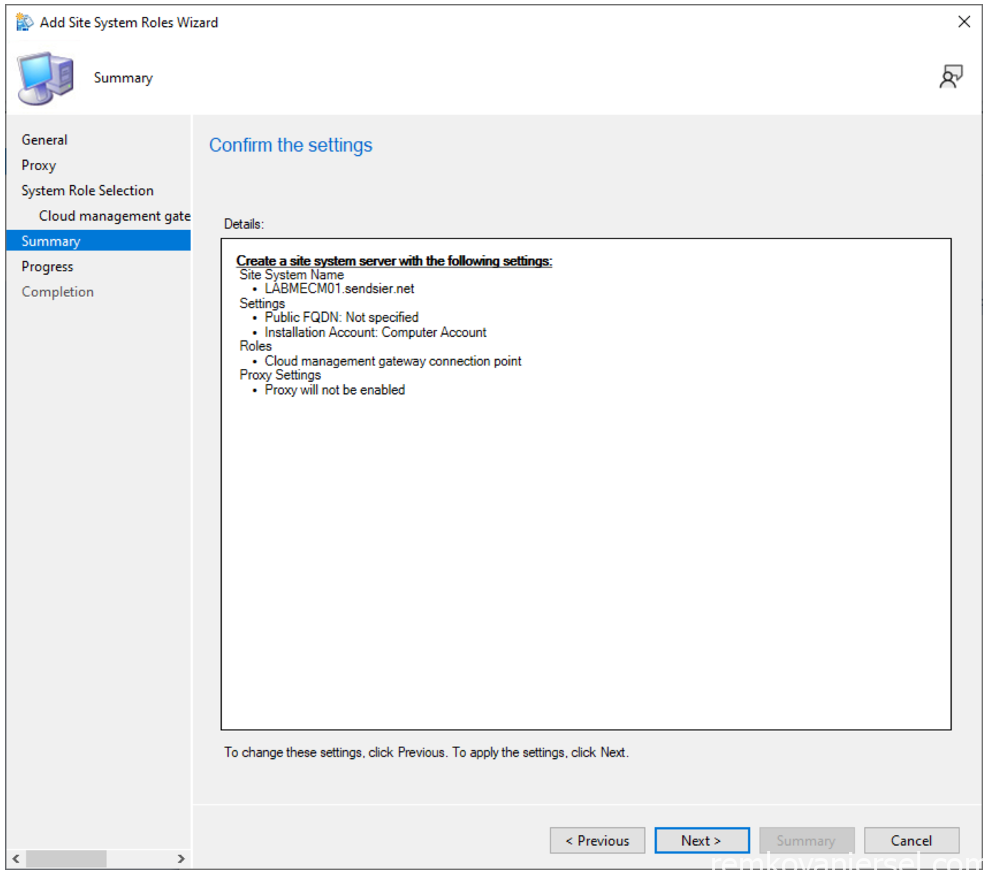
- Next
- Next
- Next
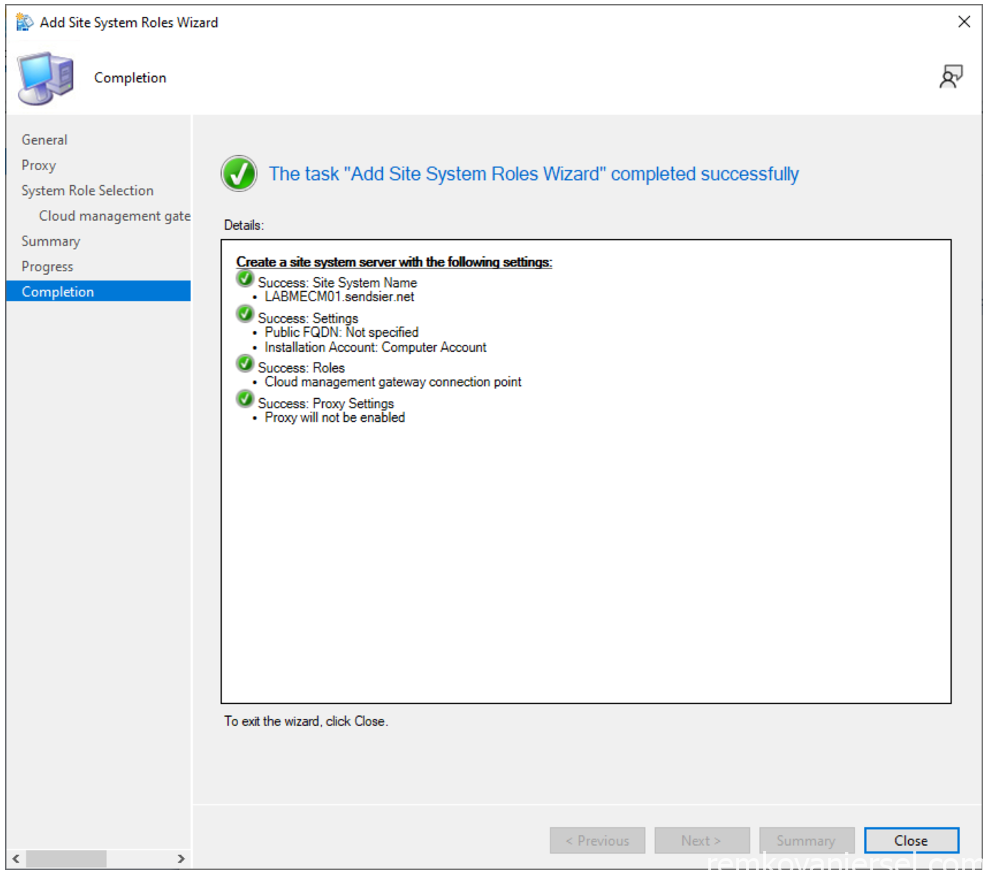
- Close
Configure Cloud Attach
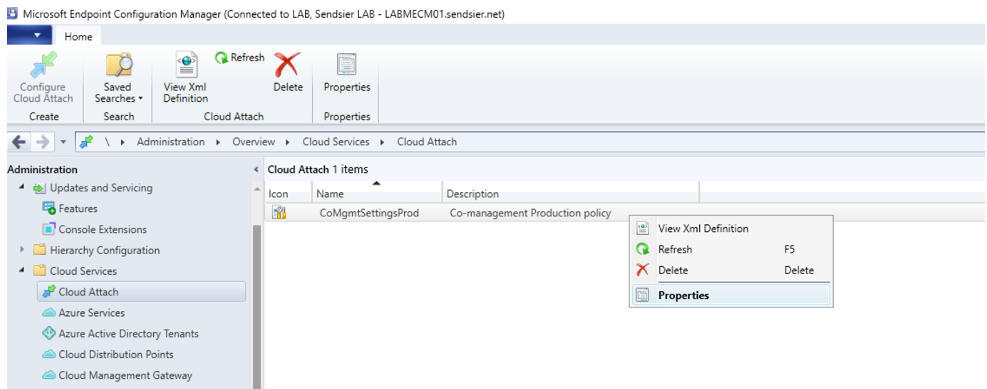
- In the MECM Console, navigate to Administration > Cloud Services > Cloud Attach
- Right mouse click on the node and select Configure Cloud Attach
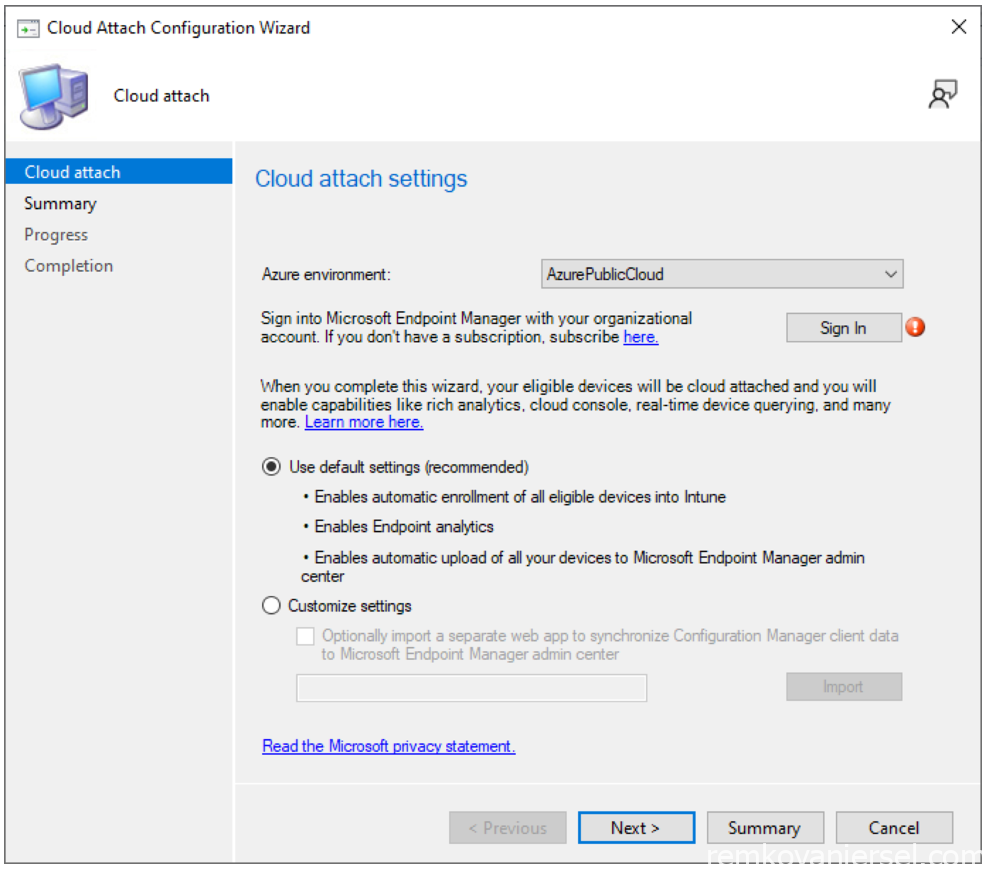
- Sign In
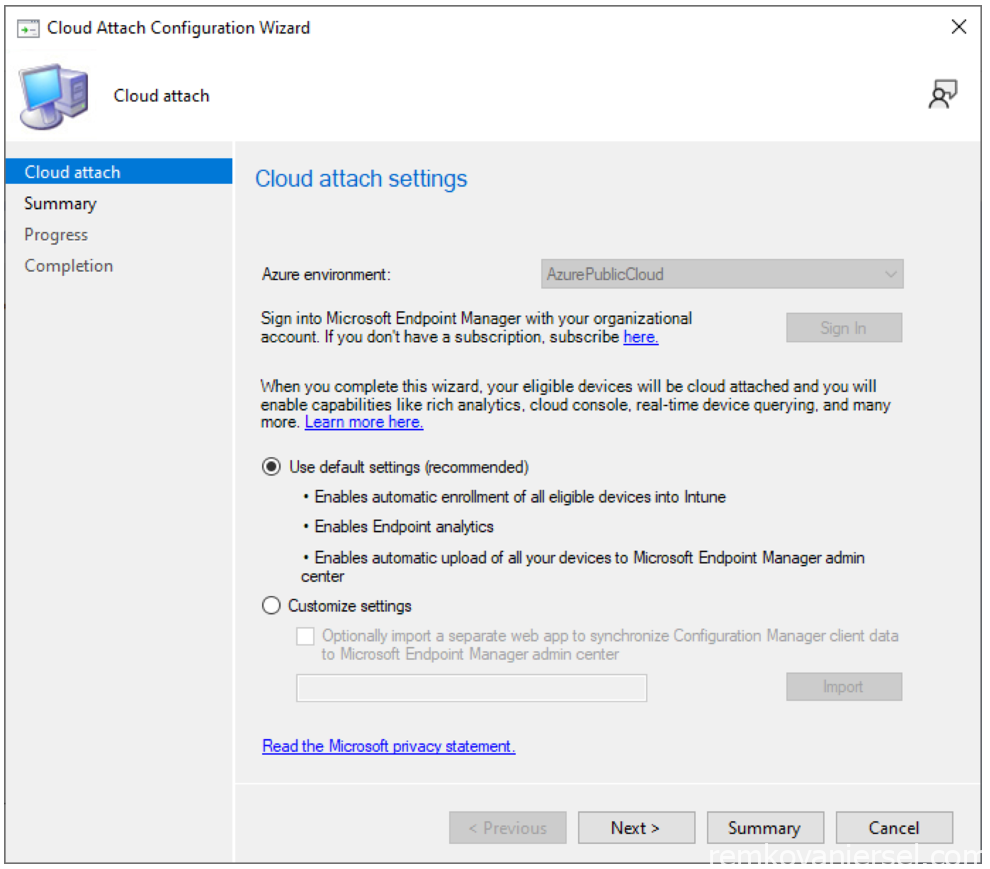
- Next
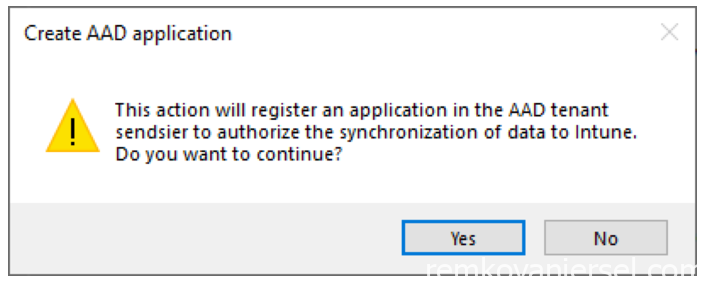
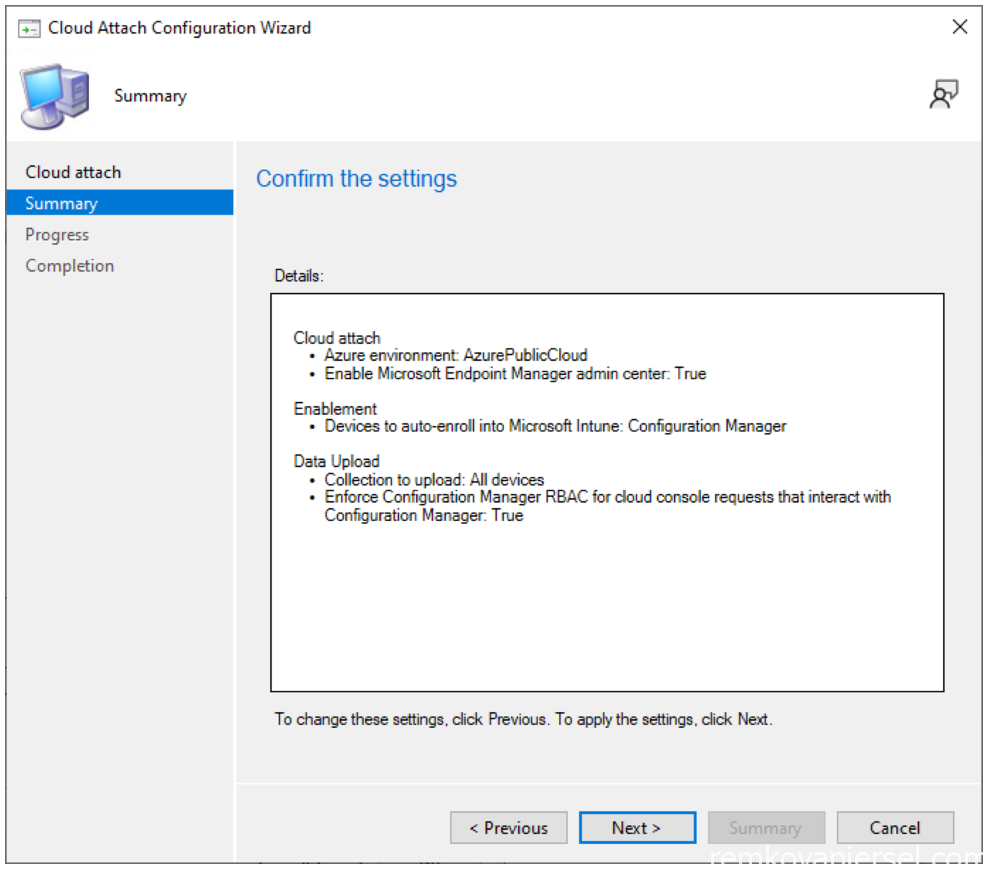
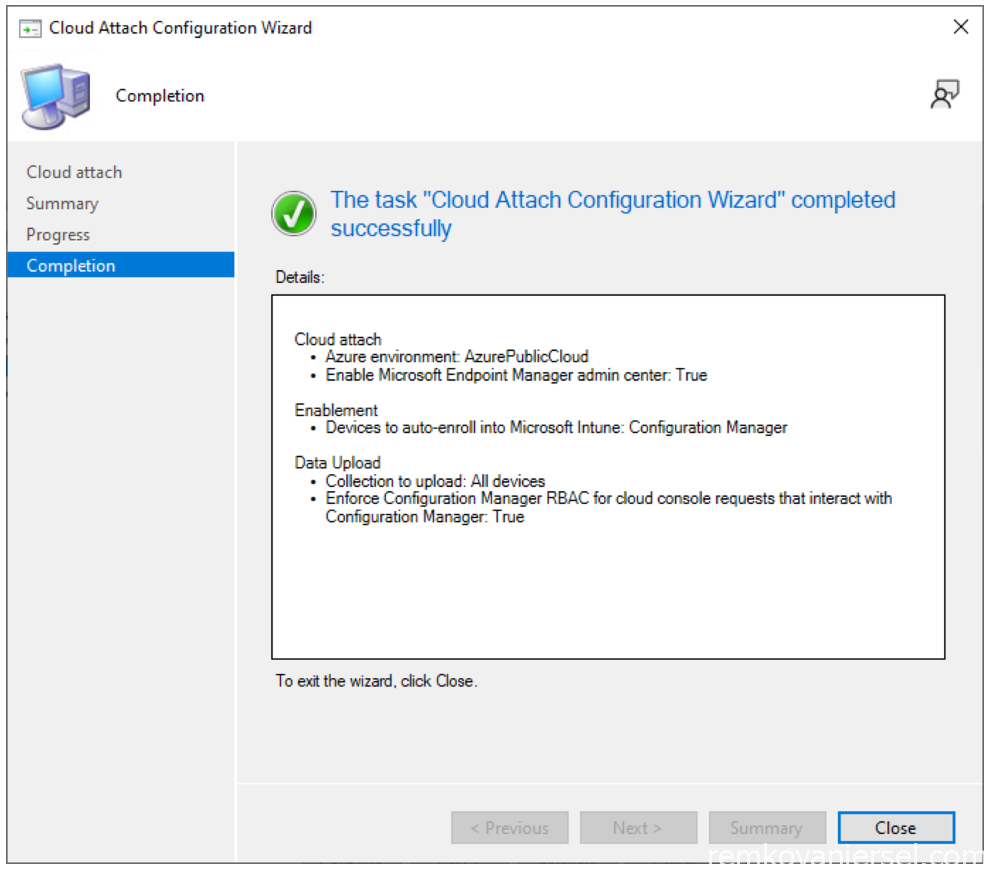
- Yes
- Close
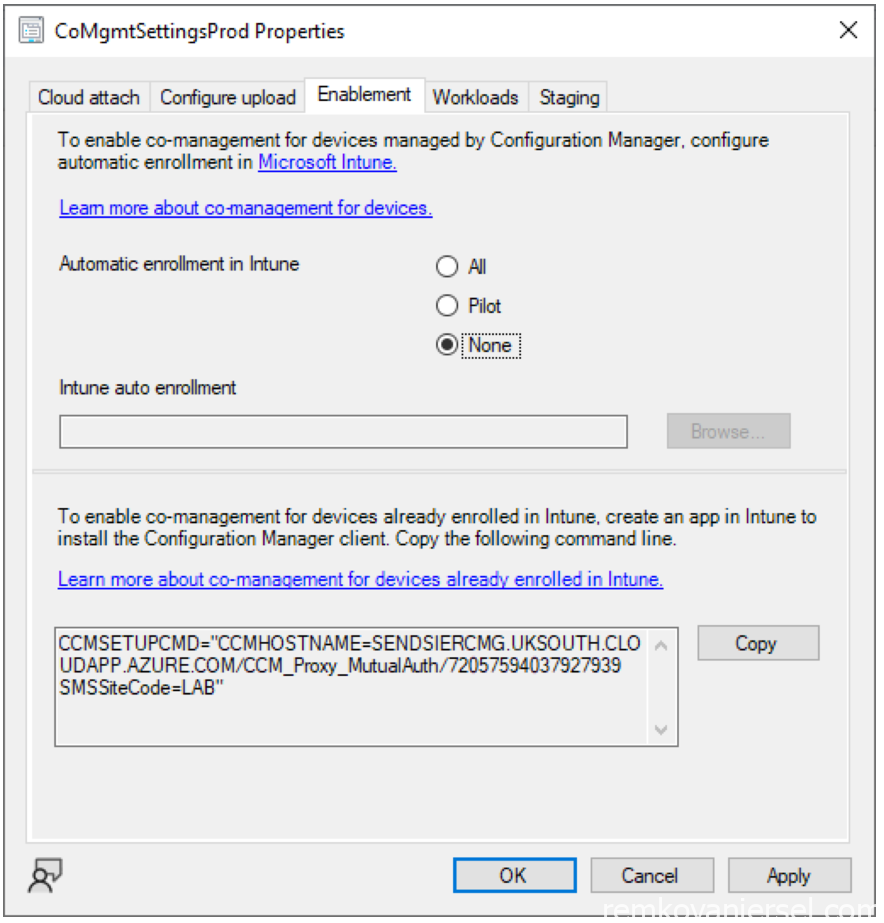
- Right mouse click on Properties
- Set Automatic enrollment in Intune to None
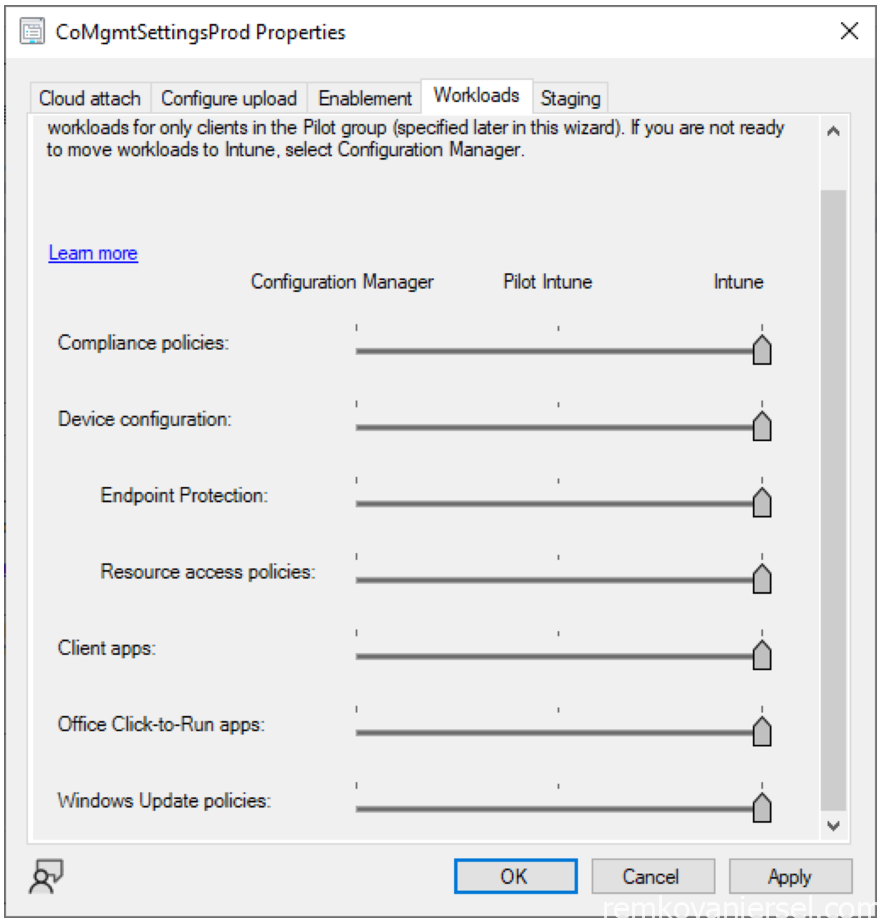
- Move all sliders to Intune, OK
- See previous article if you missed it! Part 1 : Installation of MECM 2207 with CMG
- Continue to Part 4: Installation of ConfigMgr client yet to be posted (stay tuned 📻)
Appendix – CMG Provision errors
You might get provisioning errors:
Check in the log file “CloudMgr.log” what is causing this:
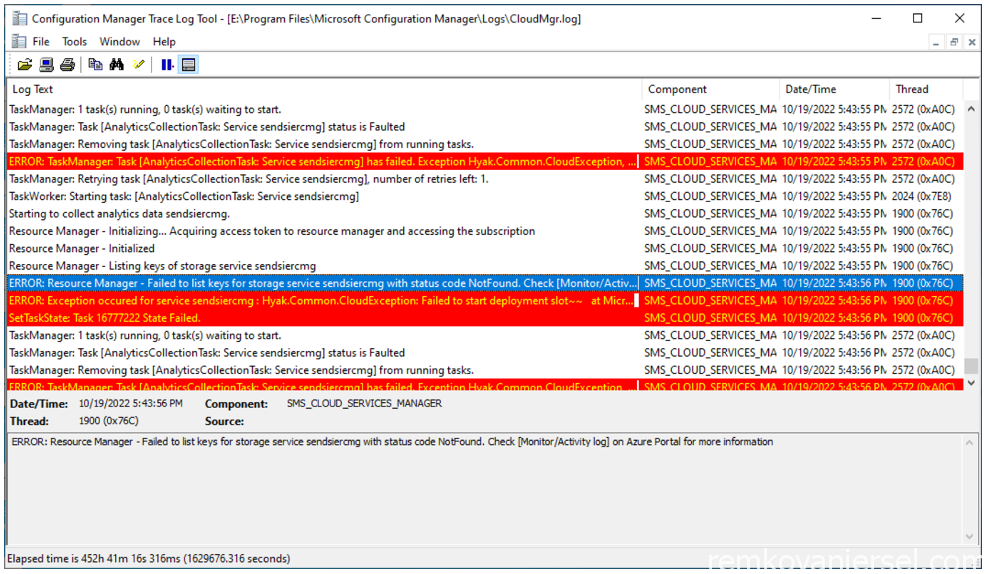
As we can see you can get errors when there is no access to the Keyvault, Storage, Network and/or Compute Azure Resource Provider.
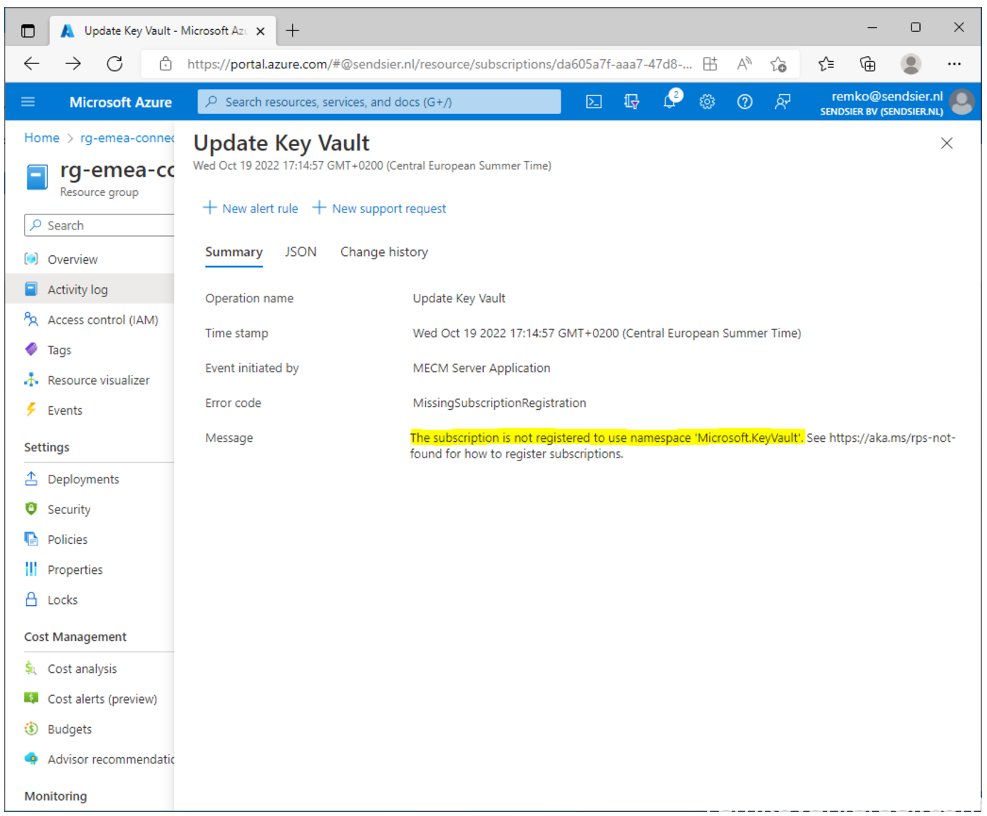
You can also see this when looking at the activity log on the targeted resource group:
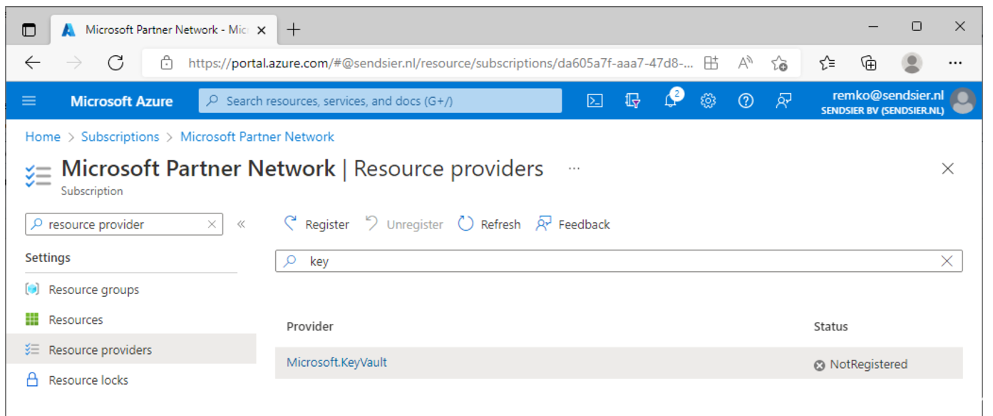
Fix this by [Register] these provider
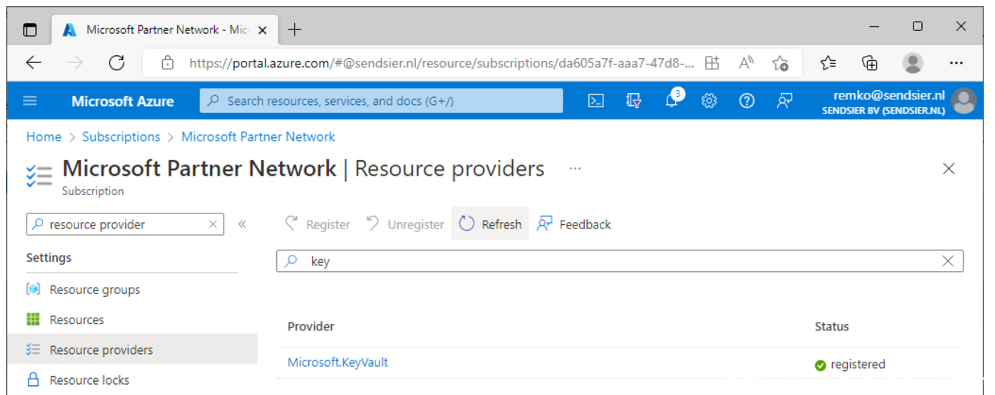
Now it’s registered
Delete the CMG instance
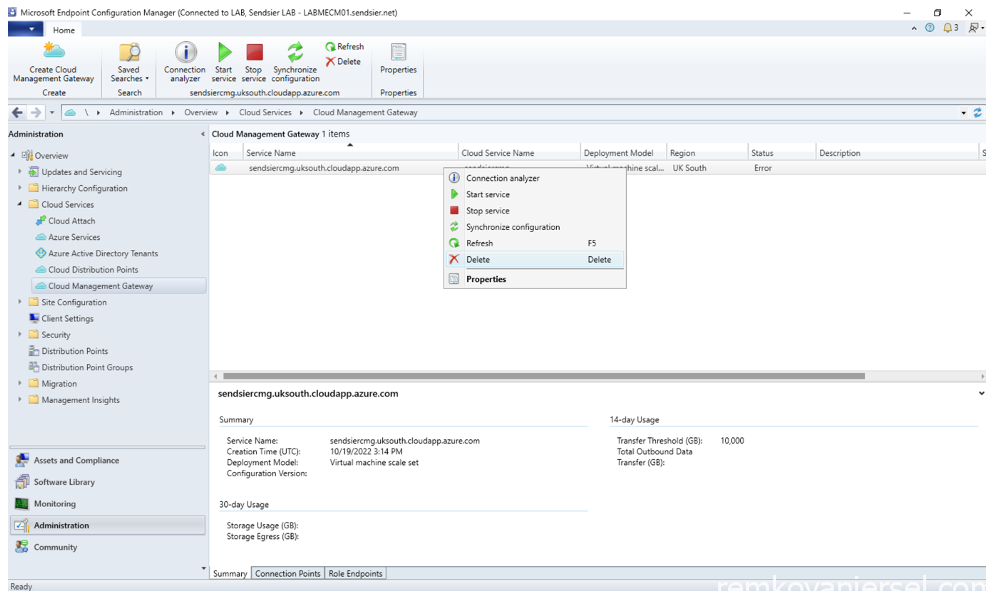
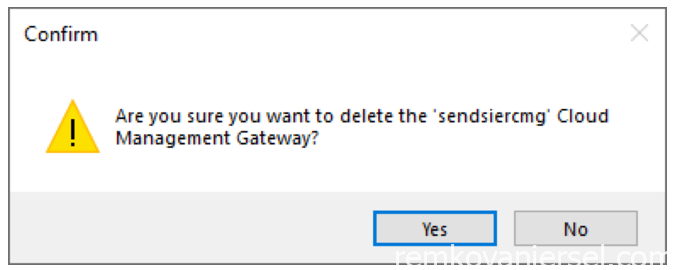
Re-run the wizard again after it has been deleted.