Table of Contents
Introduction
In today’s fast-paced and interconnected digital landscape, ensuring seamless continuity of your online services is paramount. Whether it’s a sudden hardware failure, a natural disaster, or a planned maintenance event, downtime can lead to significant losses in revenue, reputation, and customer trust. Microsoft Azure, a leading cloud platform, offers a robust disaster recovery solution in the form of Azure Site Recovery (ASR). Meanwhile, Azure Traffic Manager (ATM) provides intelligent traffic management capabilities to ensure optimal user experiences. However, the true power of these services comes to light when combined to form a cohesive and comprehensive disaster recovery strategy.
Despite their complementary roles, Microsoft’s documentation has, until now, treated Azure Site Recovery and Azure Traffic Manager as separate entities. In this blog post, we aim to bridge this gap and shed light on how you can leverage the combined potential of ASR and ATM to build a resilient, fault-tolerant infrastructure for your critical applications and services.
Join us as we delve into the world of Azure Site Recovery and Azure Traffic Manager and uncover the true synergy between these two Azure services. By the end of this article, you’ll have a clearer understanding of how this dynamic duo can safeguard your applications from downtime, effortlessly reroute traffic, and deliver uninterrupted experiences to your users, even during the most challenging circumstances.
Let’s embark on this journey of resilience and discover how to architect your Azure environment to stand tall against adversity, ensuring your digital services remain always available and ever-reliable. Together, Azure Site Recovery and Azure Traffic Manager form an indomitable force that no disaster can break. Let’s explore the intricacies of this powerful combination and equip your organization with the tools to thrive in the face of any challenge.
High Level Solution Diagram

The caveat
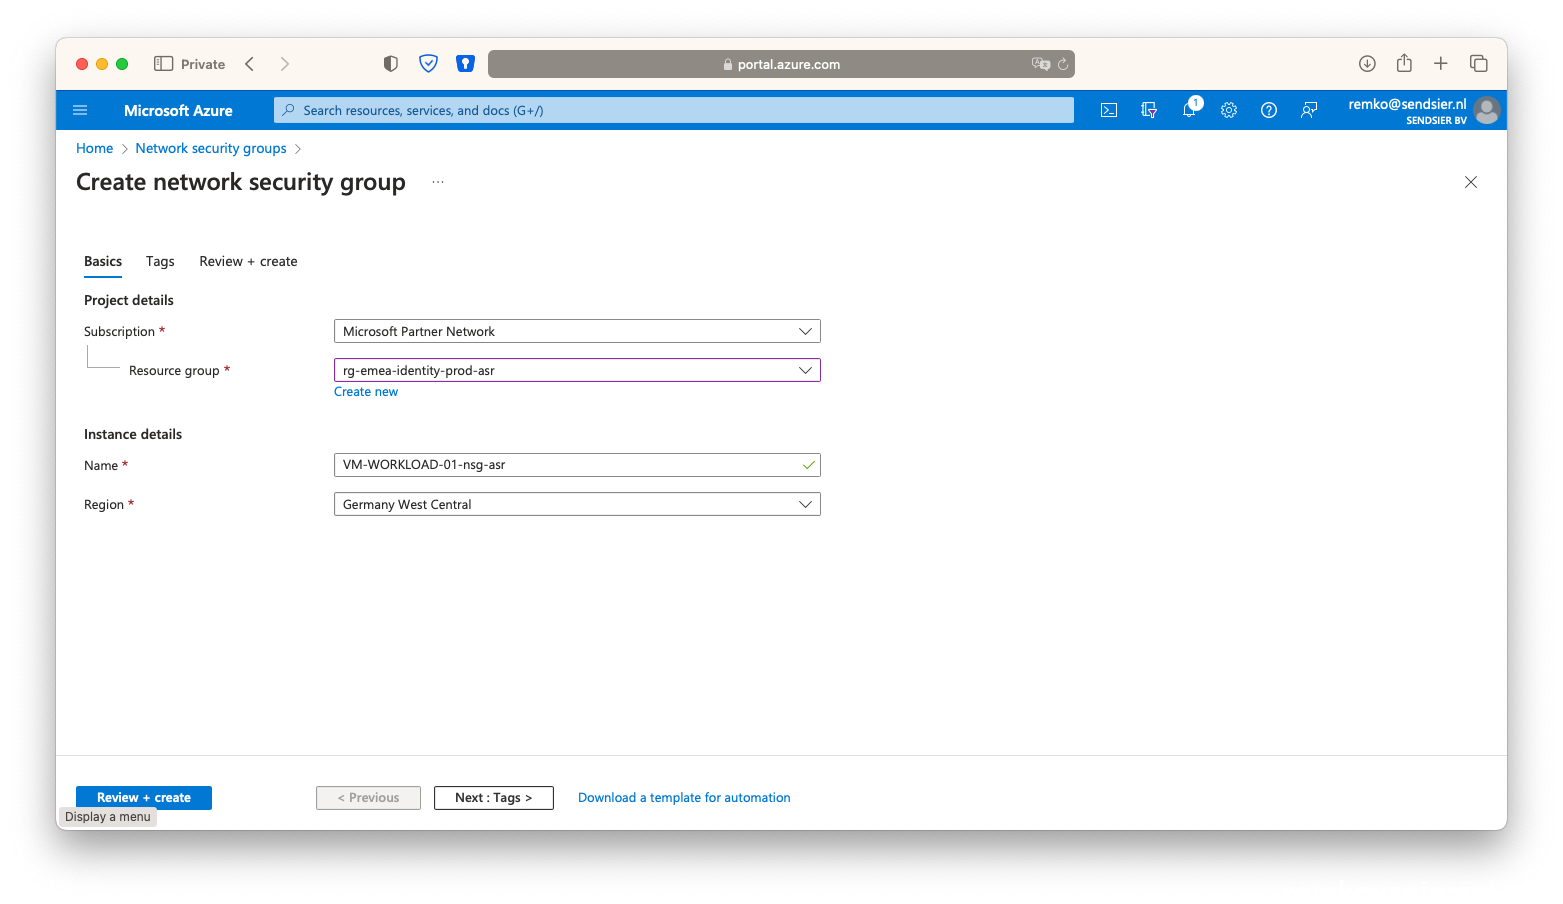
The trick is that for ASR to work in combination with Traffic Manager, that the following resource have to be already created on the failover secondary Azure site:
- Resource Group
- vNet
- Network Security Group (NSG) – standby to be linked to the VM after a failover via ASR
- Public IP – standby to be linked to the VM after a failover via ASR
Public IP address of the production application cannot be retained on failover. Workloads brought up as part of failover process must be assigned an Azure Public IP resource available in the target region. This step can be done either manually or is automated with recovery plans. A recovery plan gathers machines into recovery groups. It helps you to define a systematic recovery process. You can use a recovery plan to impose order, and automate the actions needed at each step, using Azure Automation runbooks for failover to Azure, or scripts.
Detailed configuration steps
Deployment and configuration of the (test) VM
- Create a VM “VM-WORKLOAD-01” in the primary (Active) Azure region
- Windows Server (Security Type standard to use for application load balancer)
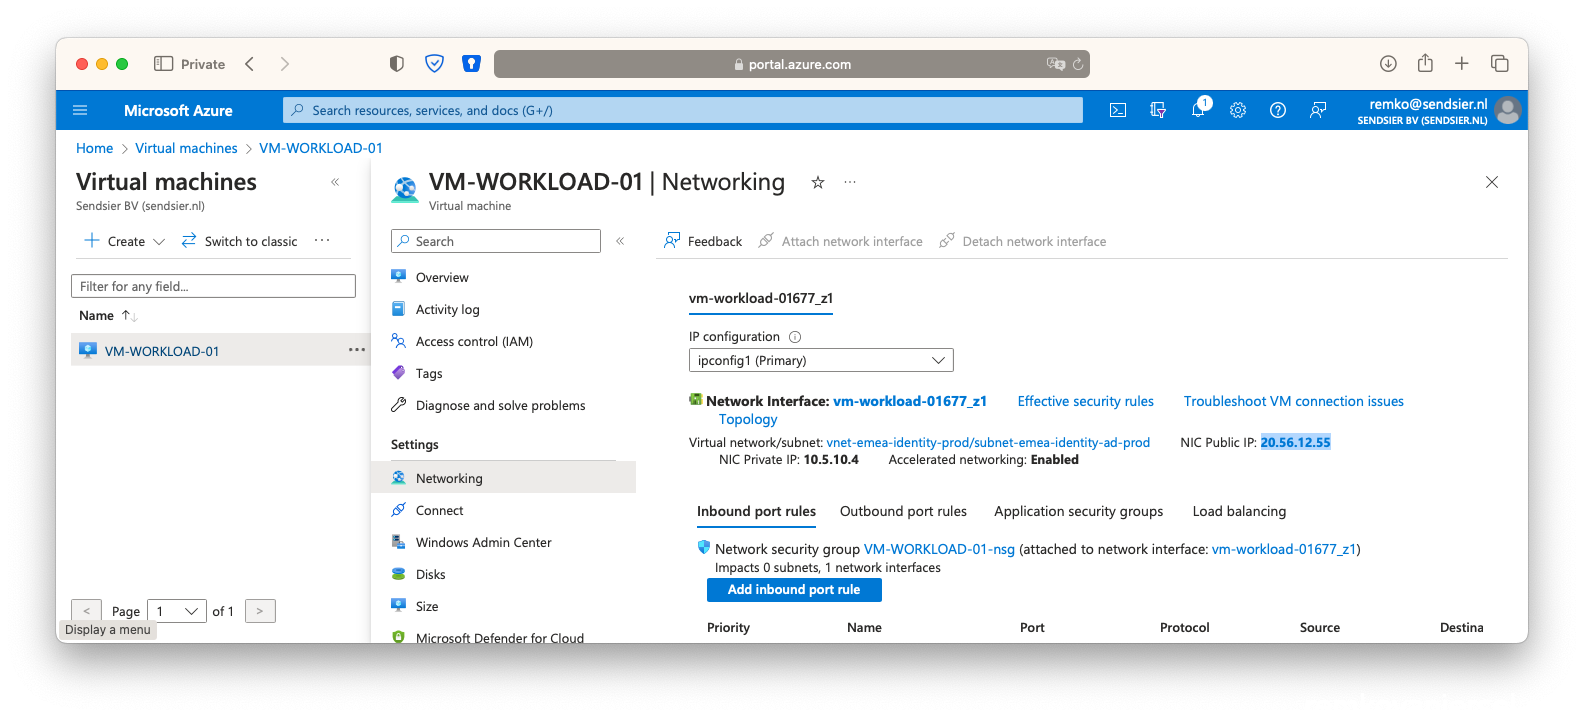
- Give it a Public IP
- eg: 20.56.12.55
- assign a DNS name label (under configuration)
eg: workload-01.westeurope.cloudapp.azure.com
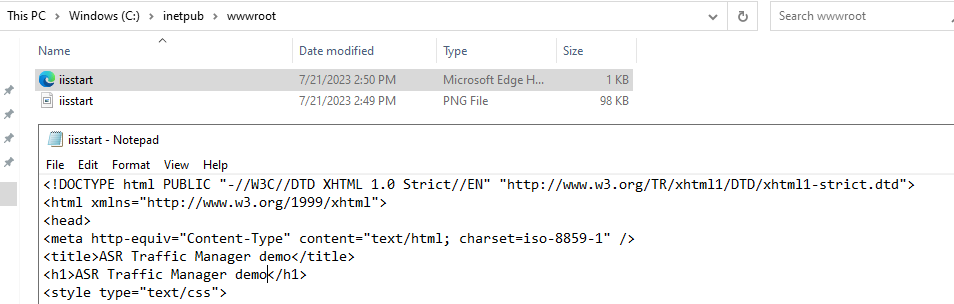
- Login on the VM using RDP, and install IIS role
- Edit C:\inetpub\wwwwroot\issstart.html and change the title and add a H1 text:
- Add a http 80 rule to the NSG (VM-WORKLOAD-01-nsg)

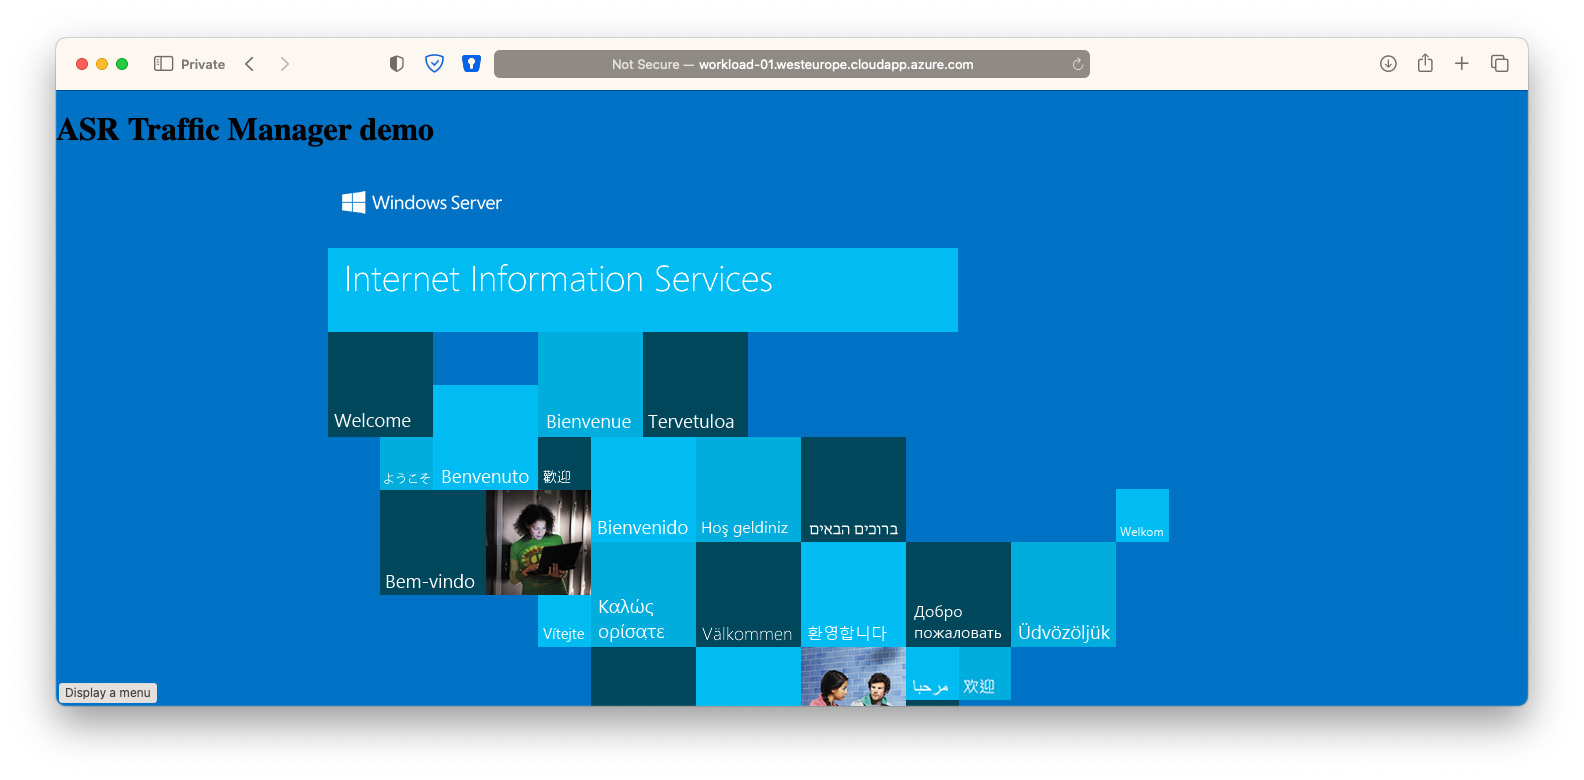
- Now on your local browser test if you can load this page, eg:
http://workload-01.westeurope.cloudapp.azure.com/
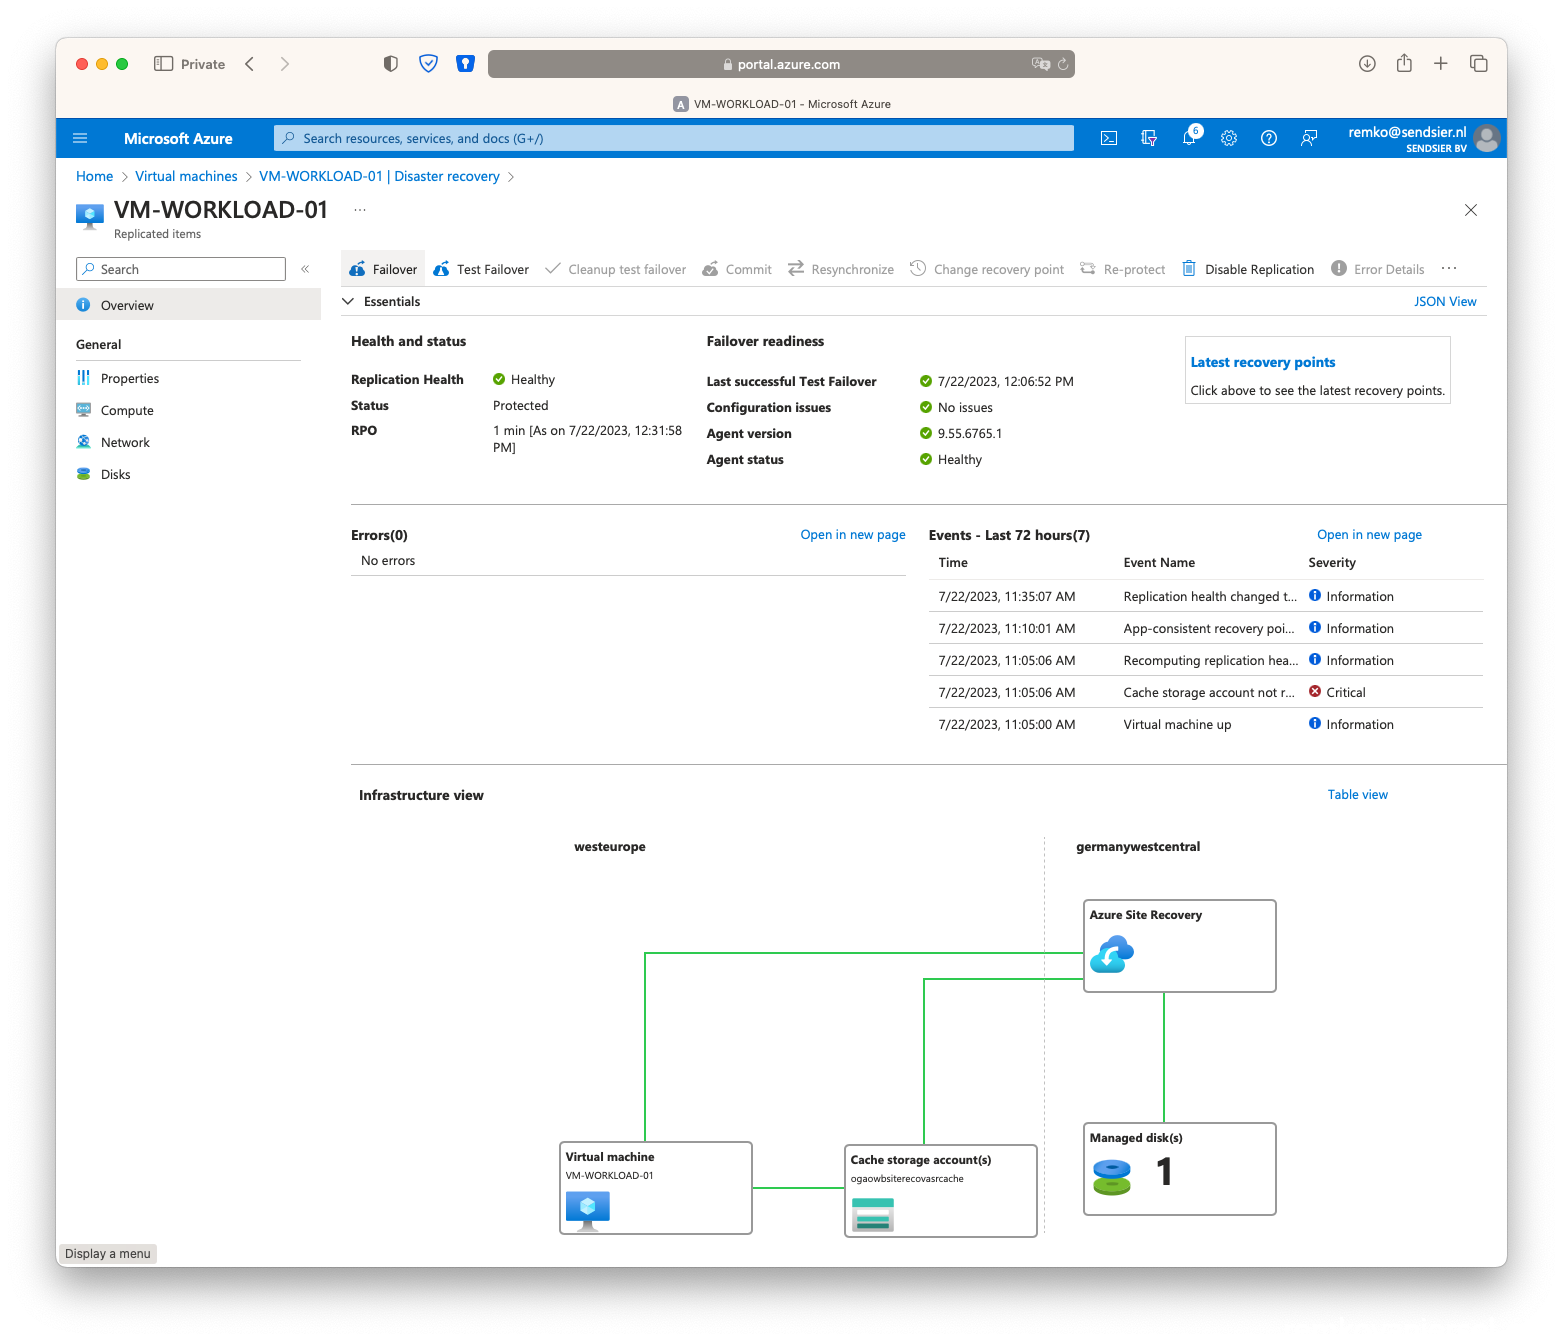
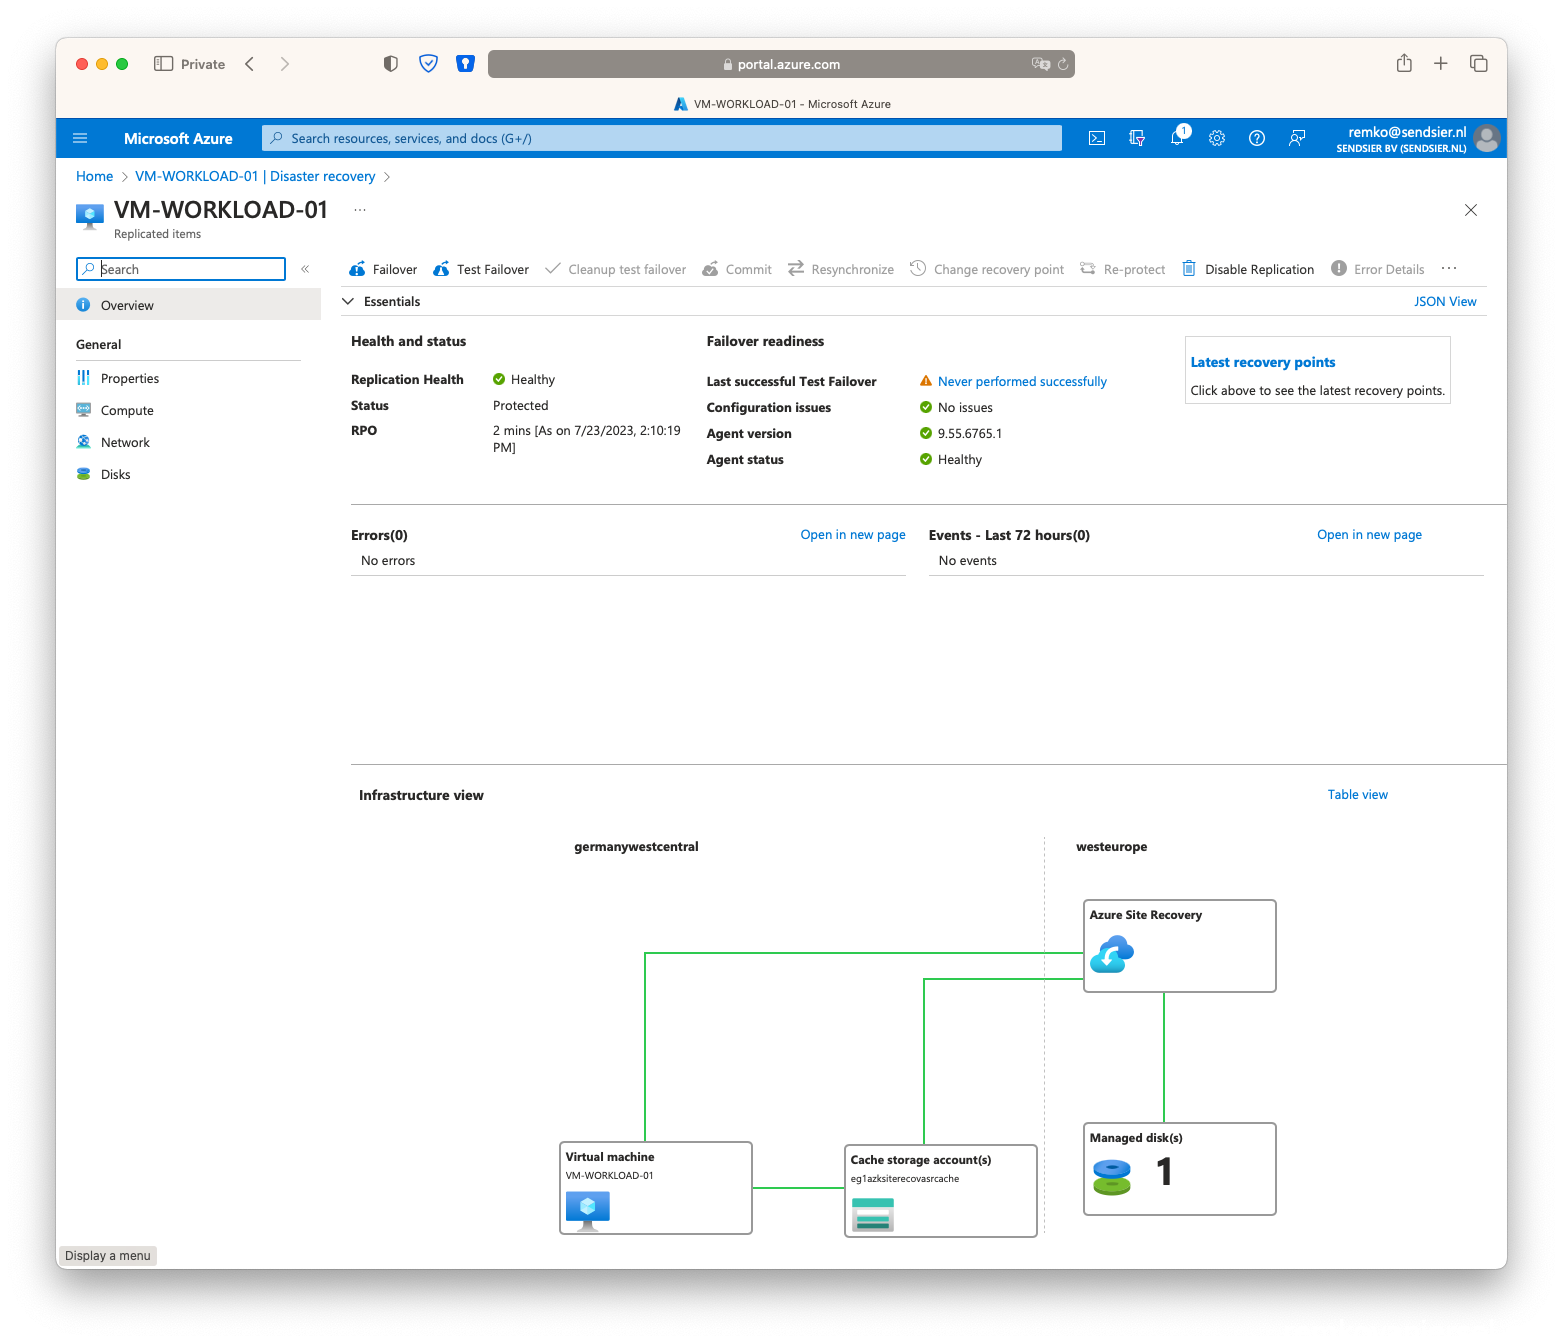
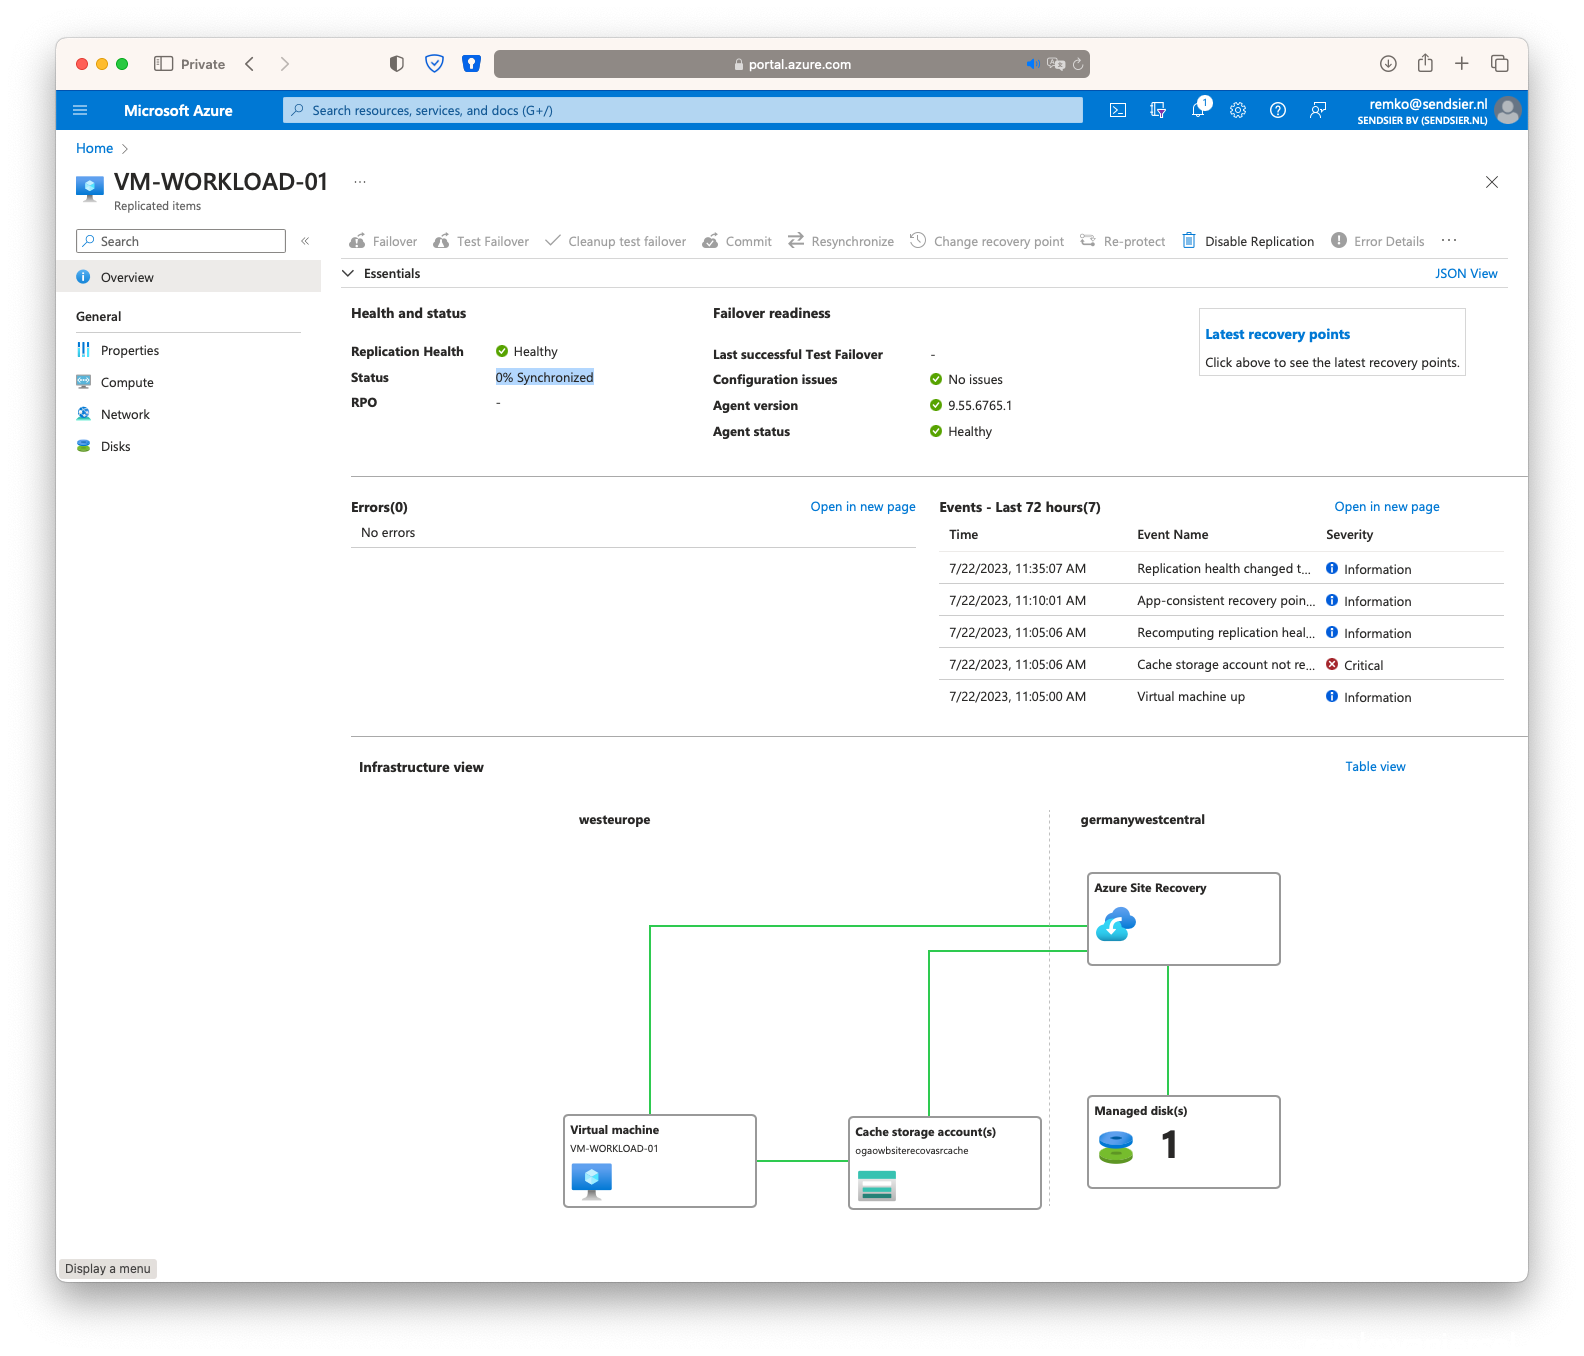
Azure Site Recovery
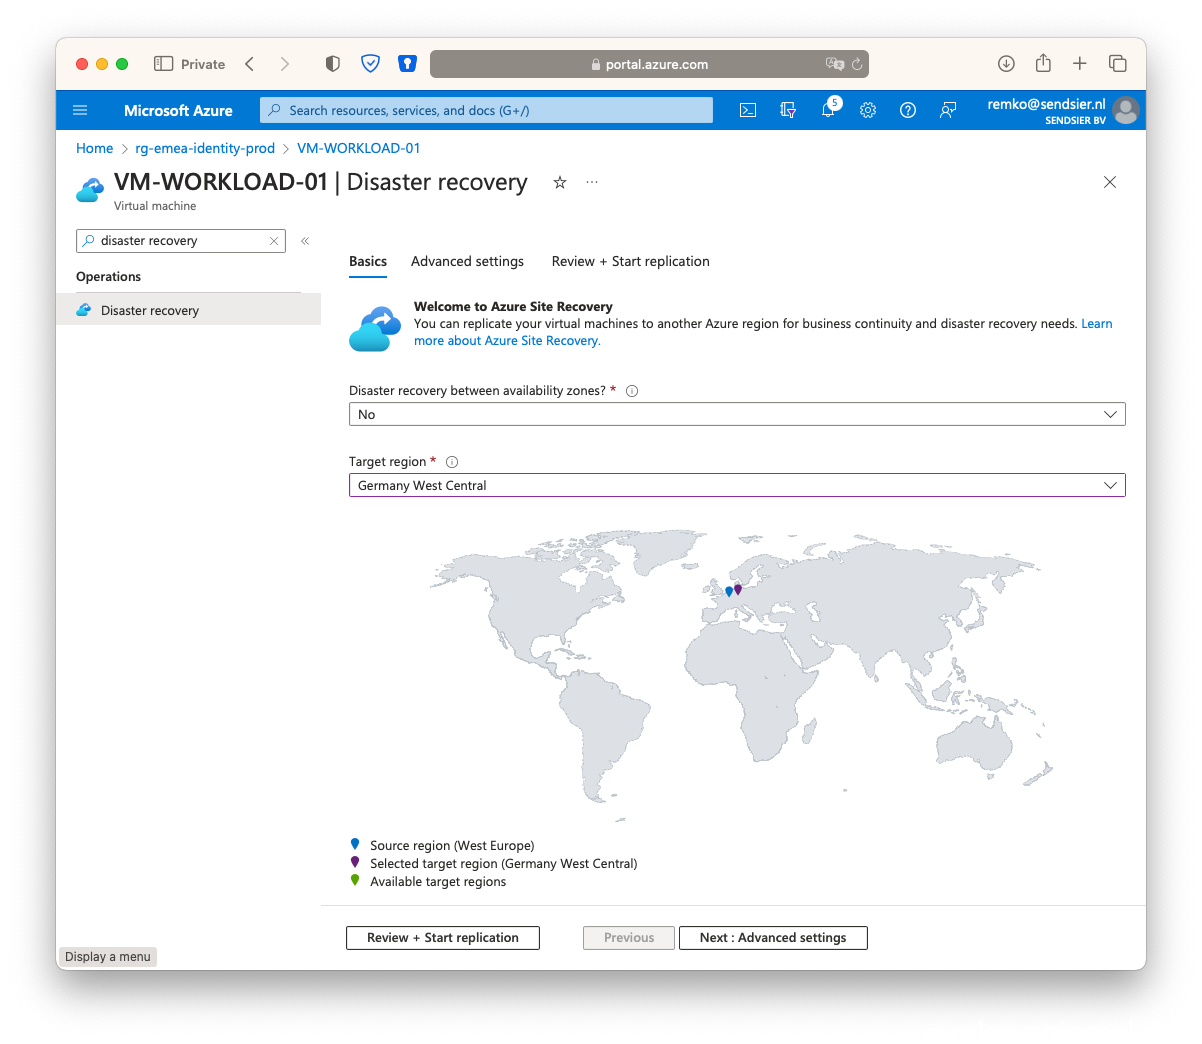
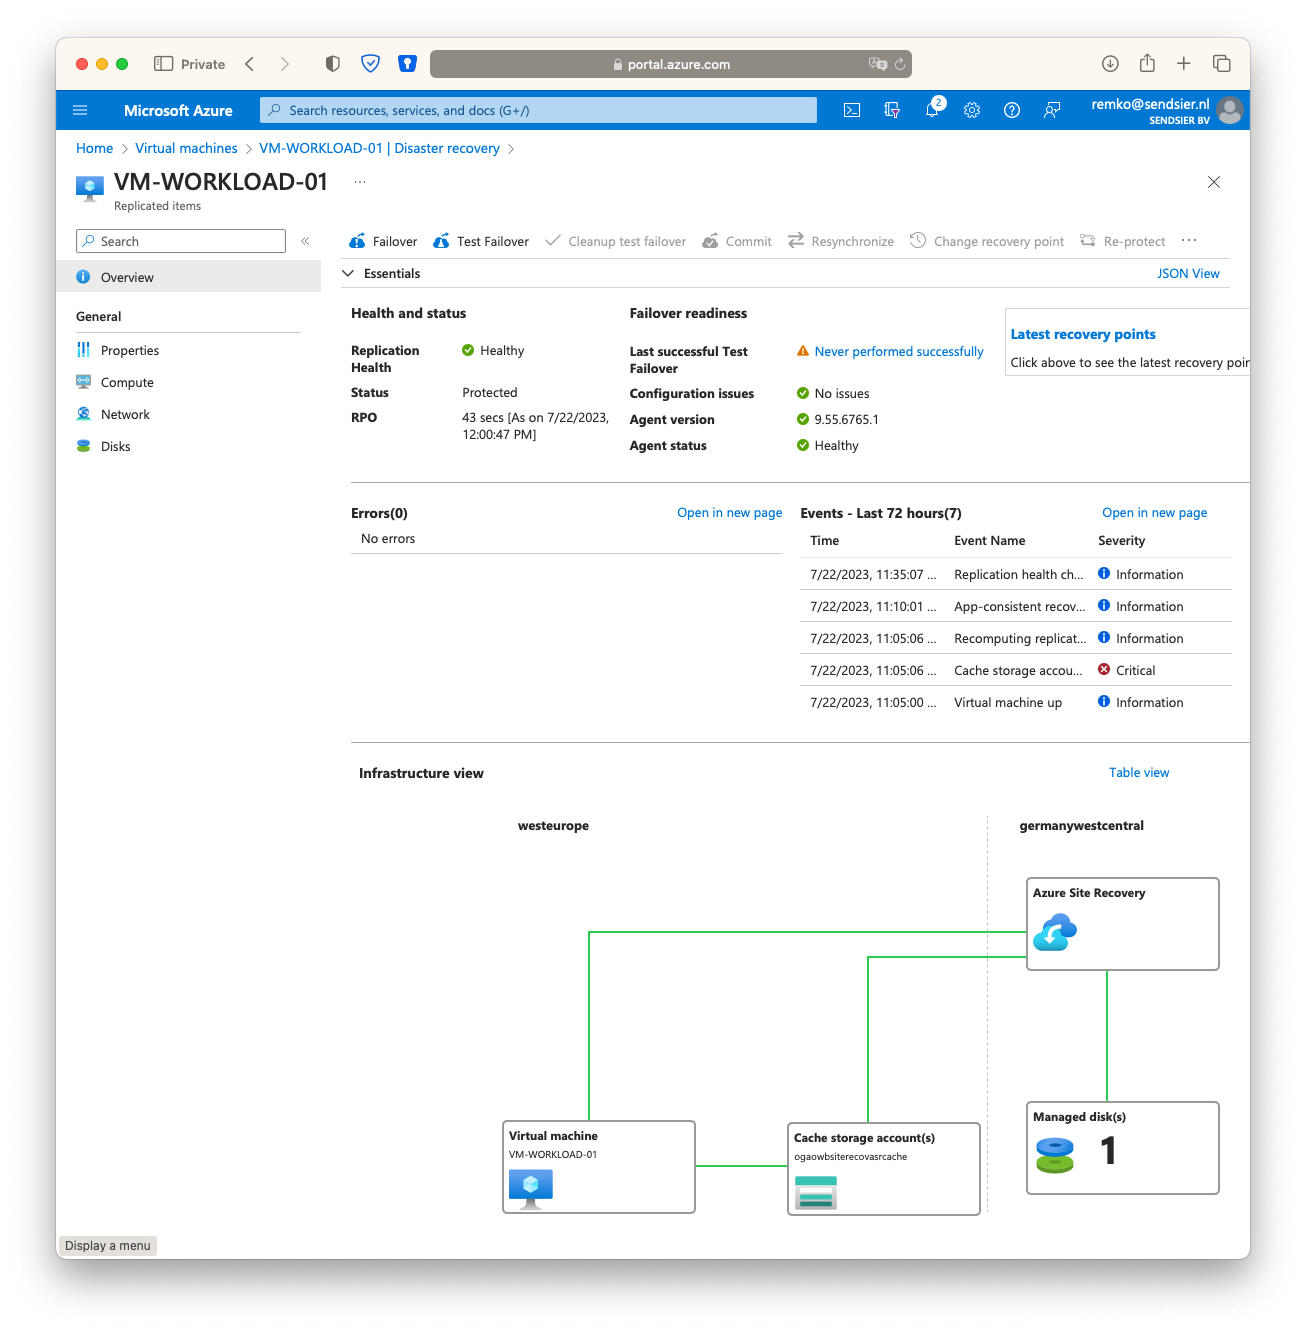
- Go to the VM and select Disaster recovery, choose you passive failover Azure Region and click on Review + Start Replication:
- Click on start replication
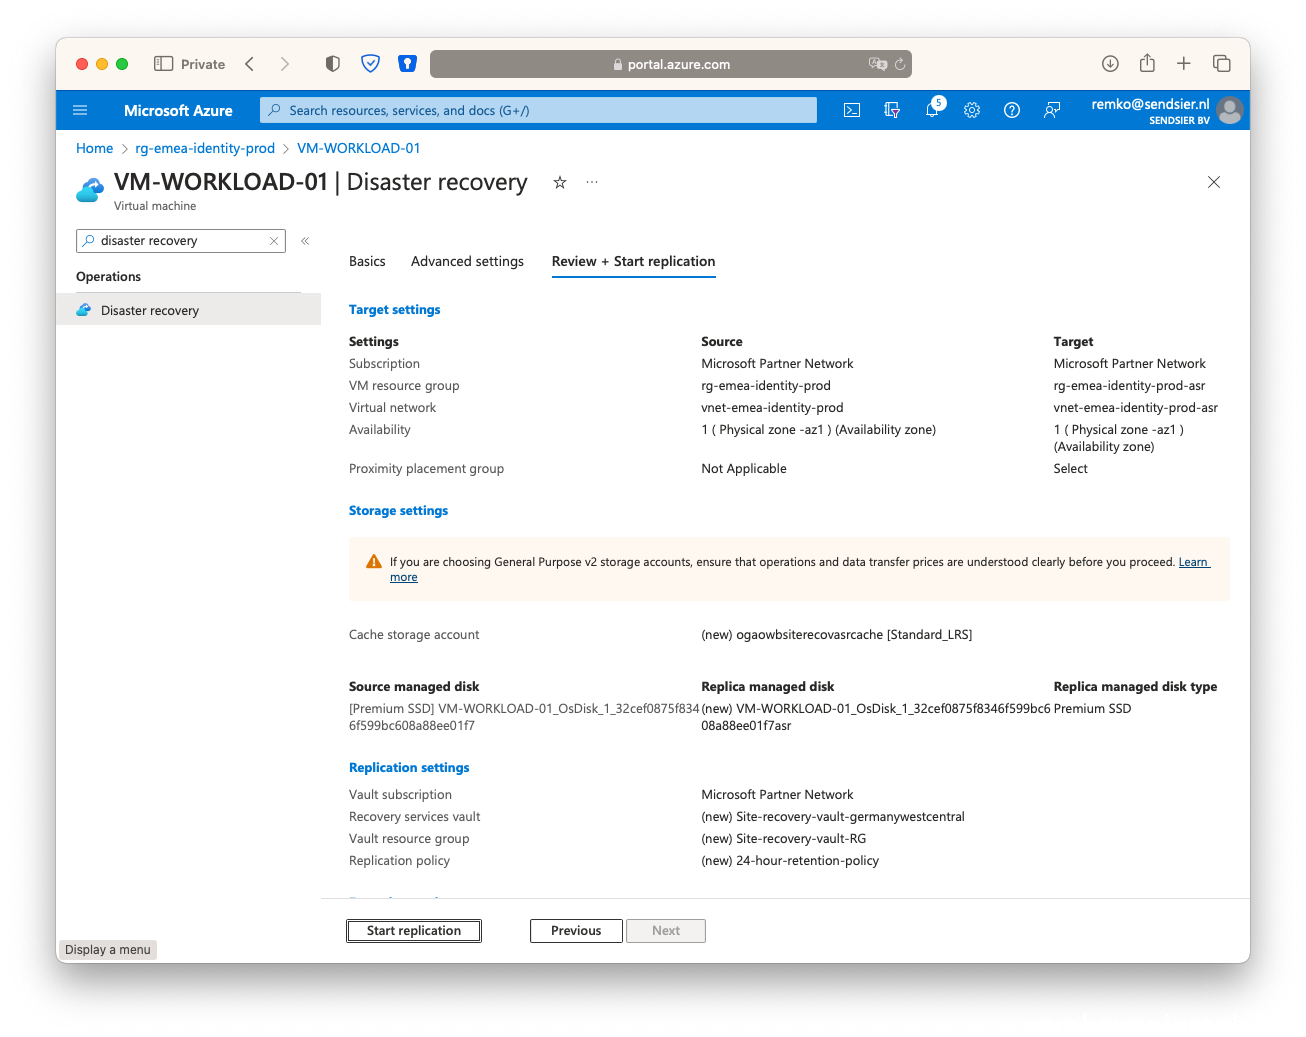
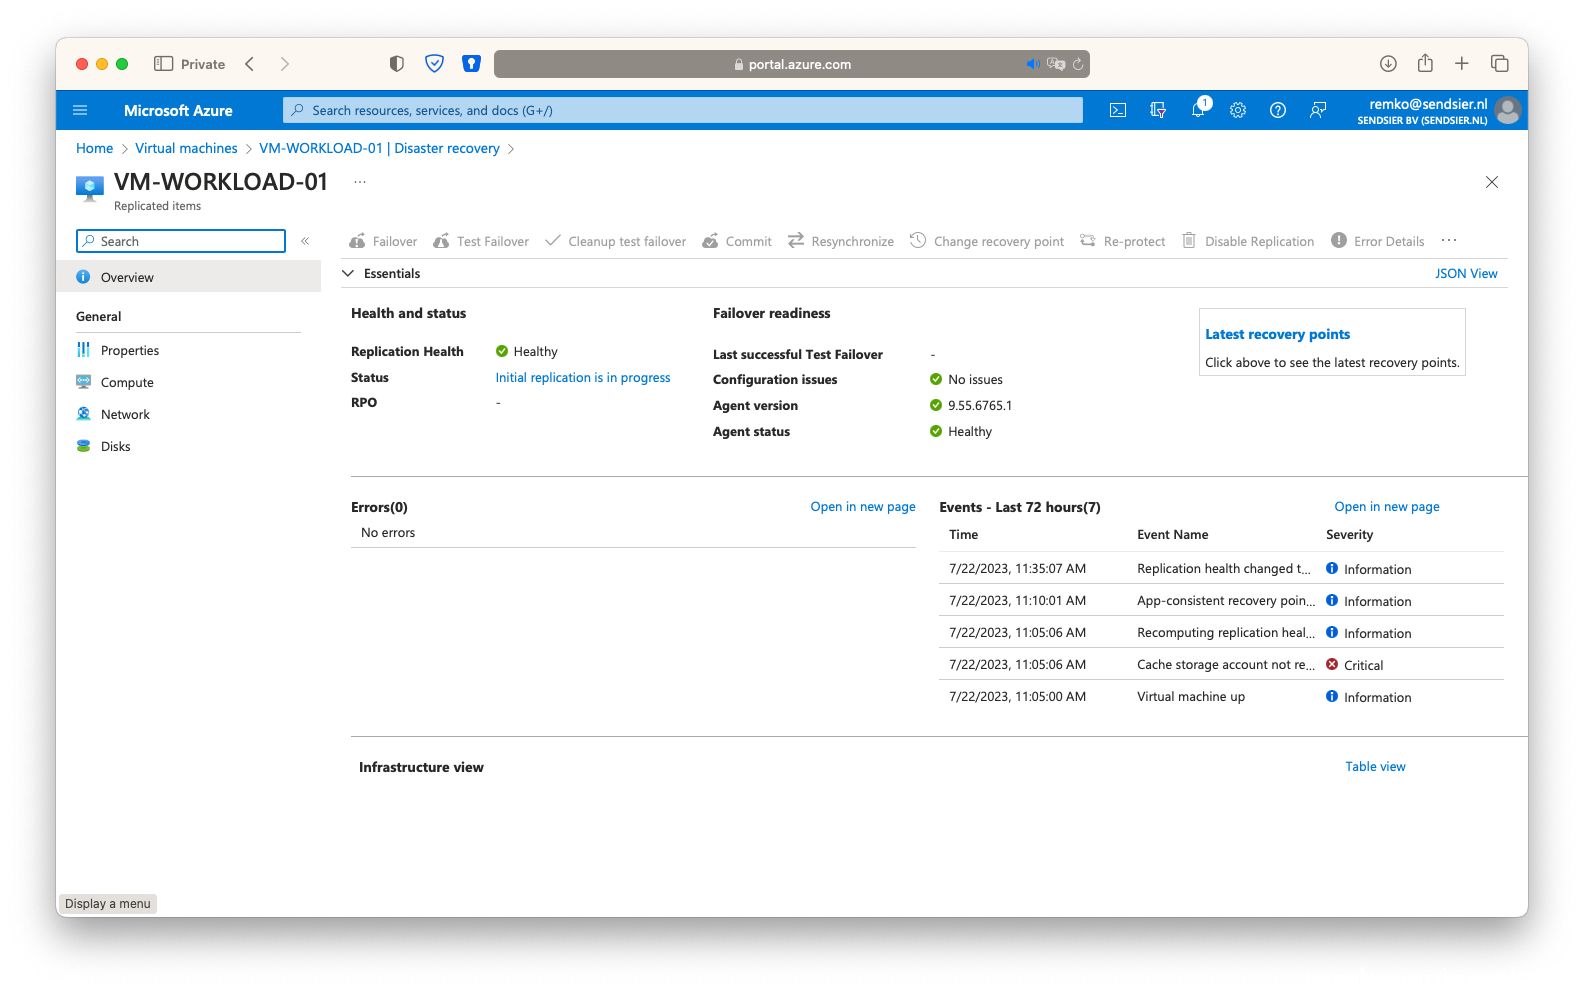
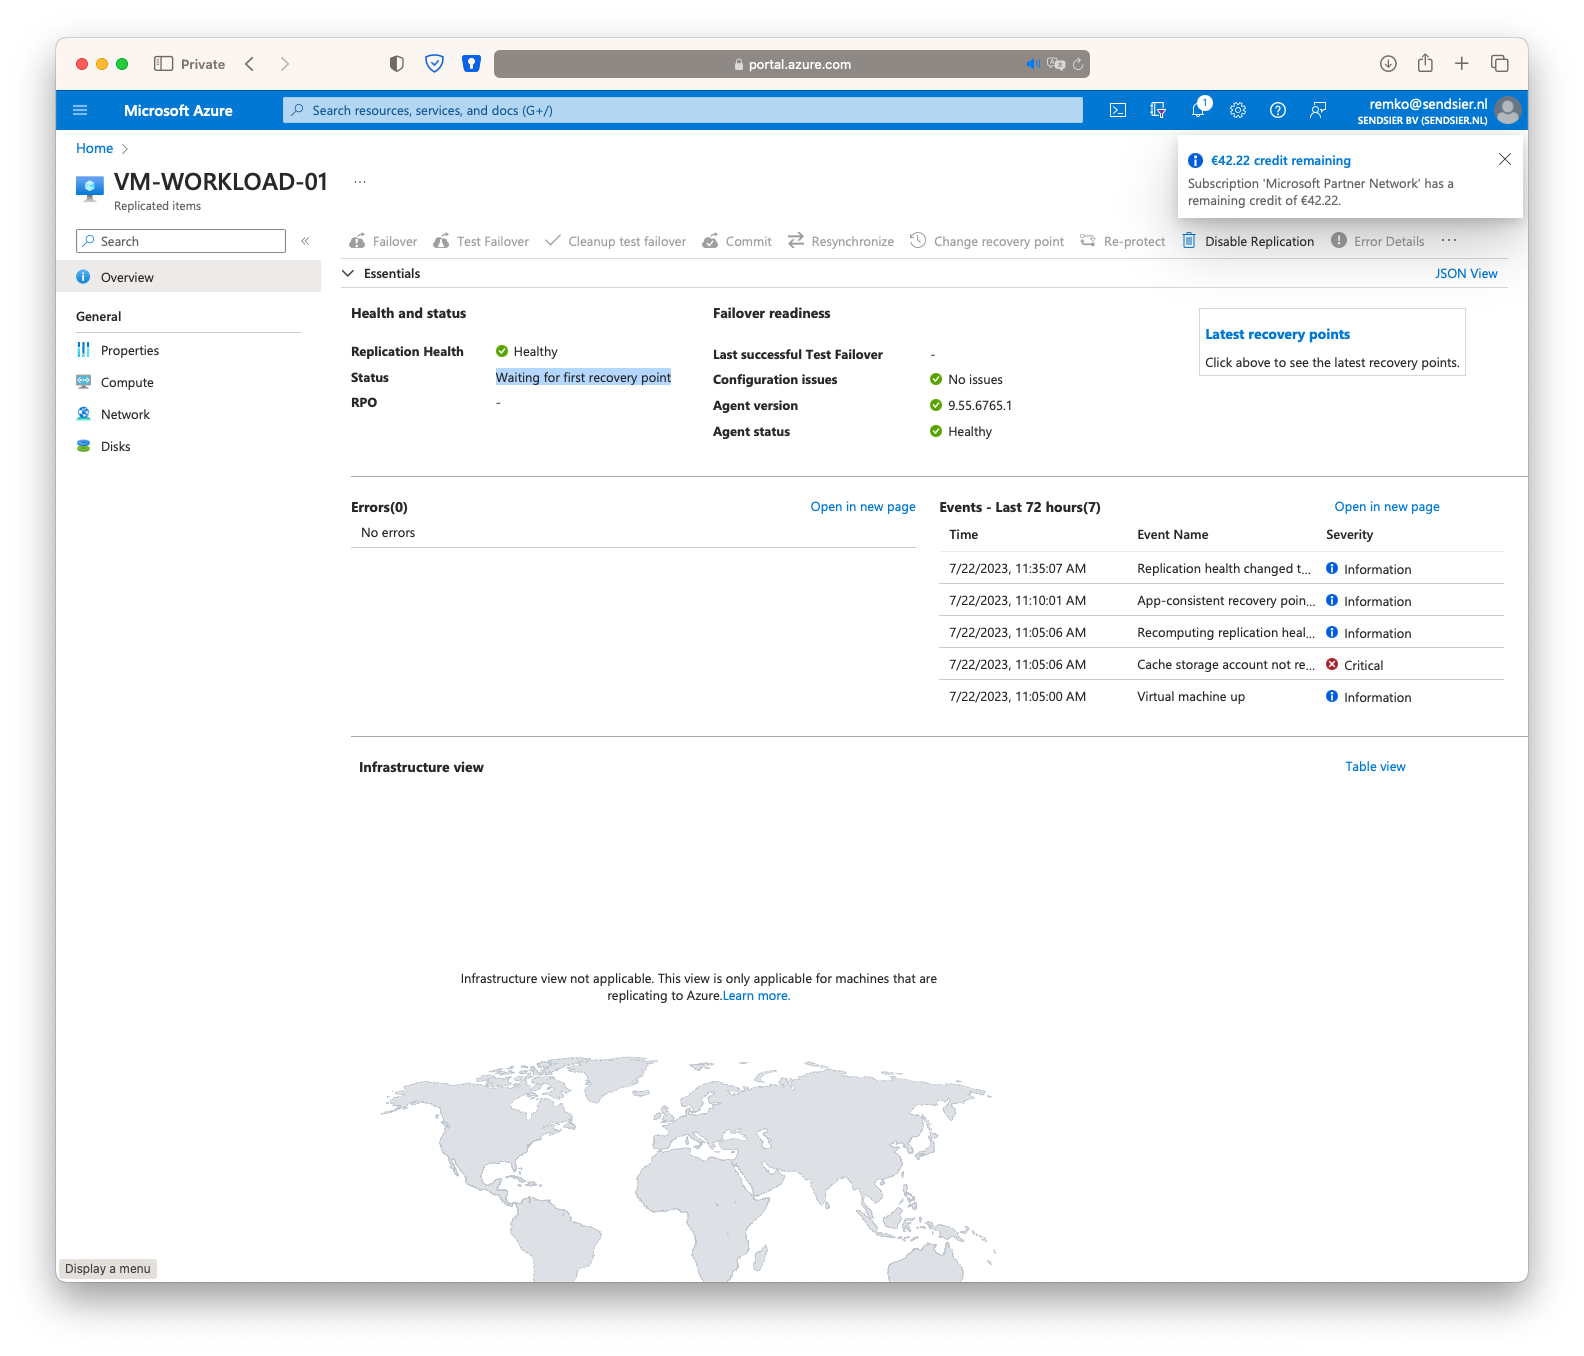
- This will take up to 30 minutes to sync this VM (disk) to the other region in the newly create Azure Recovery Vault
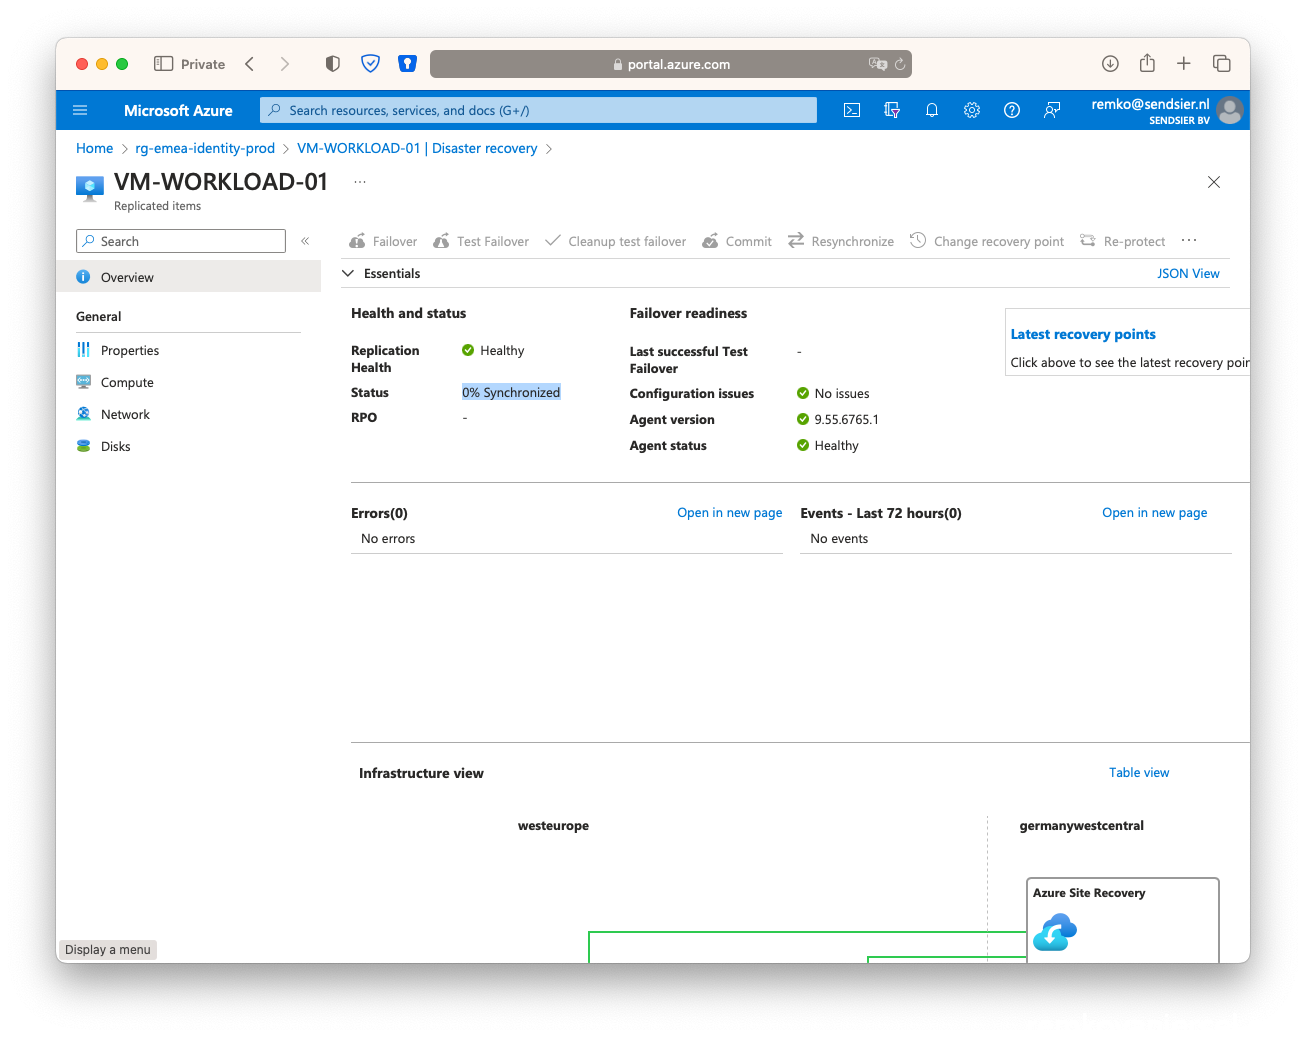
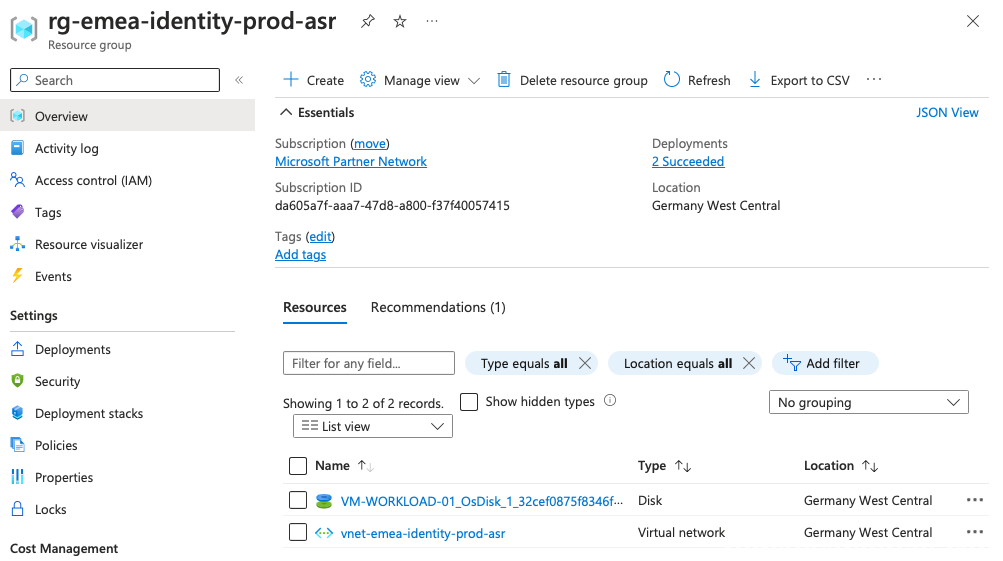
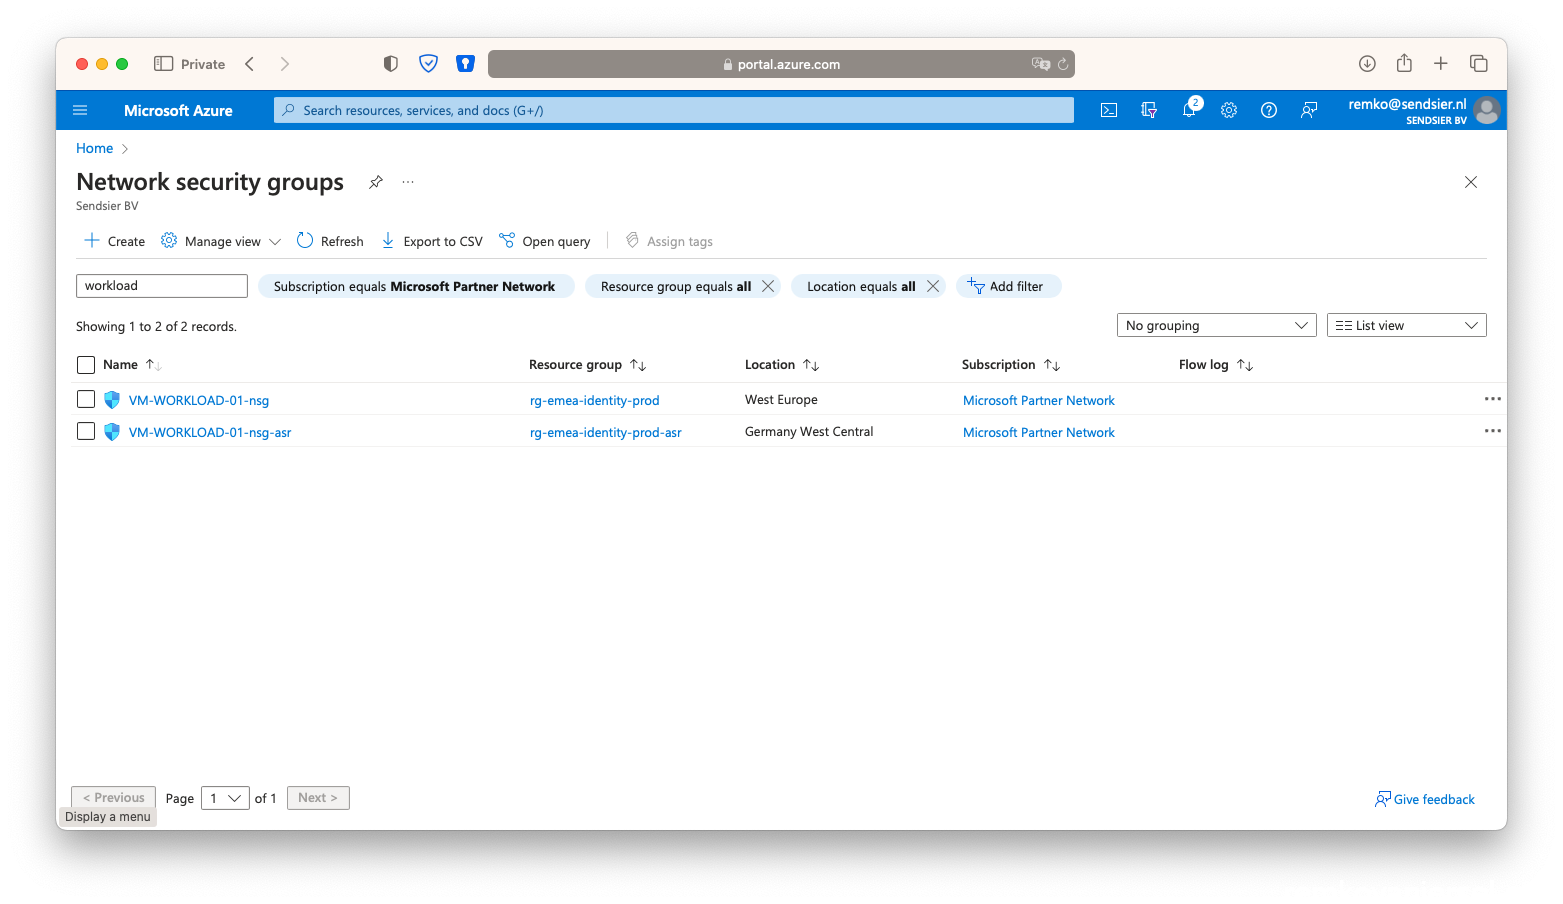
- After it is synced, you will notice a virtual disk and a vNet in the ***-asr resource group:
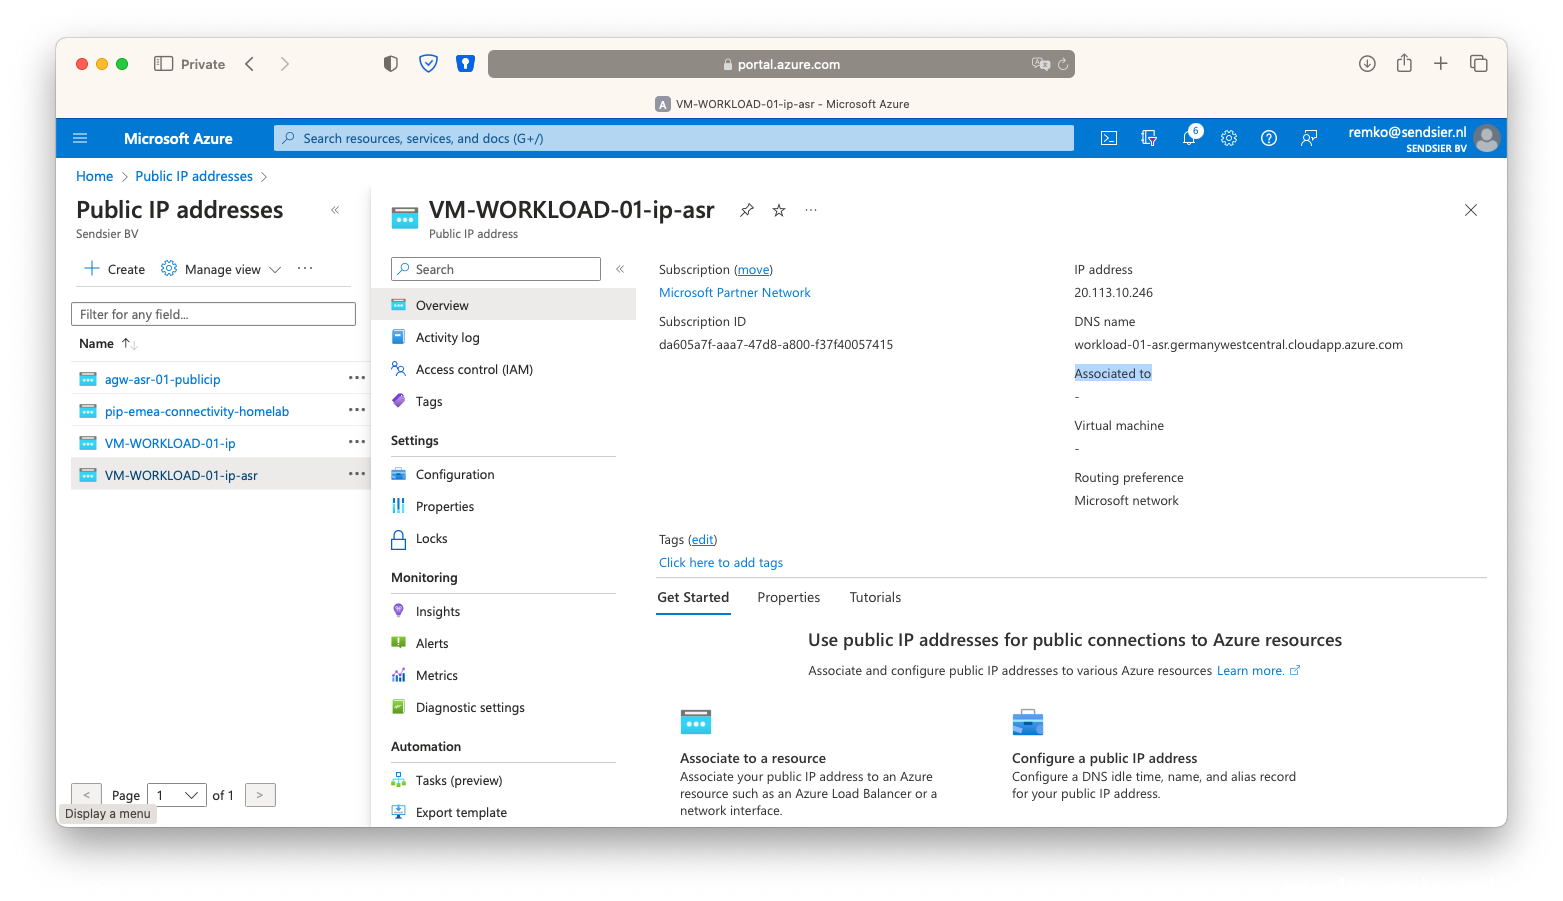
Public IP
A secondary public IP needs to be created, because the Public IP address of the production application cannot be retained on failover. Workloads brought up as part of failover process must be assigned an Azure Public IP resource available in the target region. This step can be done either manually or is automated with recovery plans. A recovery plan gathers machines into recovery groups. It helps you to define a systematic recovery process. You can use a recovery plan to impose order, and automate the actions needed at each step, using Azure Automation runbooks for failover to Azure, or scripts.
Click on create and a public IP: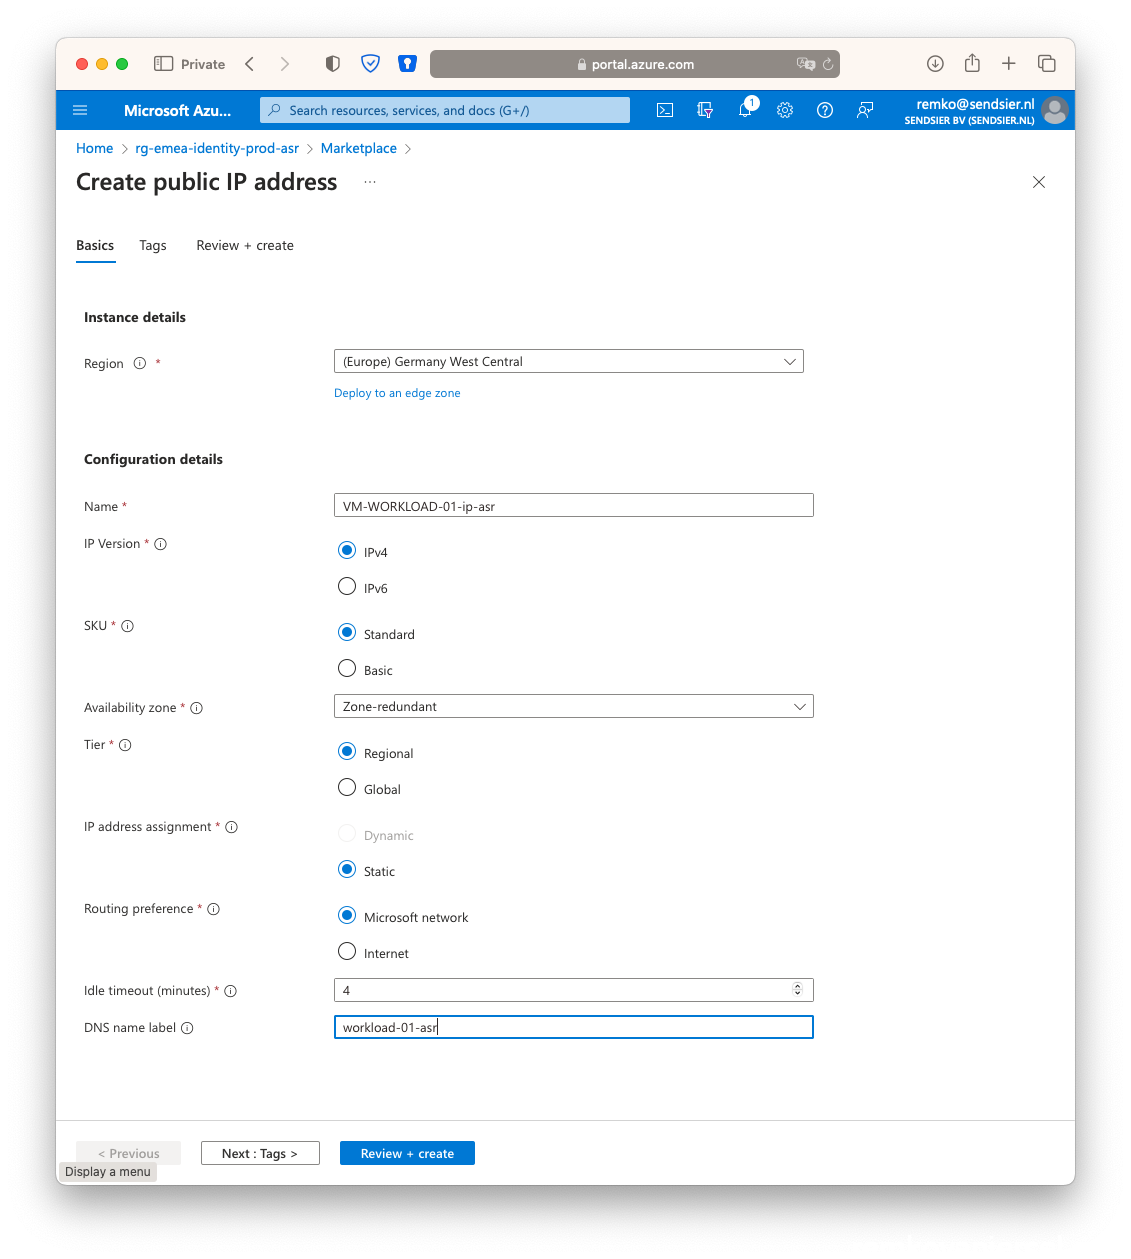
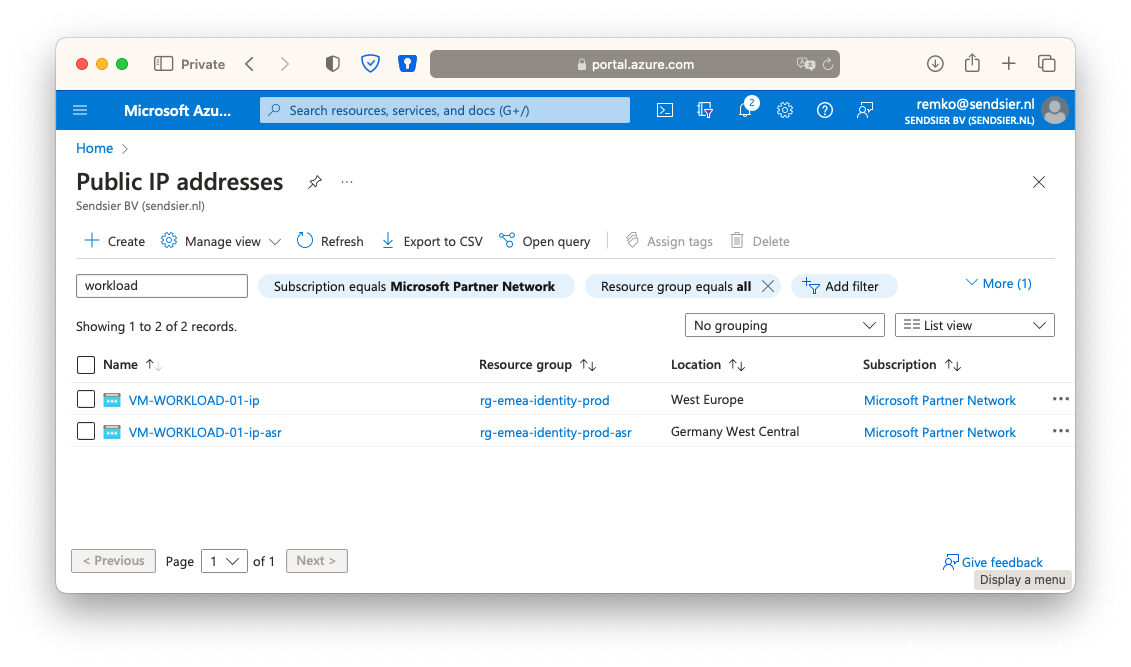
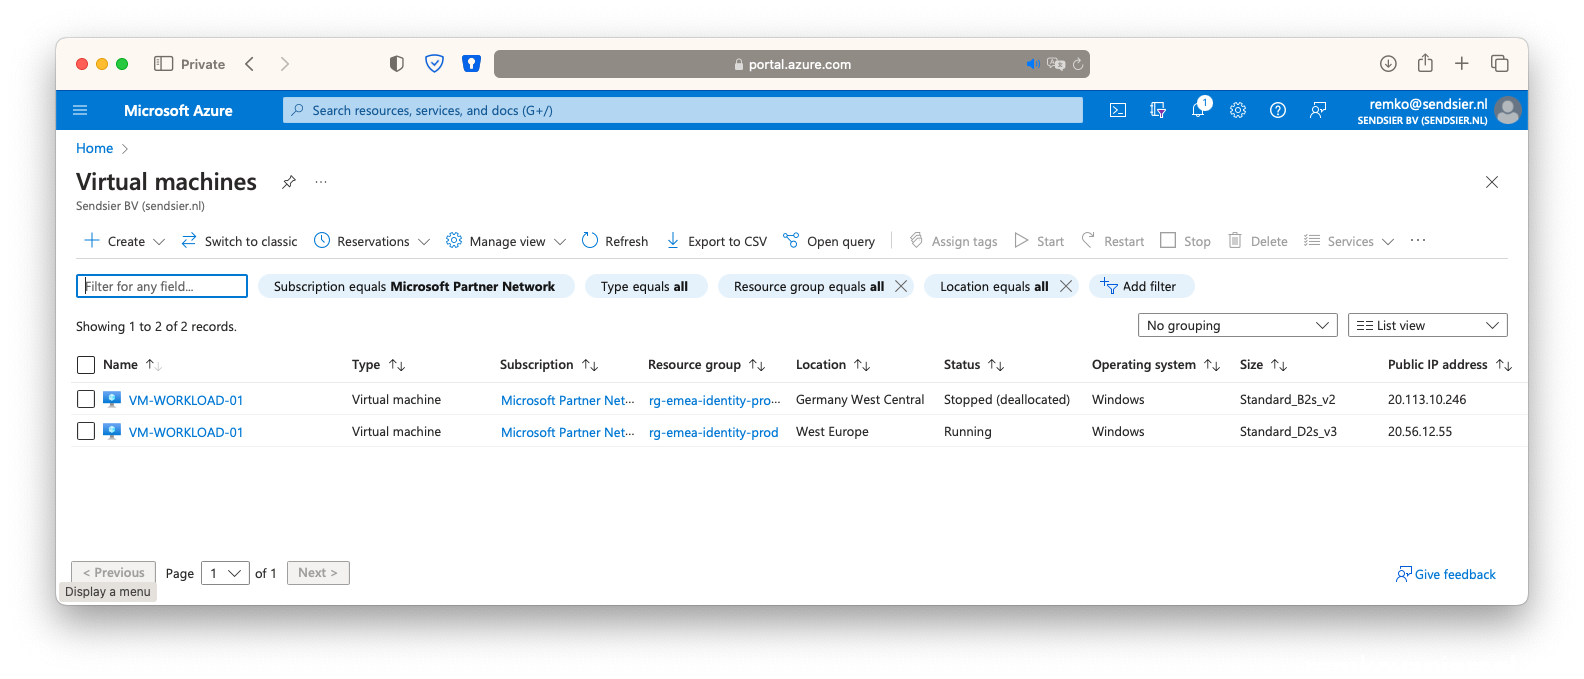
You now see 2 public IP’s for this VM workload, notice the different locations (Azure regions, one for the primary Active site and the second one for the Passive failover site):
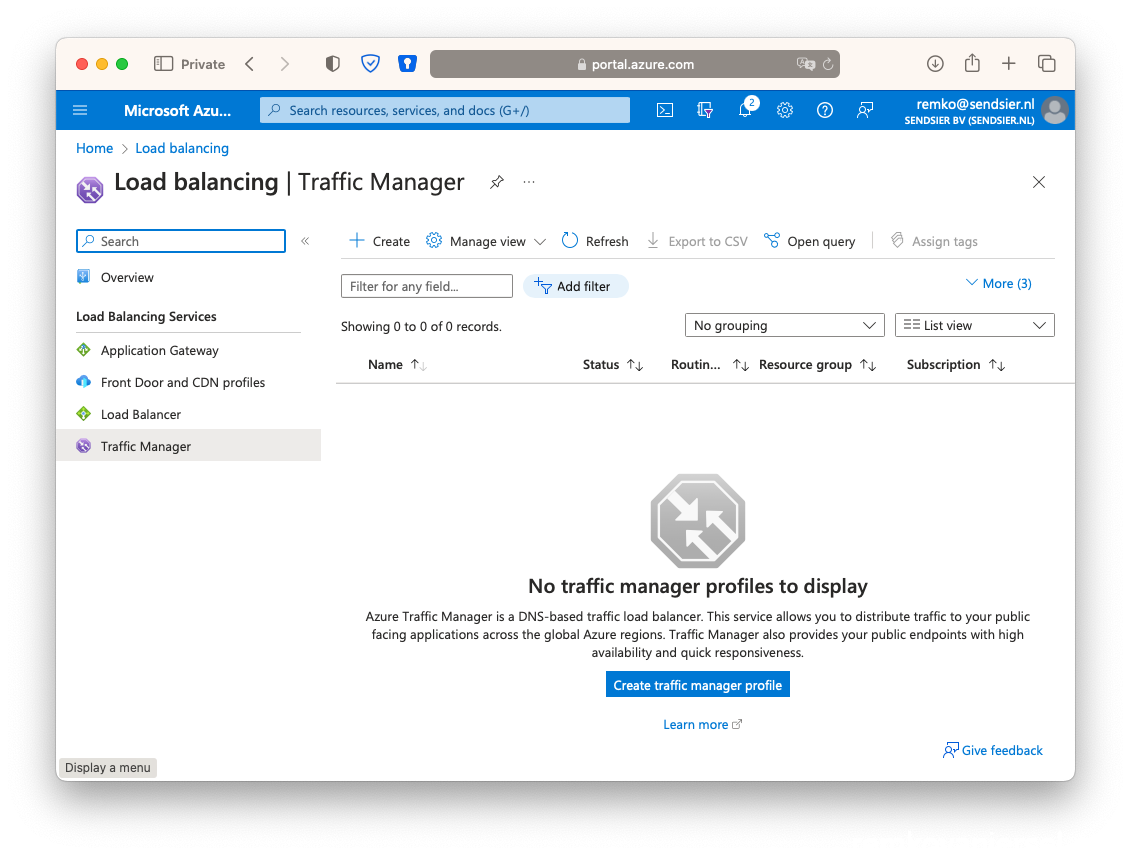
Traffic Manager
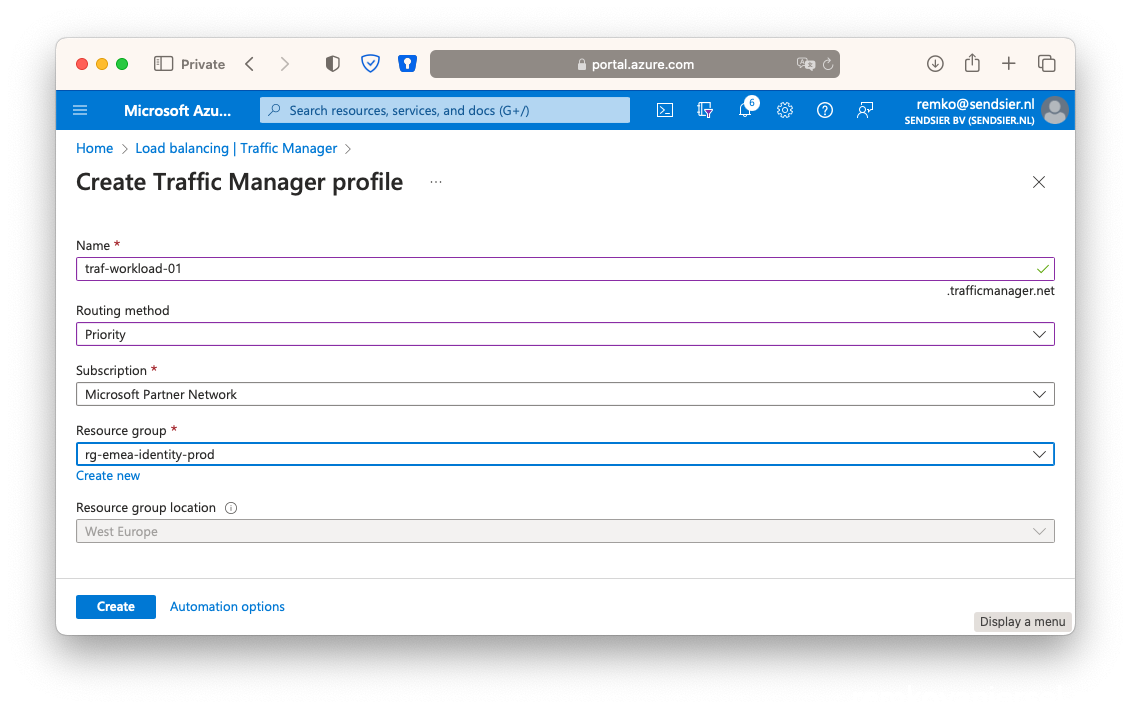
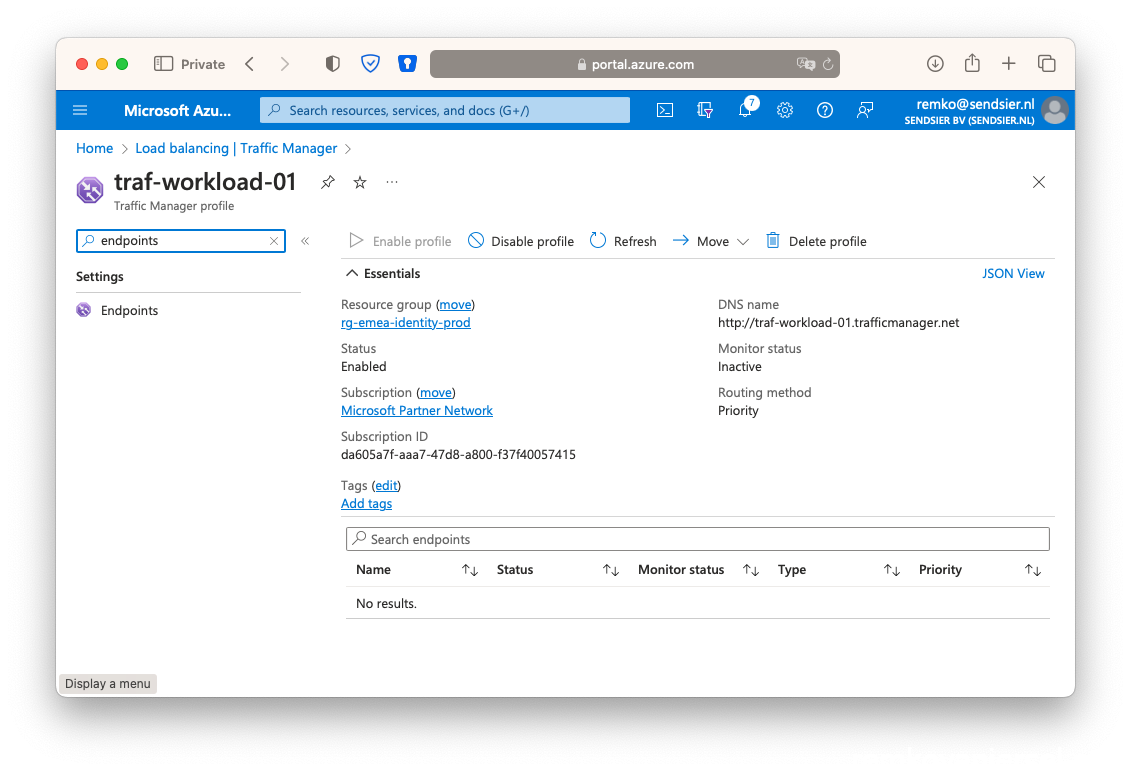
- Go to Traffic Manager and create a new Traffic Manager Profile:
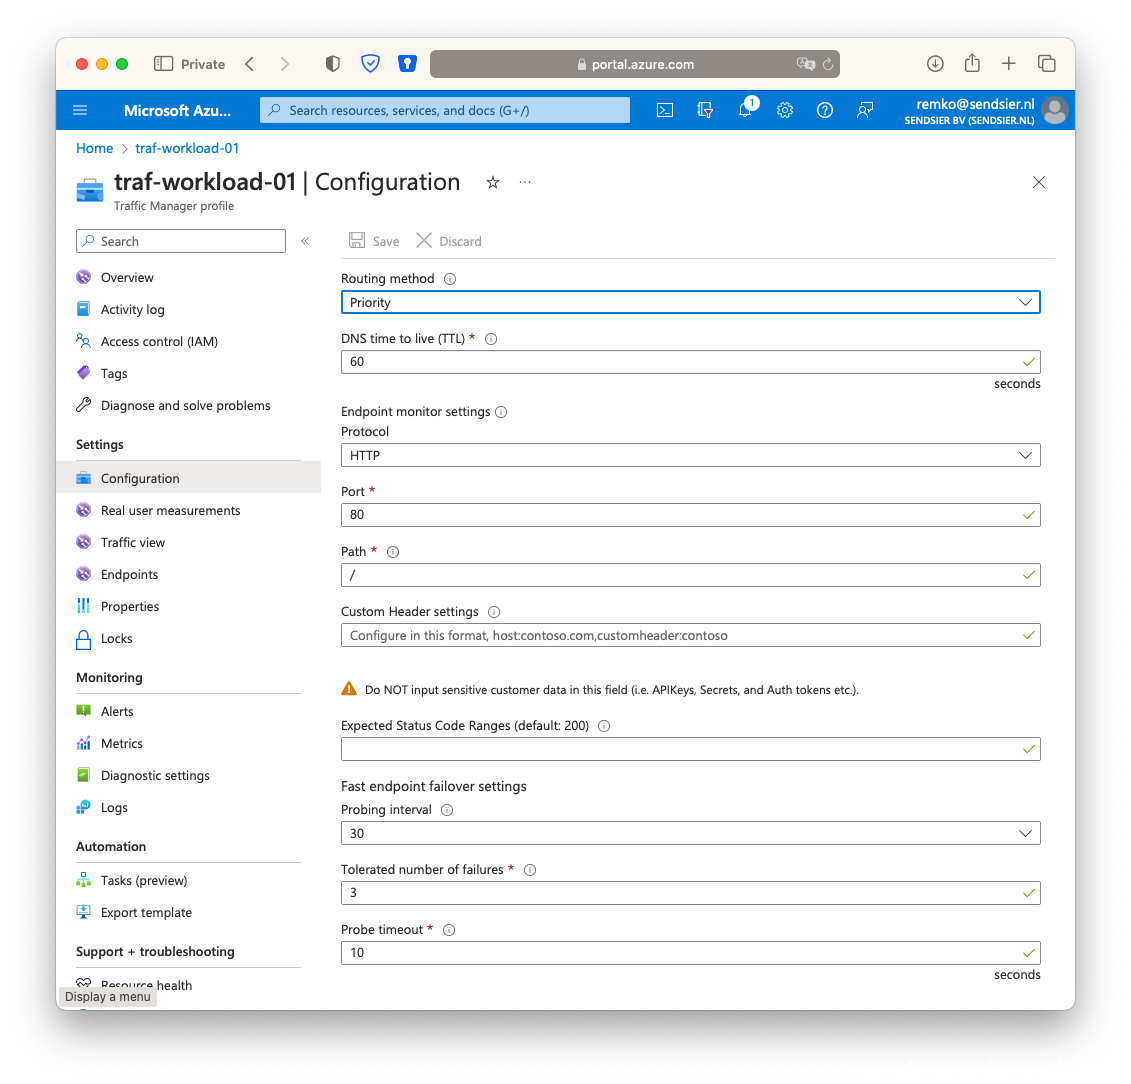
- Change the routing method to Priority, and put this profile in your primary site resource group:
| Endpoint | (Location) | Priority | Status |
| Primary | West Europe | 1 | Online |
| Failover | Germany | 2 | Degraded |
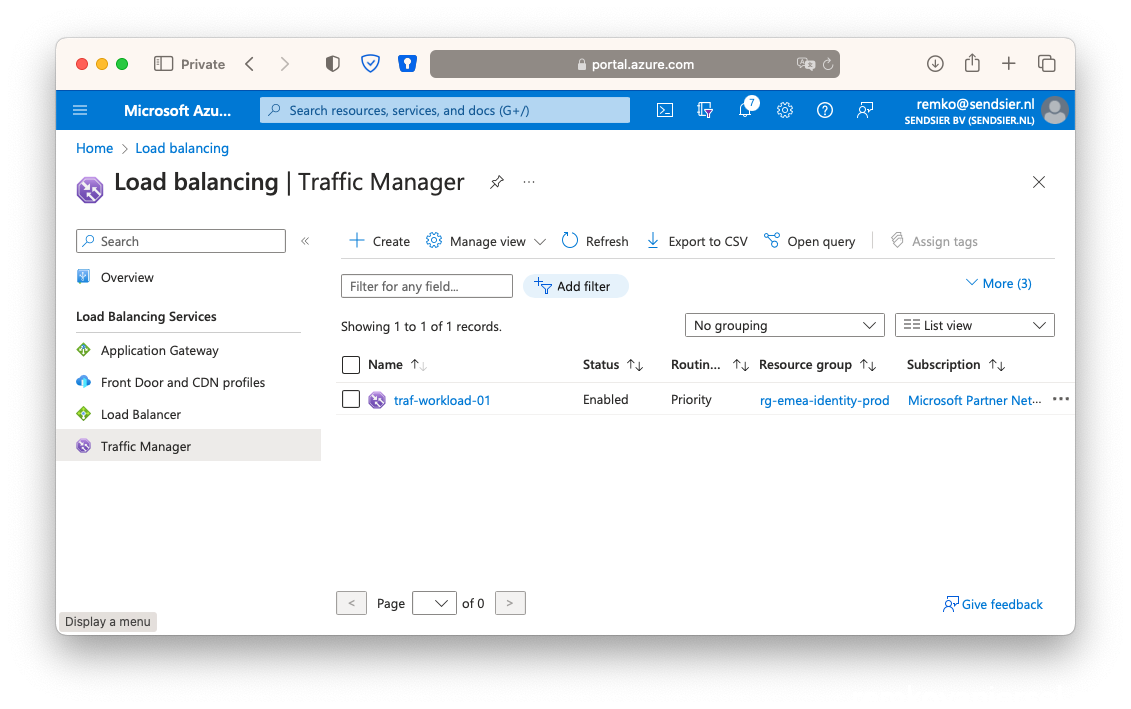
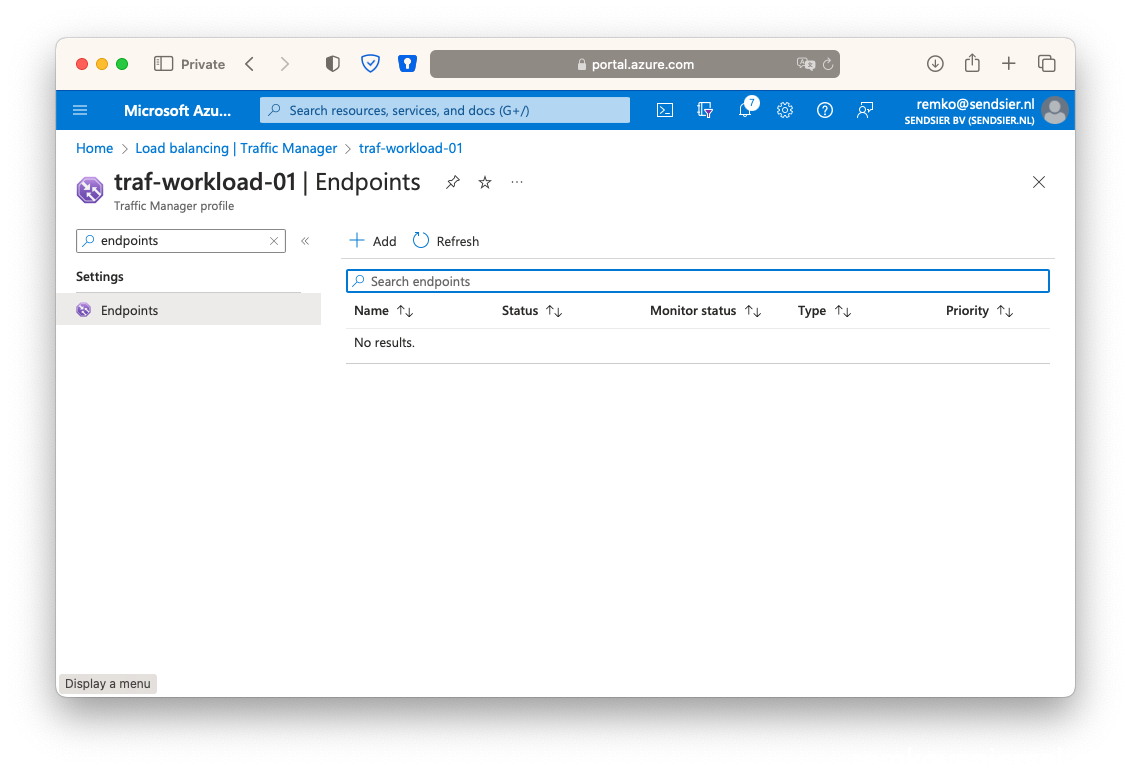
- Click on the profile, and click on Endpoints
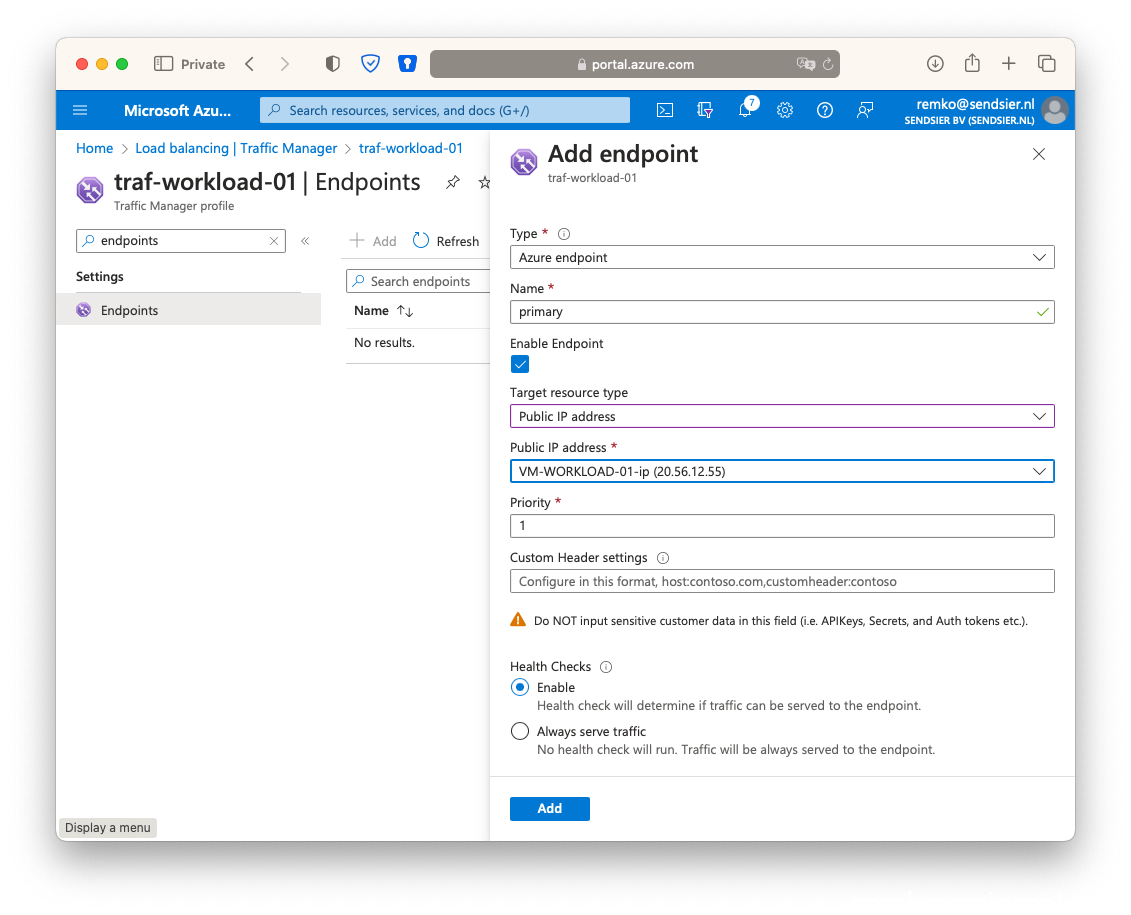
- As type choose Azure endpoint, name Primary, as target resource type public IP address, choose the public IP address of the VM Workload IP of the primary active VM in the active Azure site, as priority type 1:
- Add the second endpoint:
As type choose Azure endpoint, name Failover, as target resource type public IP address, choose the public IP address of the VM Workload IP of the passive VM in the active Passive site, as priority type 2:
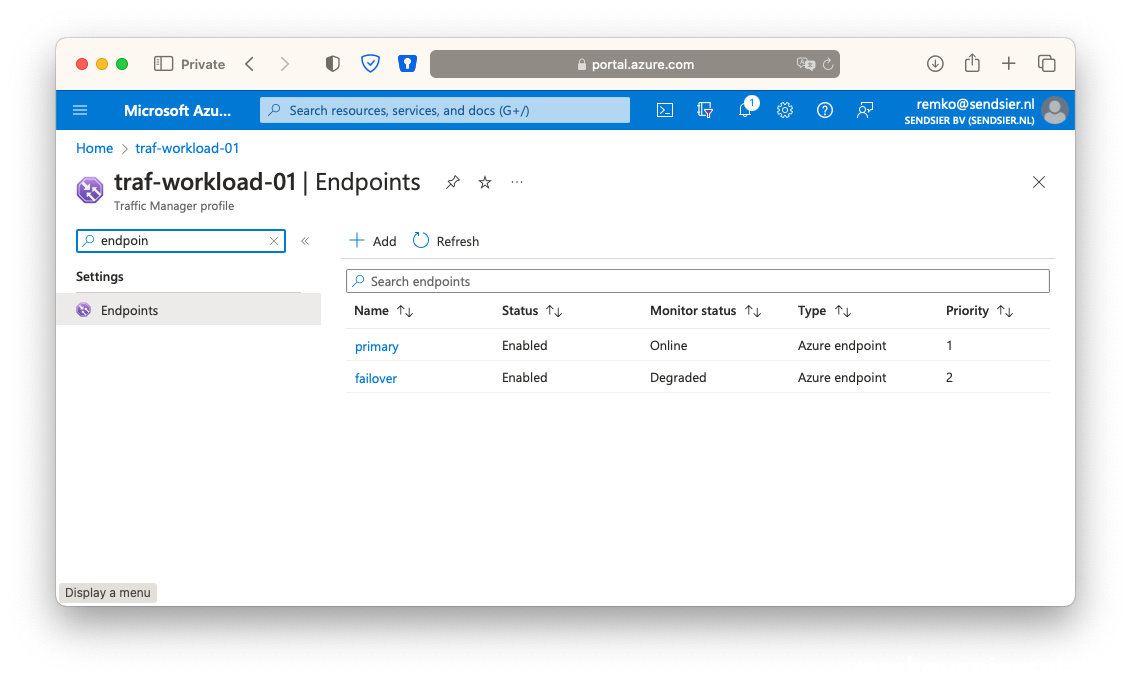
- Now it is checking both the endpoints, notice after a while that the Primary is online (VM is running) and the second one is Degraded as there is no VM running or at least nothing link:
- Now check that the website is reachable via the traffic manager DNS name
(eg http://traf-workload-01.trafficmanager.net )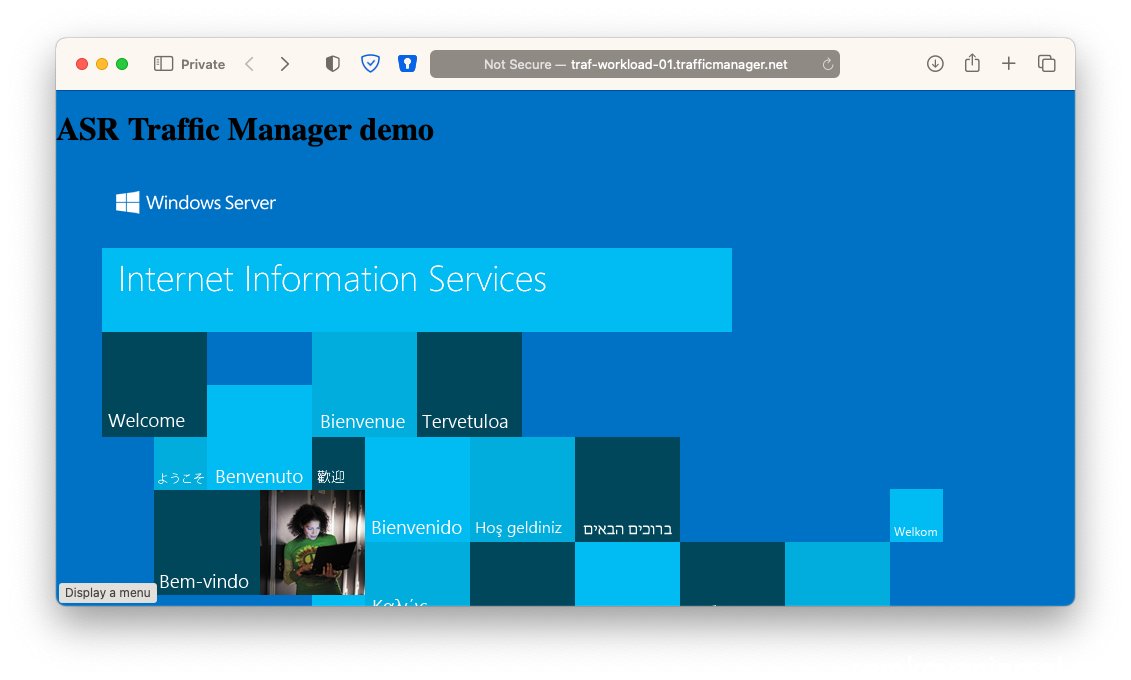
- Note: you can customize the configuration of the profile to be more precise like look at a certain webpage and the probing intervals etc:
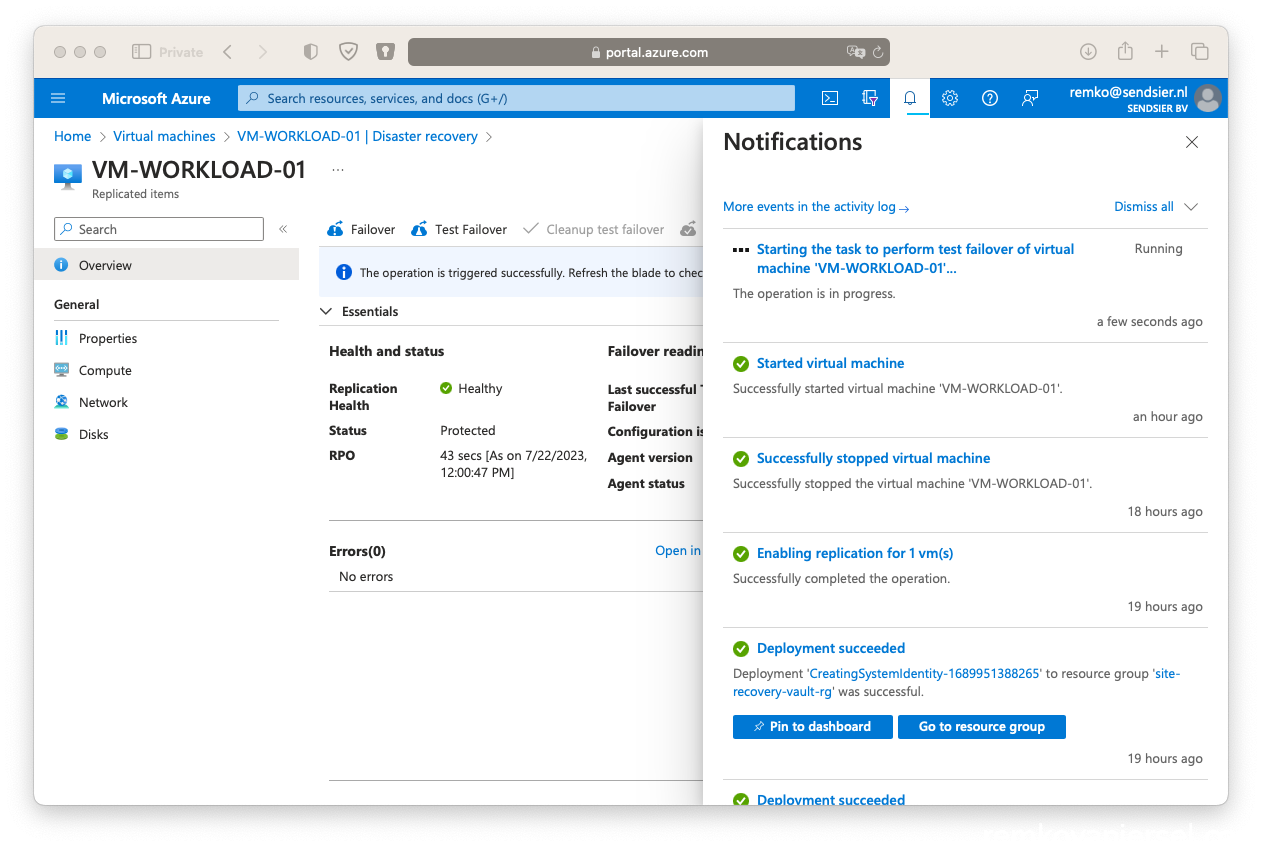
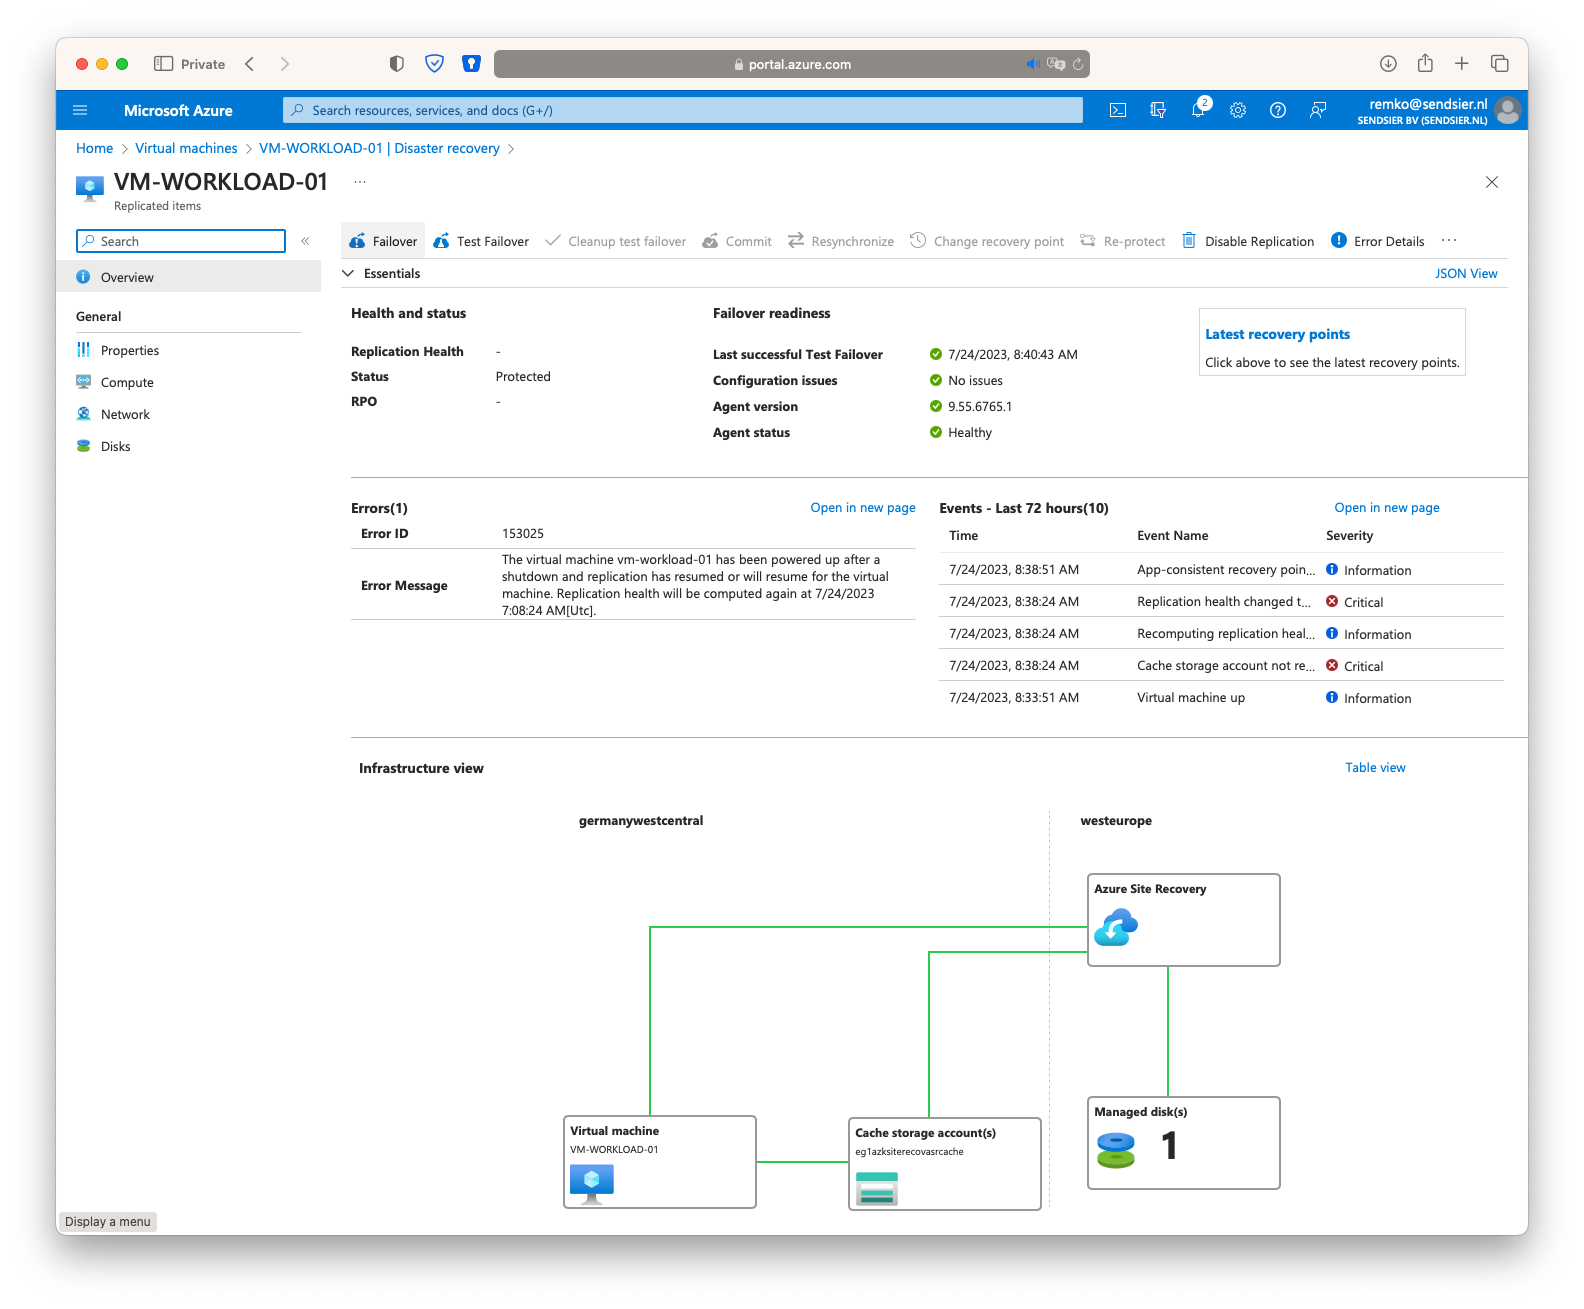
Perform a test failover for ASR
- Goto the VM and under Disaster Recovery click on [Test Failover]
- Select the secondary vNet
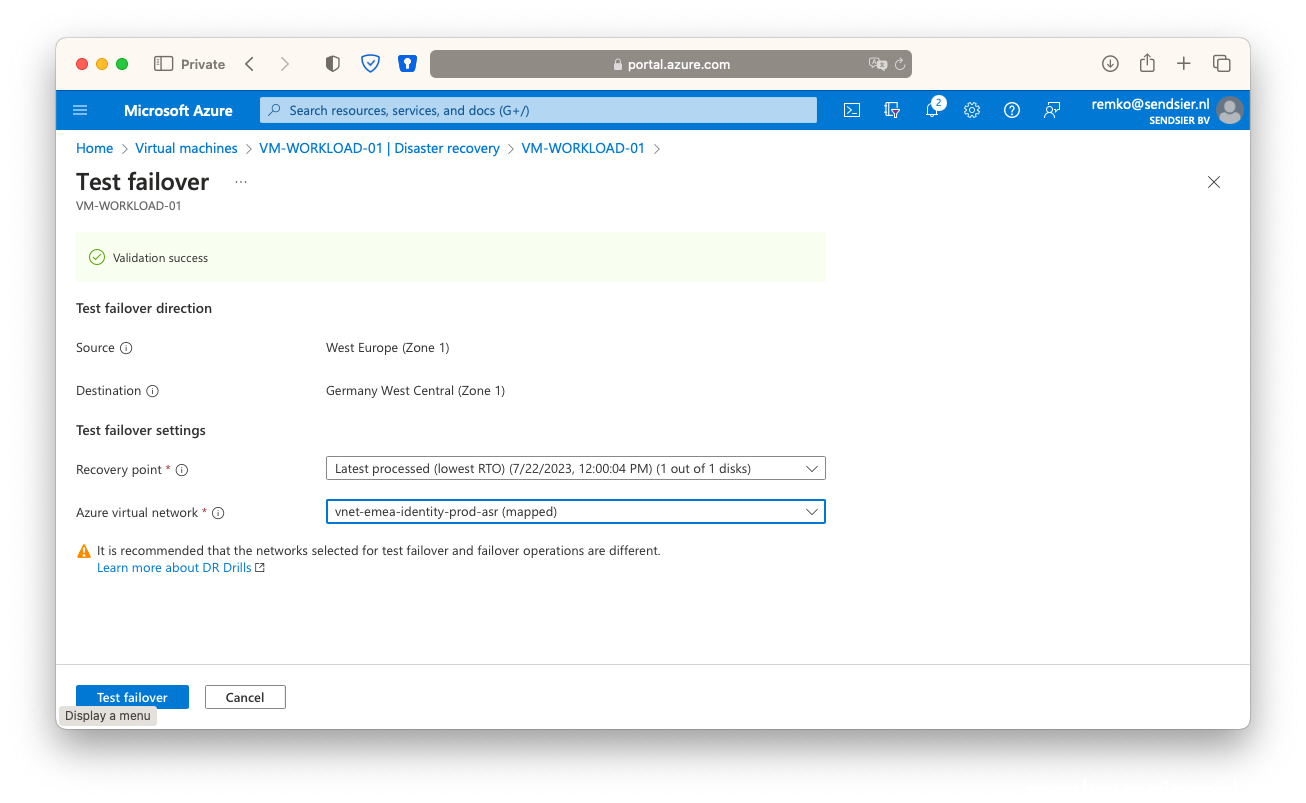
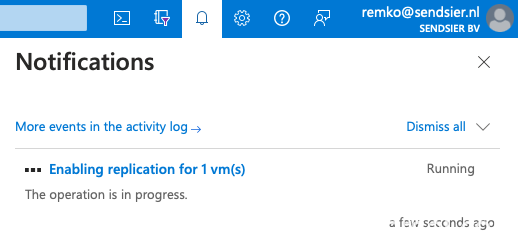
- [Test failover] this will take a while, follow the progress at the notification menu (bell icon)
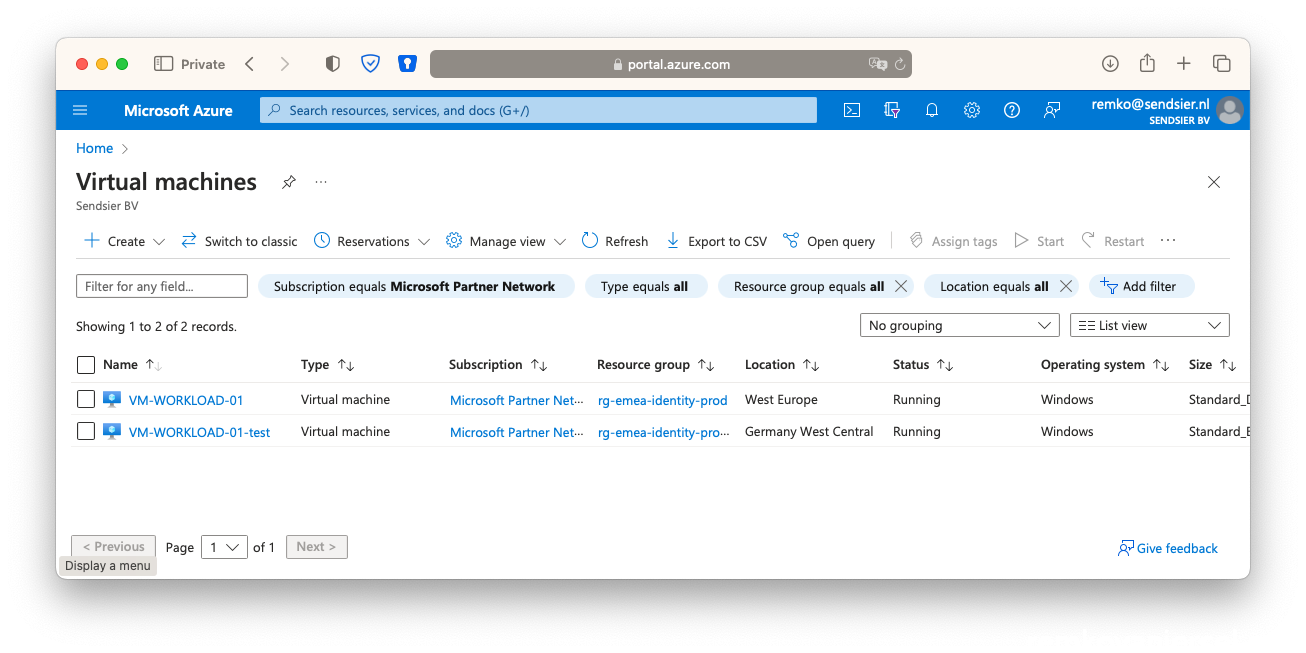
- After a while the second failover VM will be brought up:
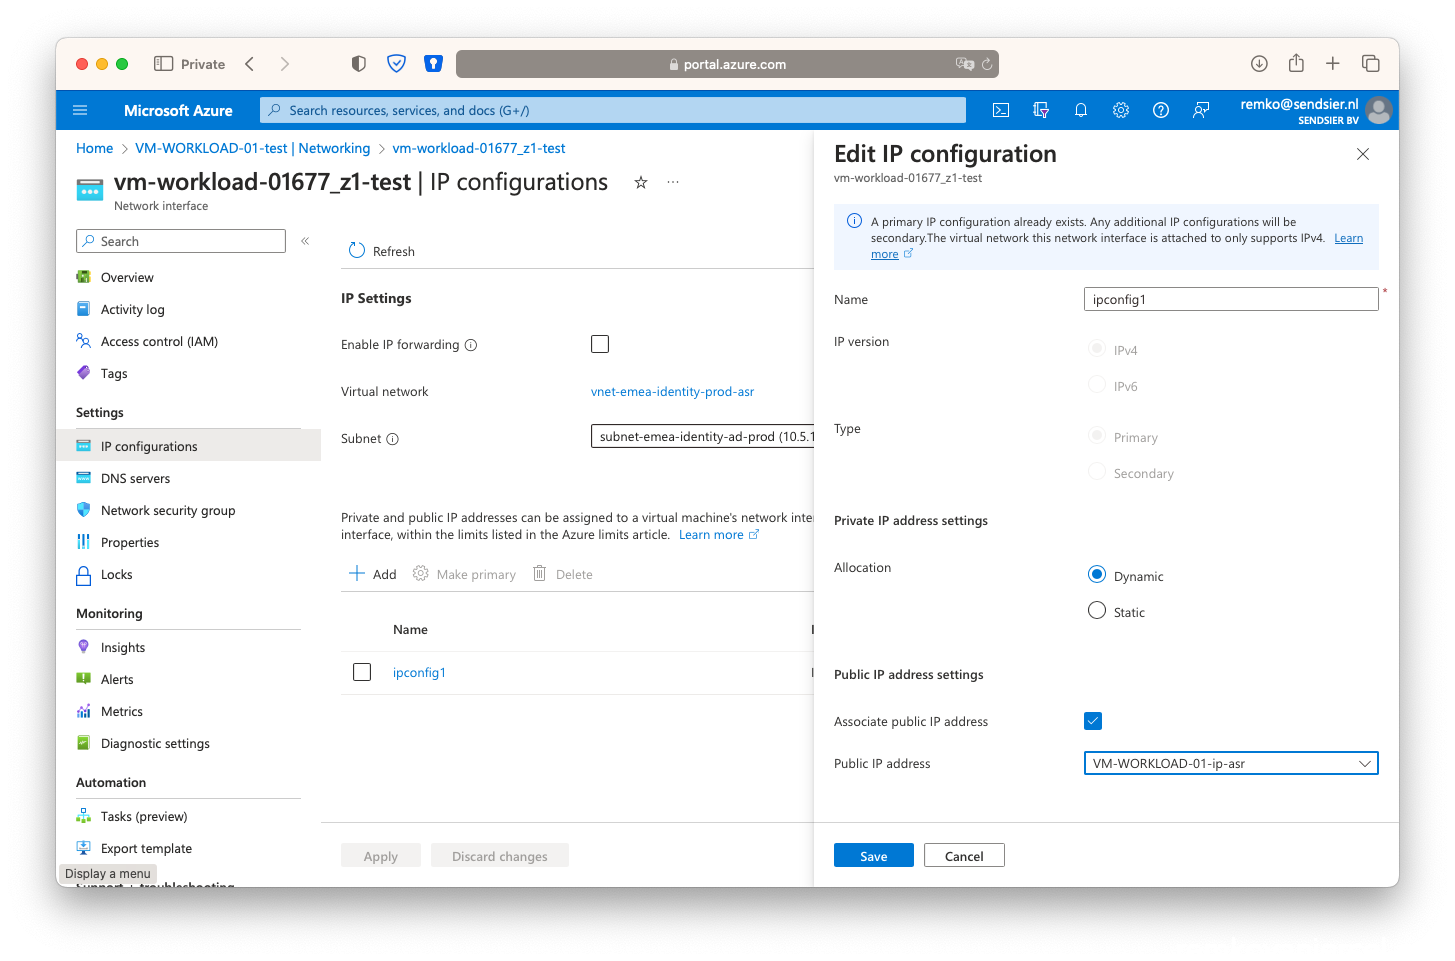
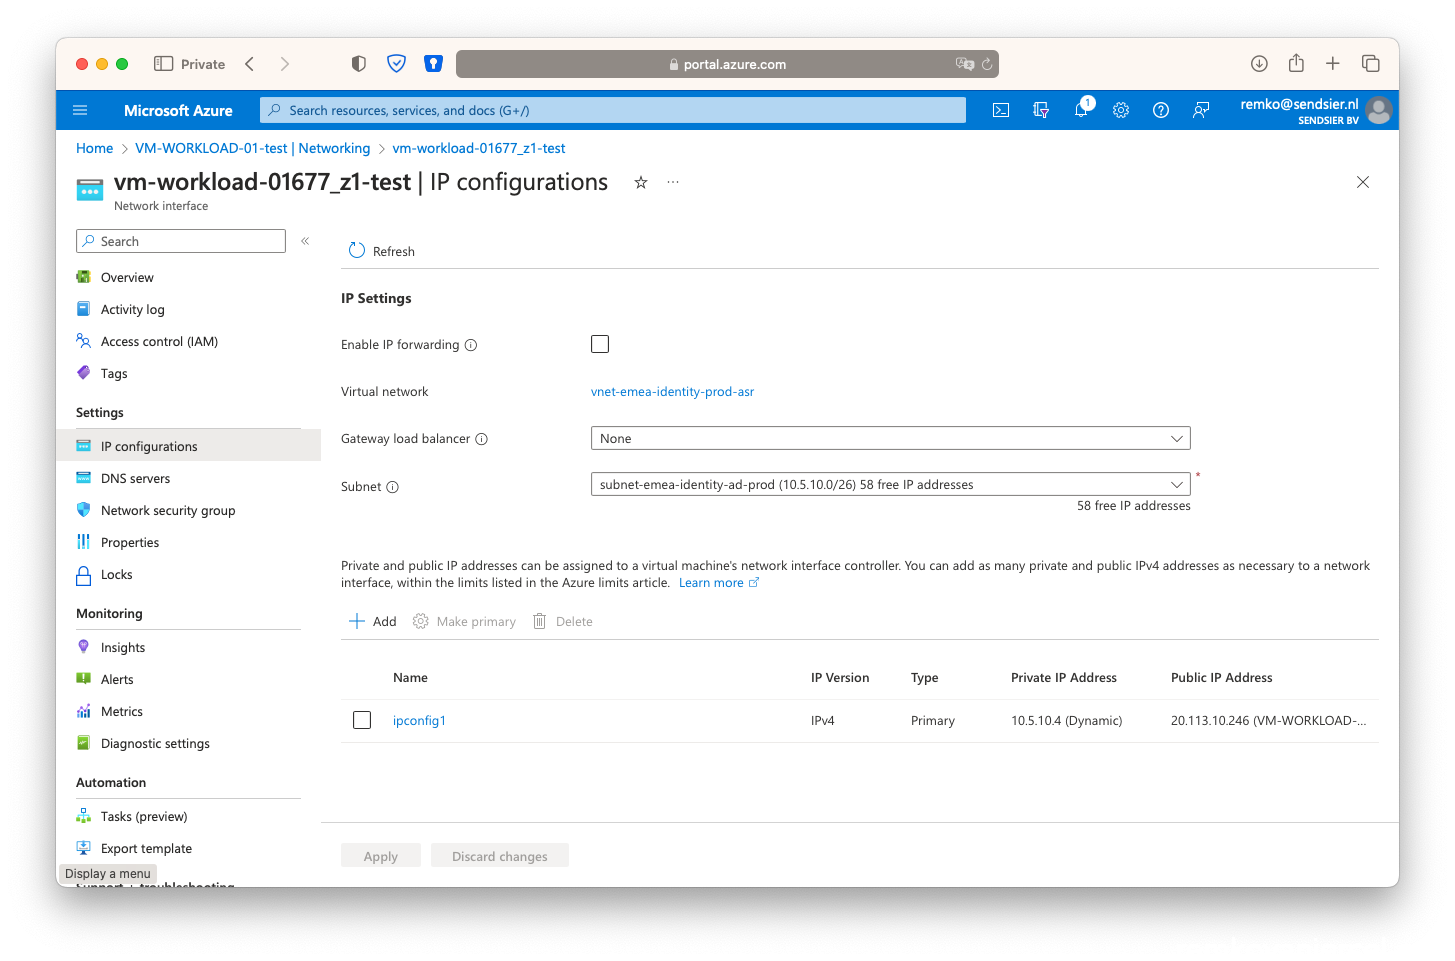
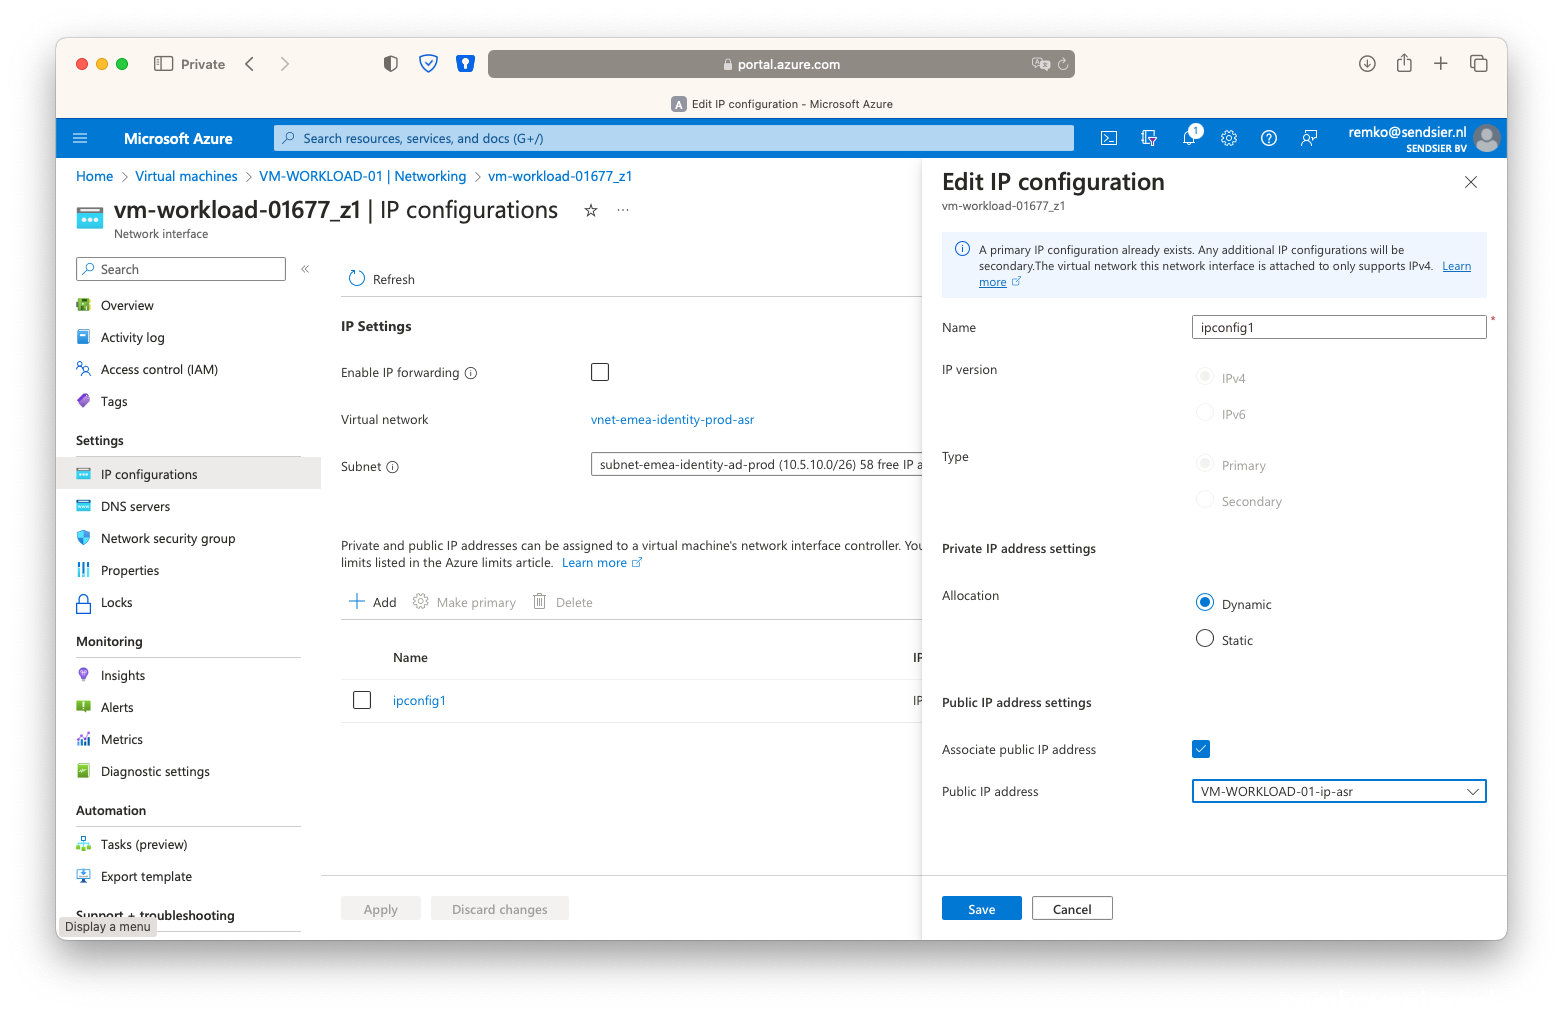
- Associate the failover public IP with this VM network inface:
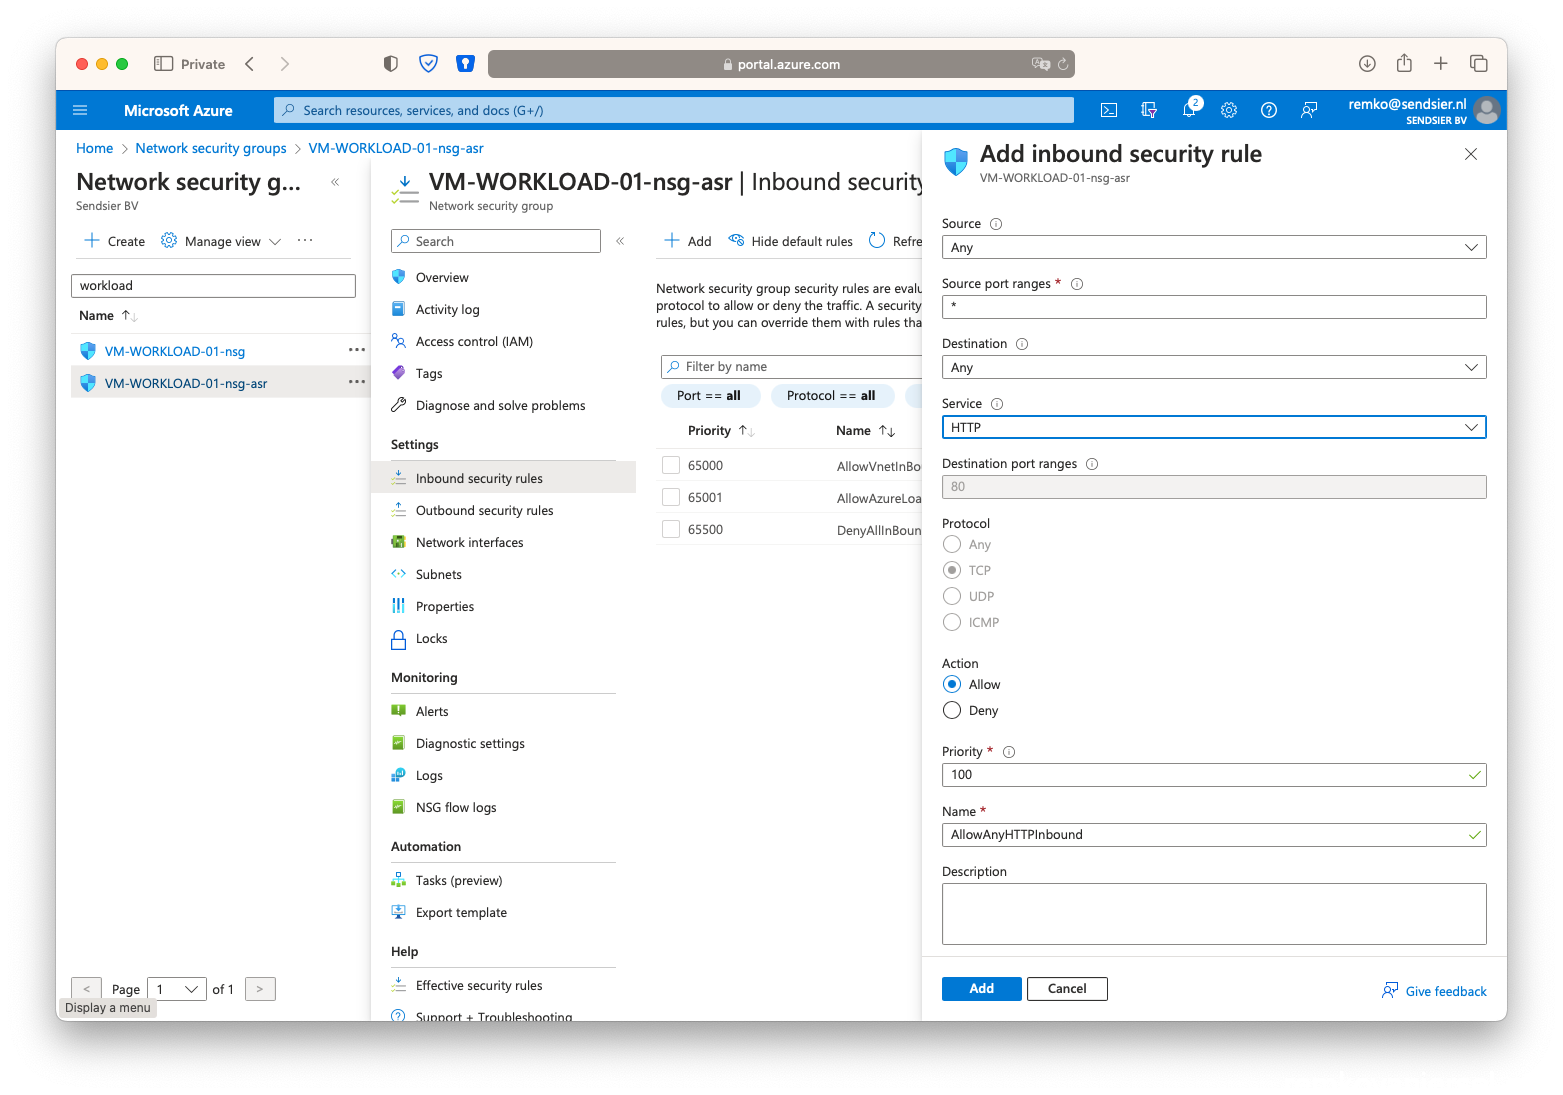
- Create the second NSG on the secondary resource group:
- After creating of the NSG, add a HTTP 80 inbound rule
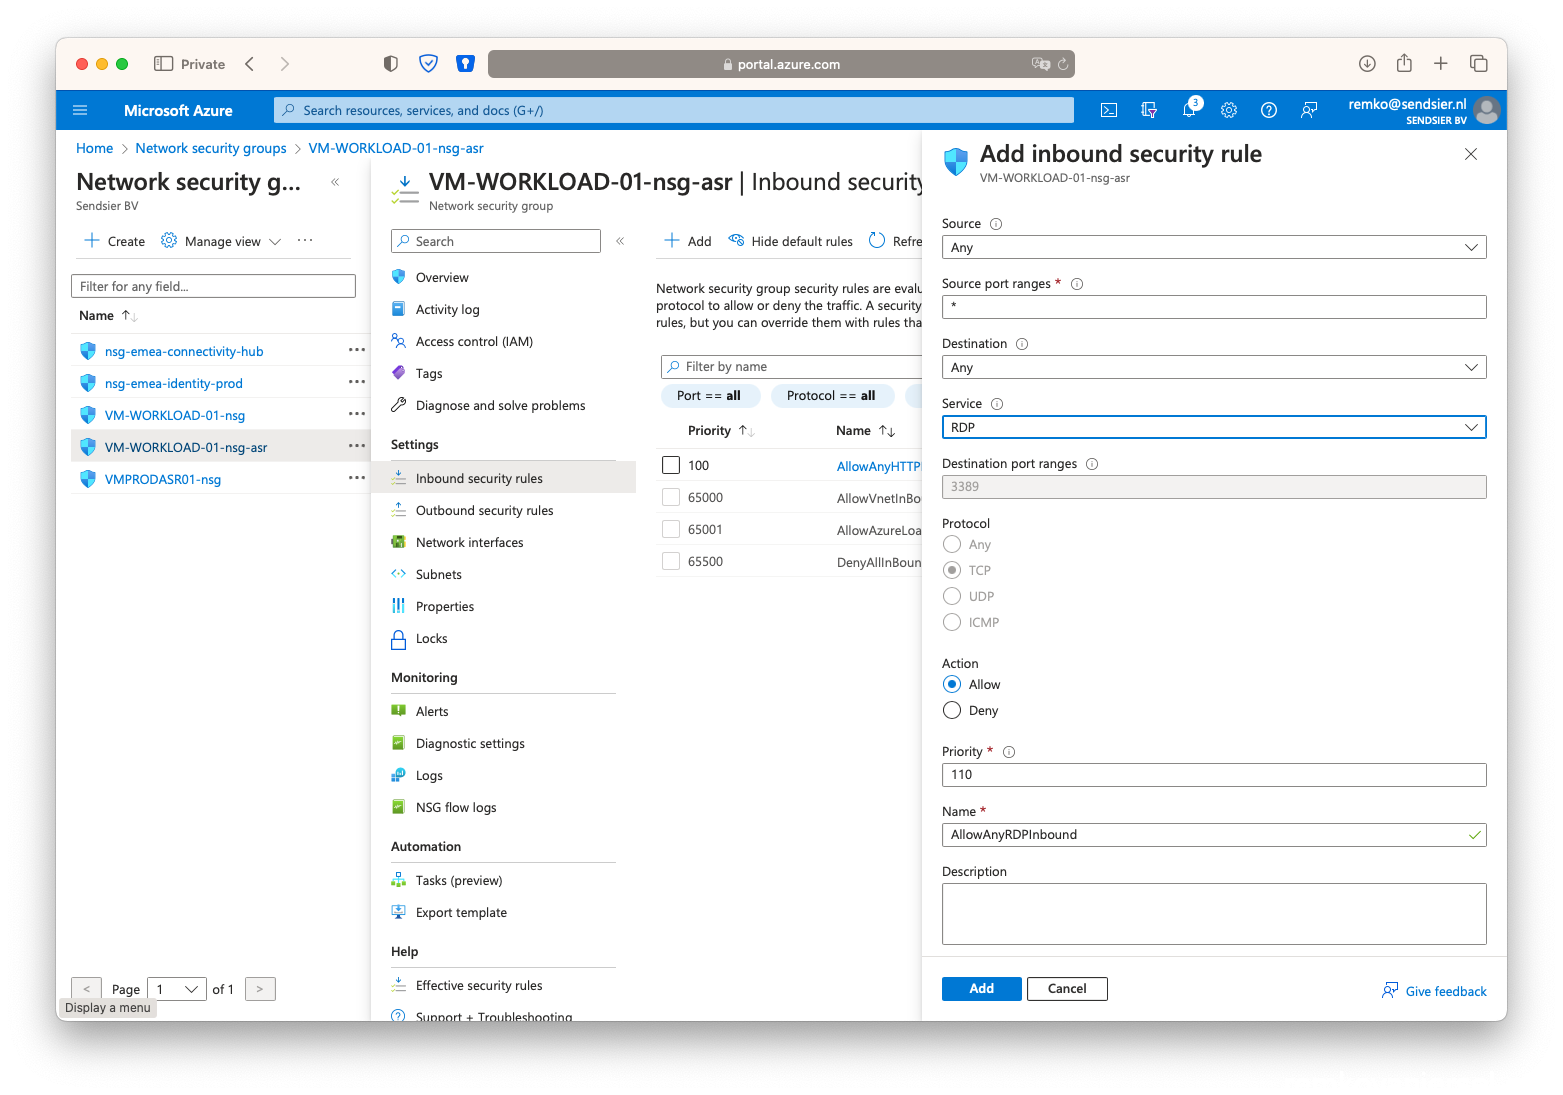
- Also add RDP 3389
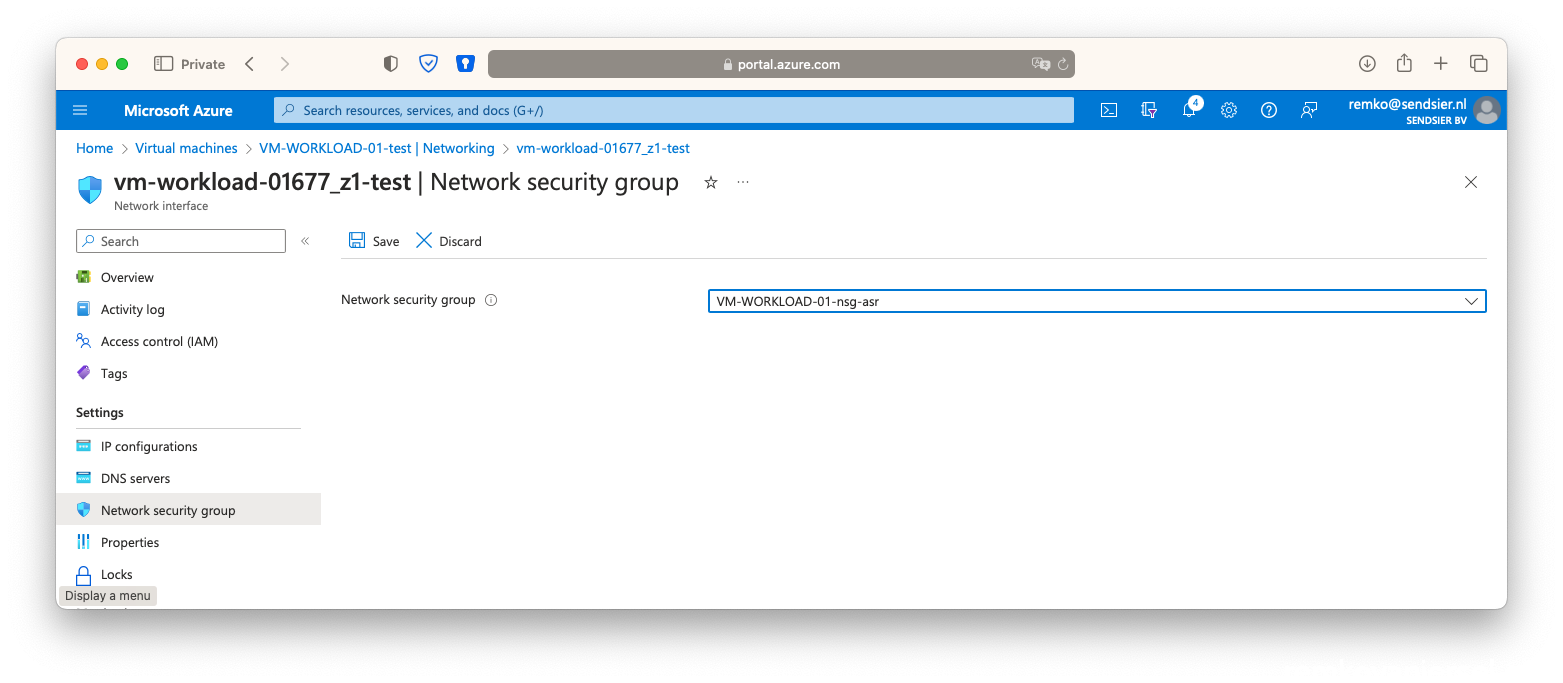
- Goto the VM VM-WORKLOAD-01-test
- Associate the NSG with this VM network interface
- Now check if you can load the website via the public IP DNS
(eg: http://workload-01-asr.germanywestcentral.cloudapp.azure.com/ )
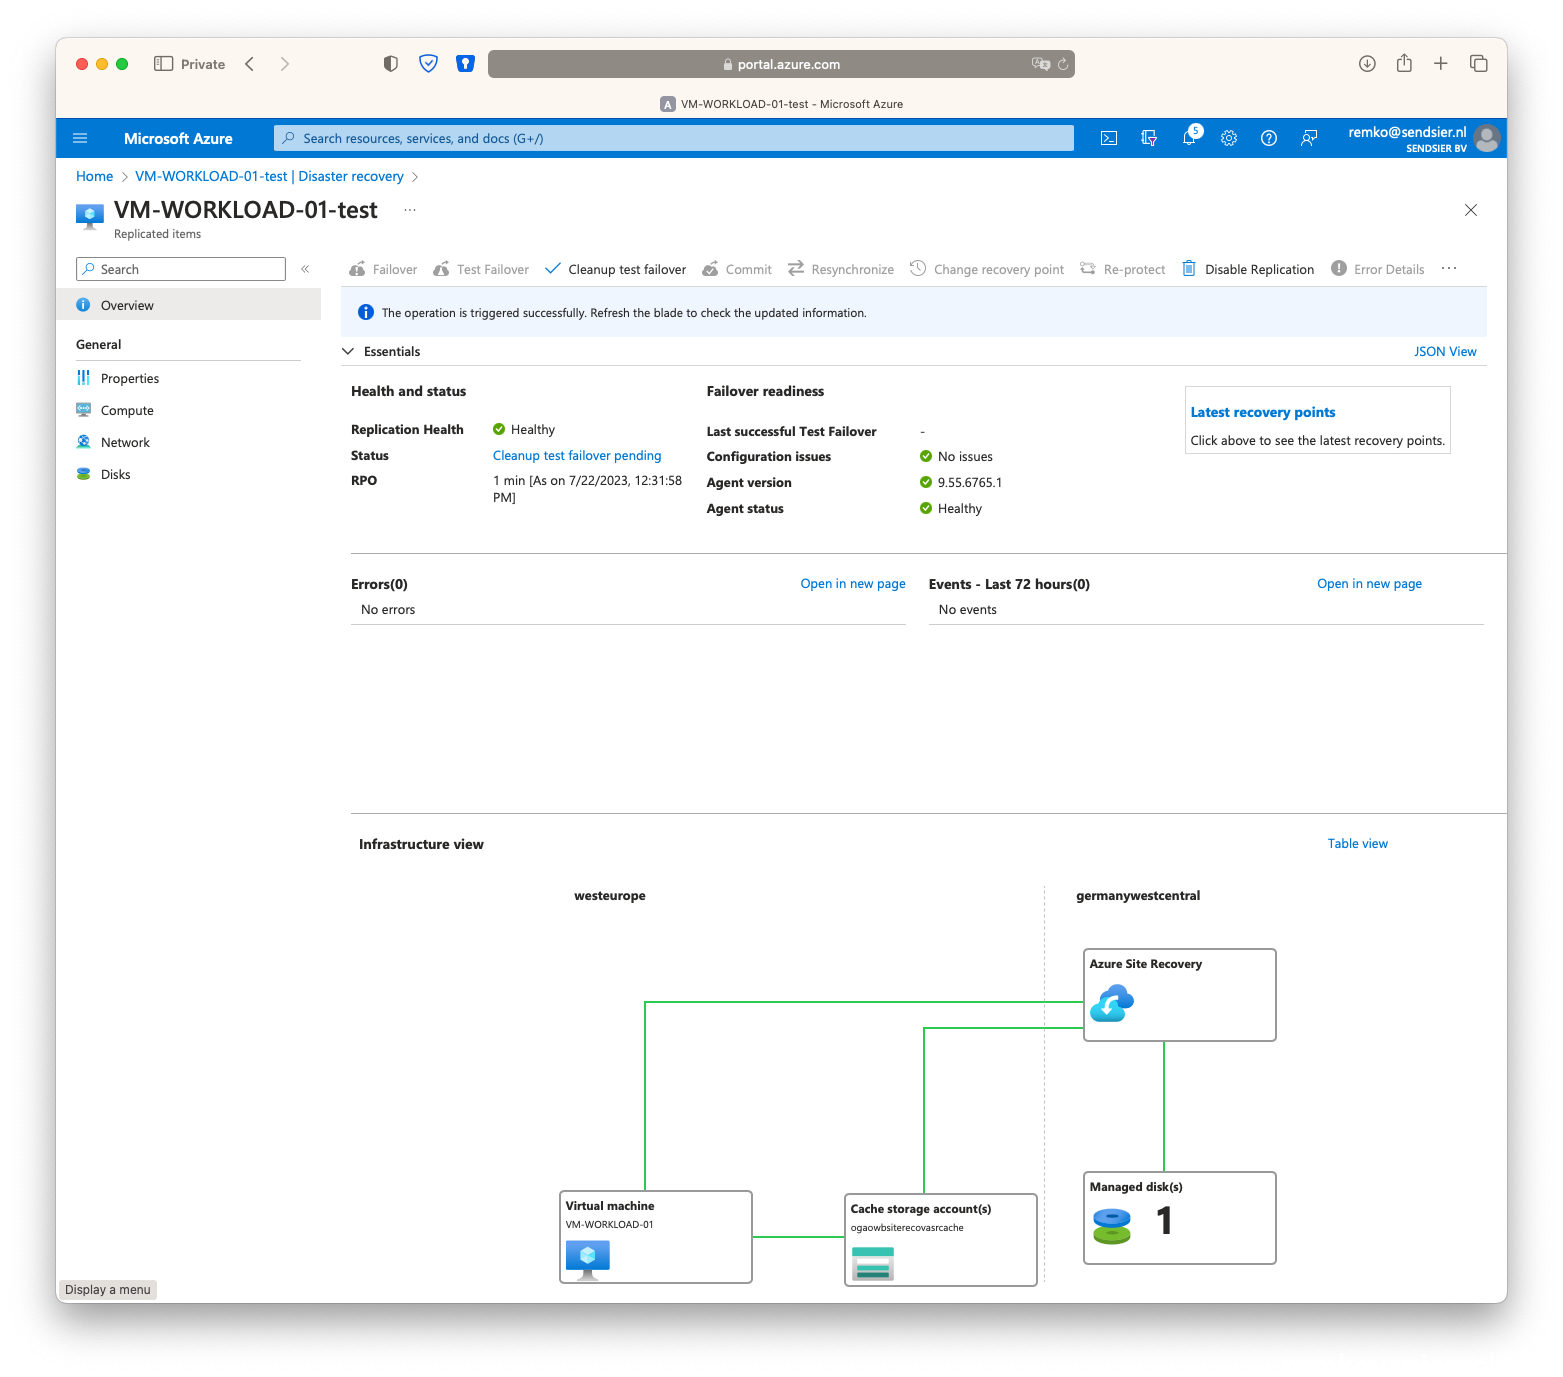
- Yes! So the ASR failover test succeeded!
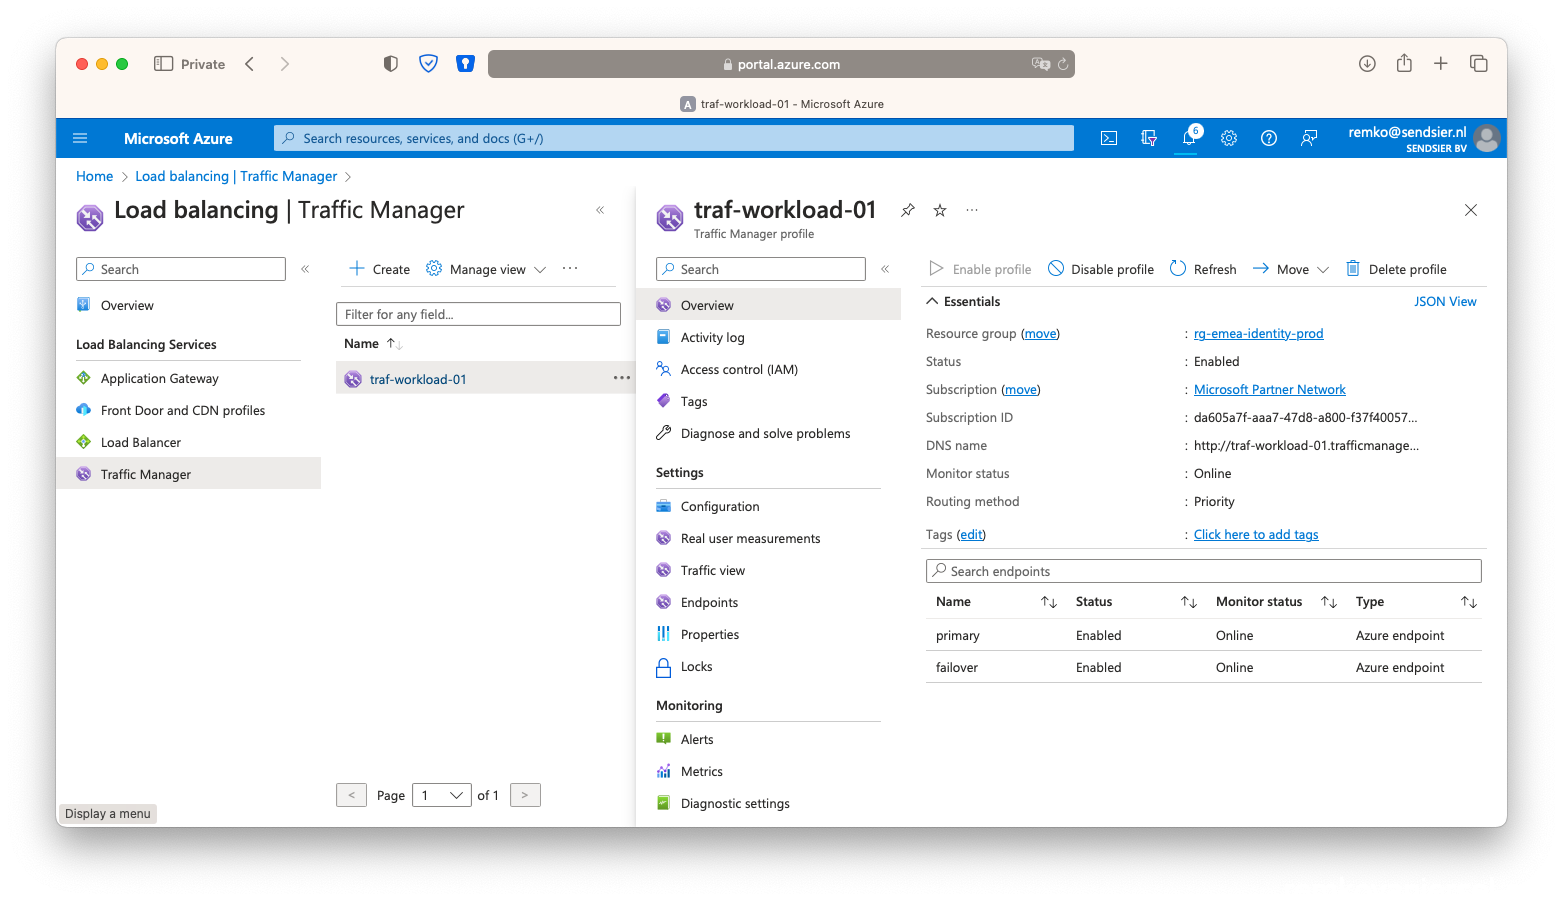
- Also notice in the Traffic Manager that both endpoints are Online:
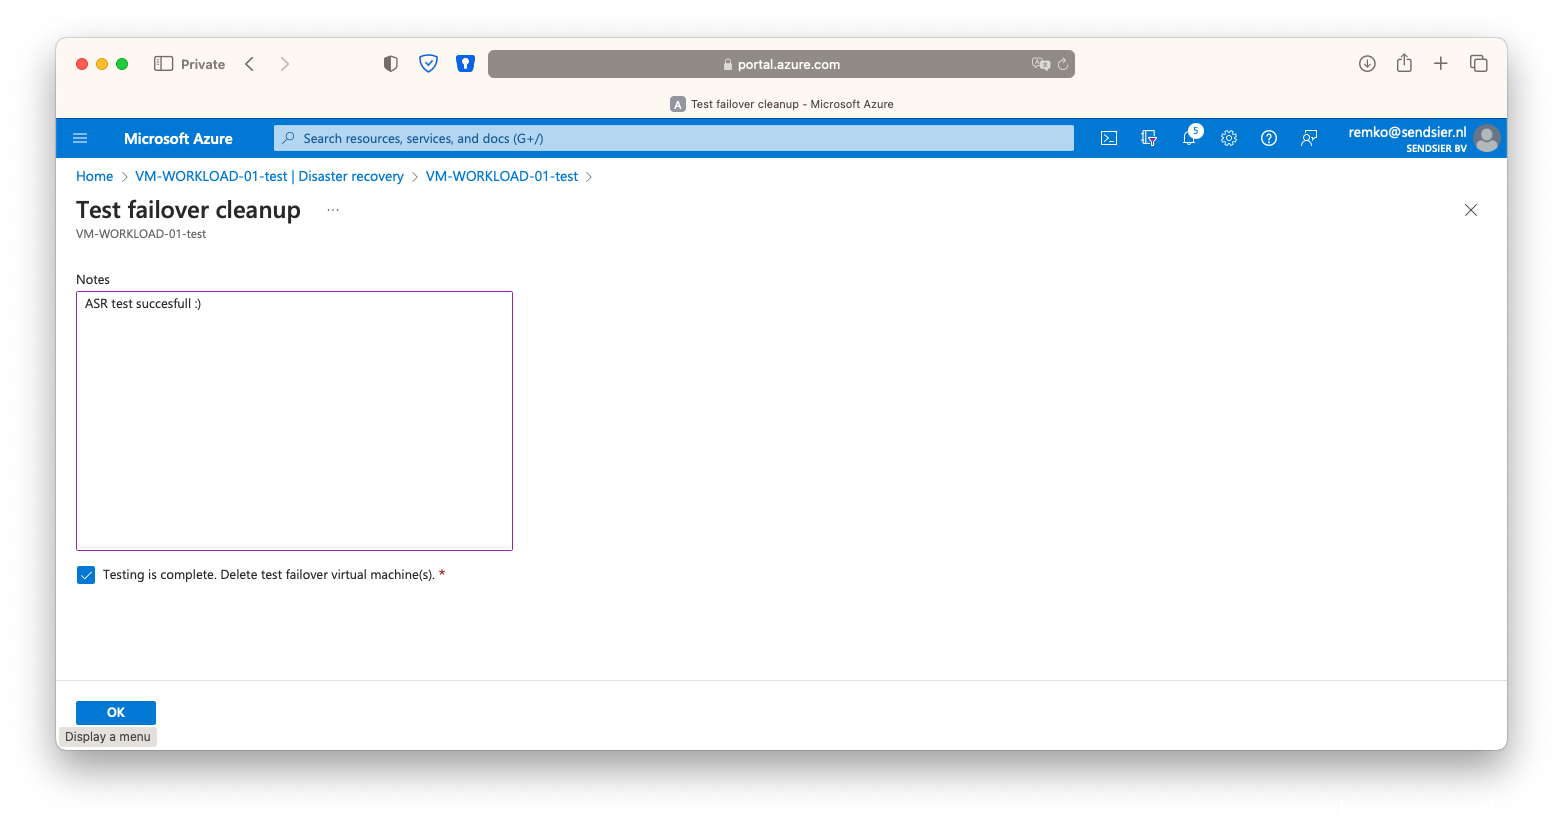
- Delete the test VM via the [Cleanup test failover] button:
- Notice after the cleanup that the Traffic Manager will report that the second failover endpoint is down:

- Also notice the second Public IP is disassociated again:
Full ASR test failover
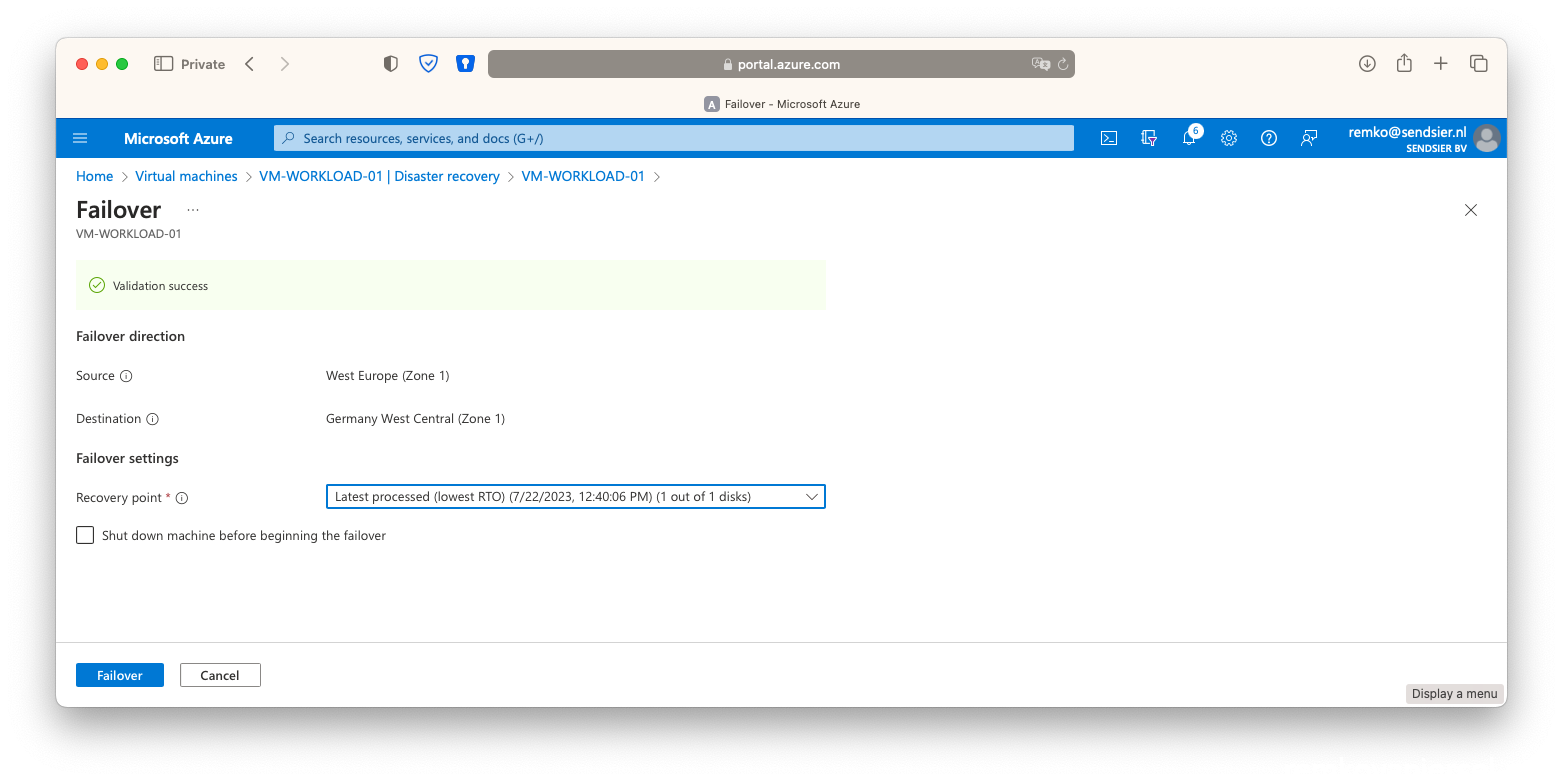
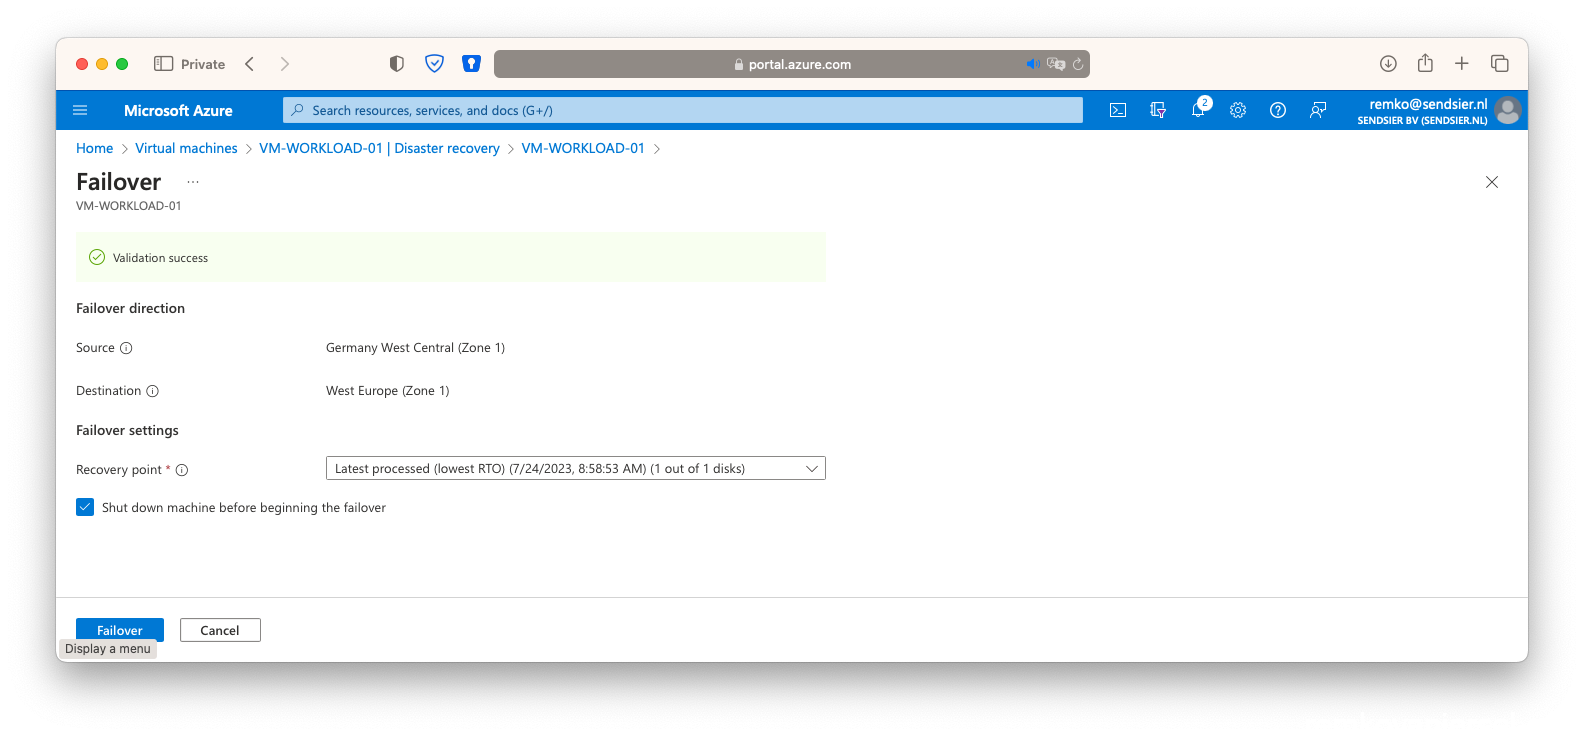
- Goto the VM, under disaster recovery click on [Failover]
- Again click on [Failover]
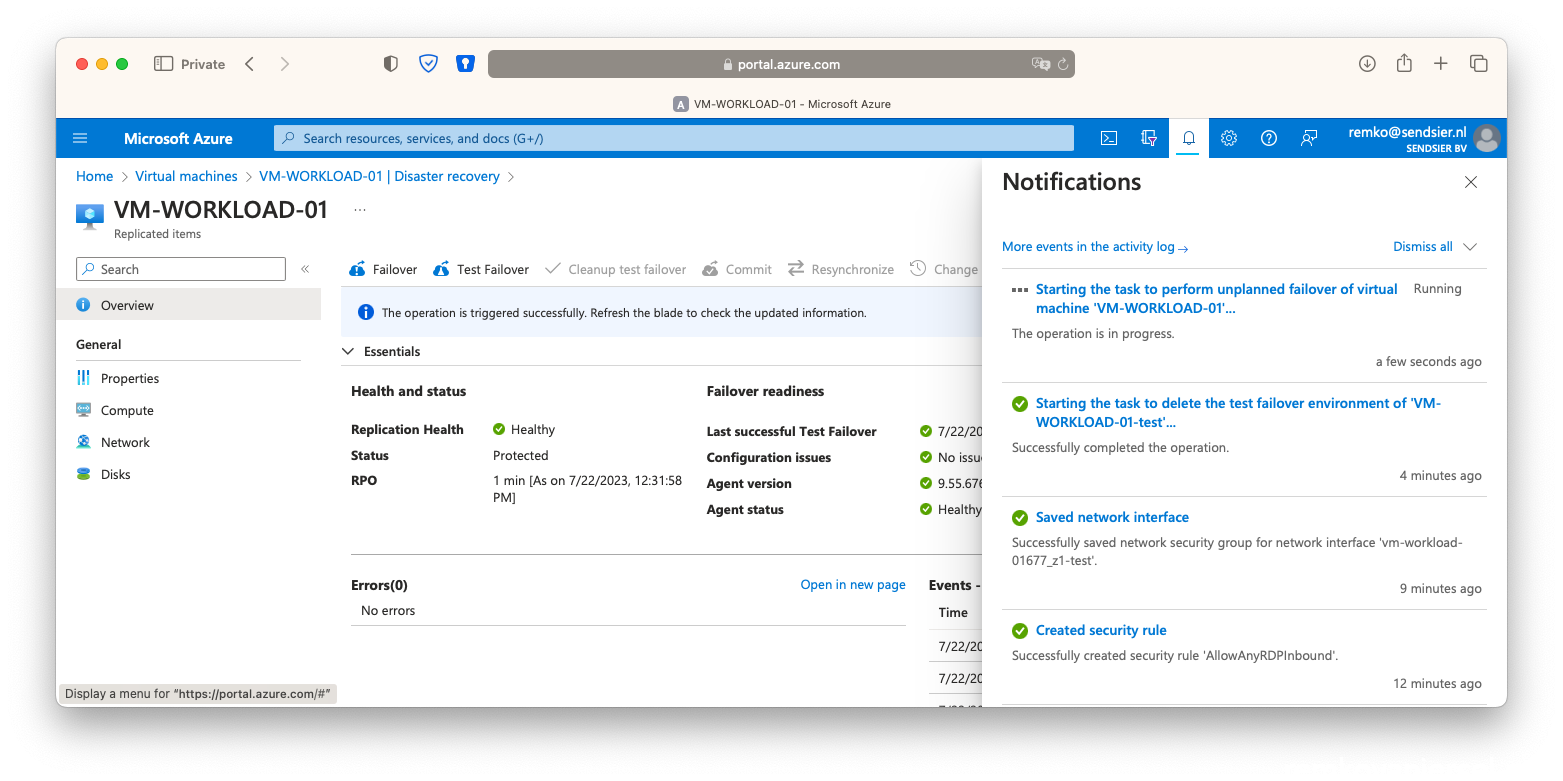
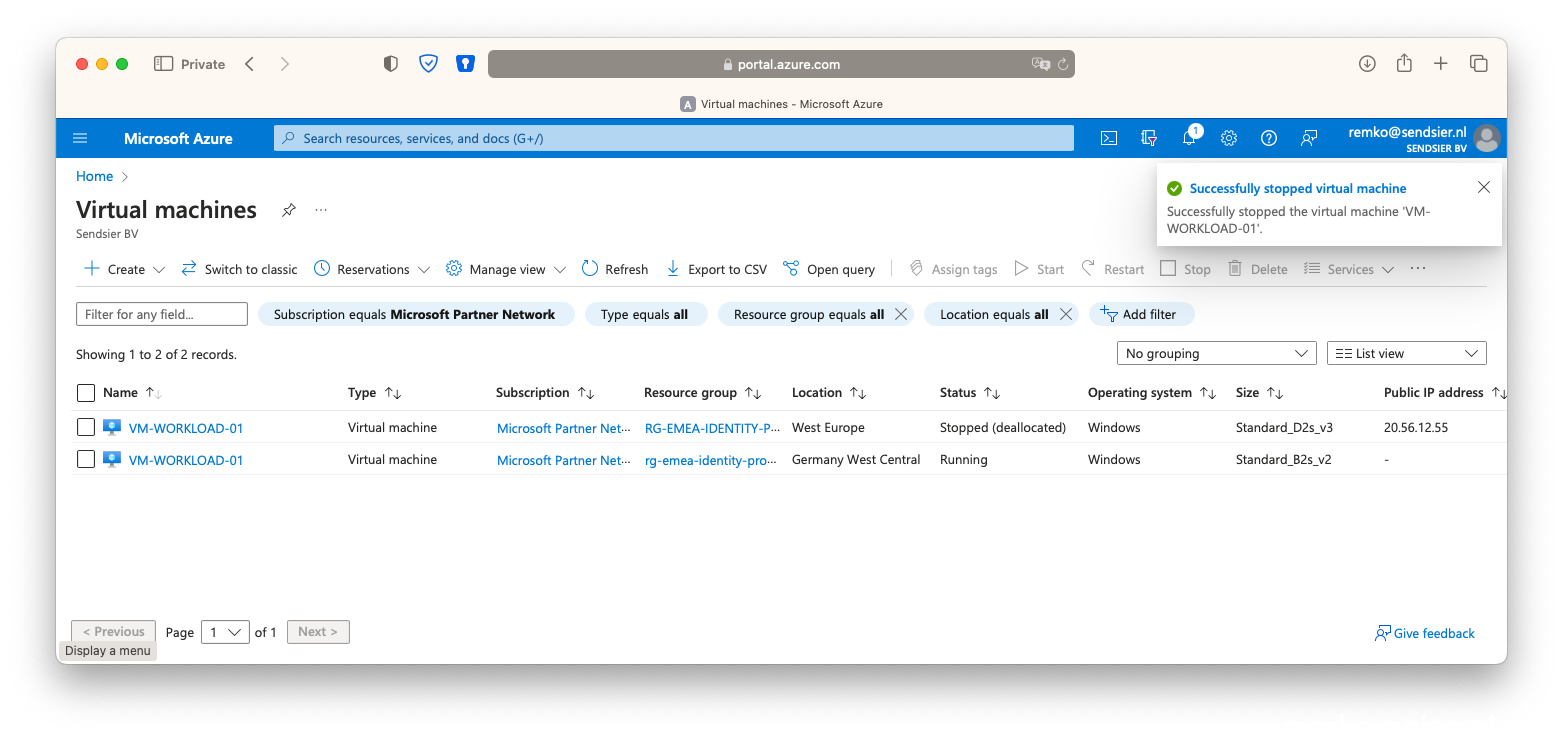
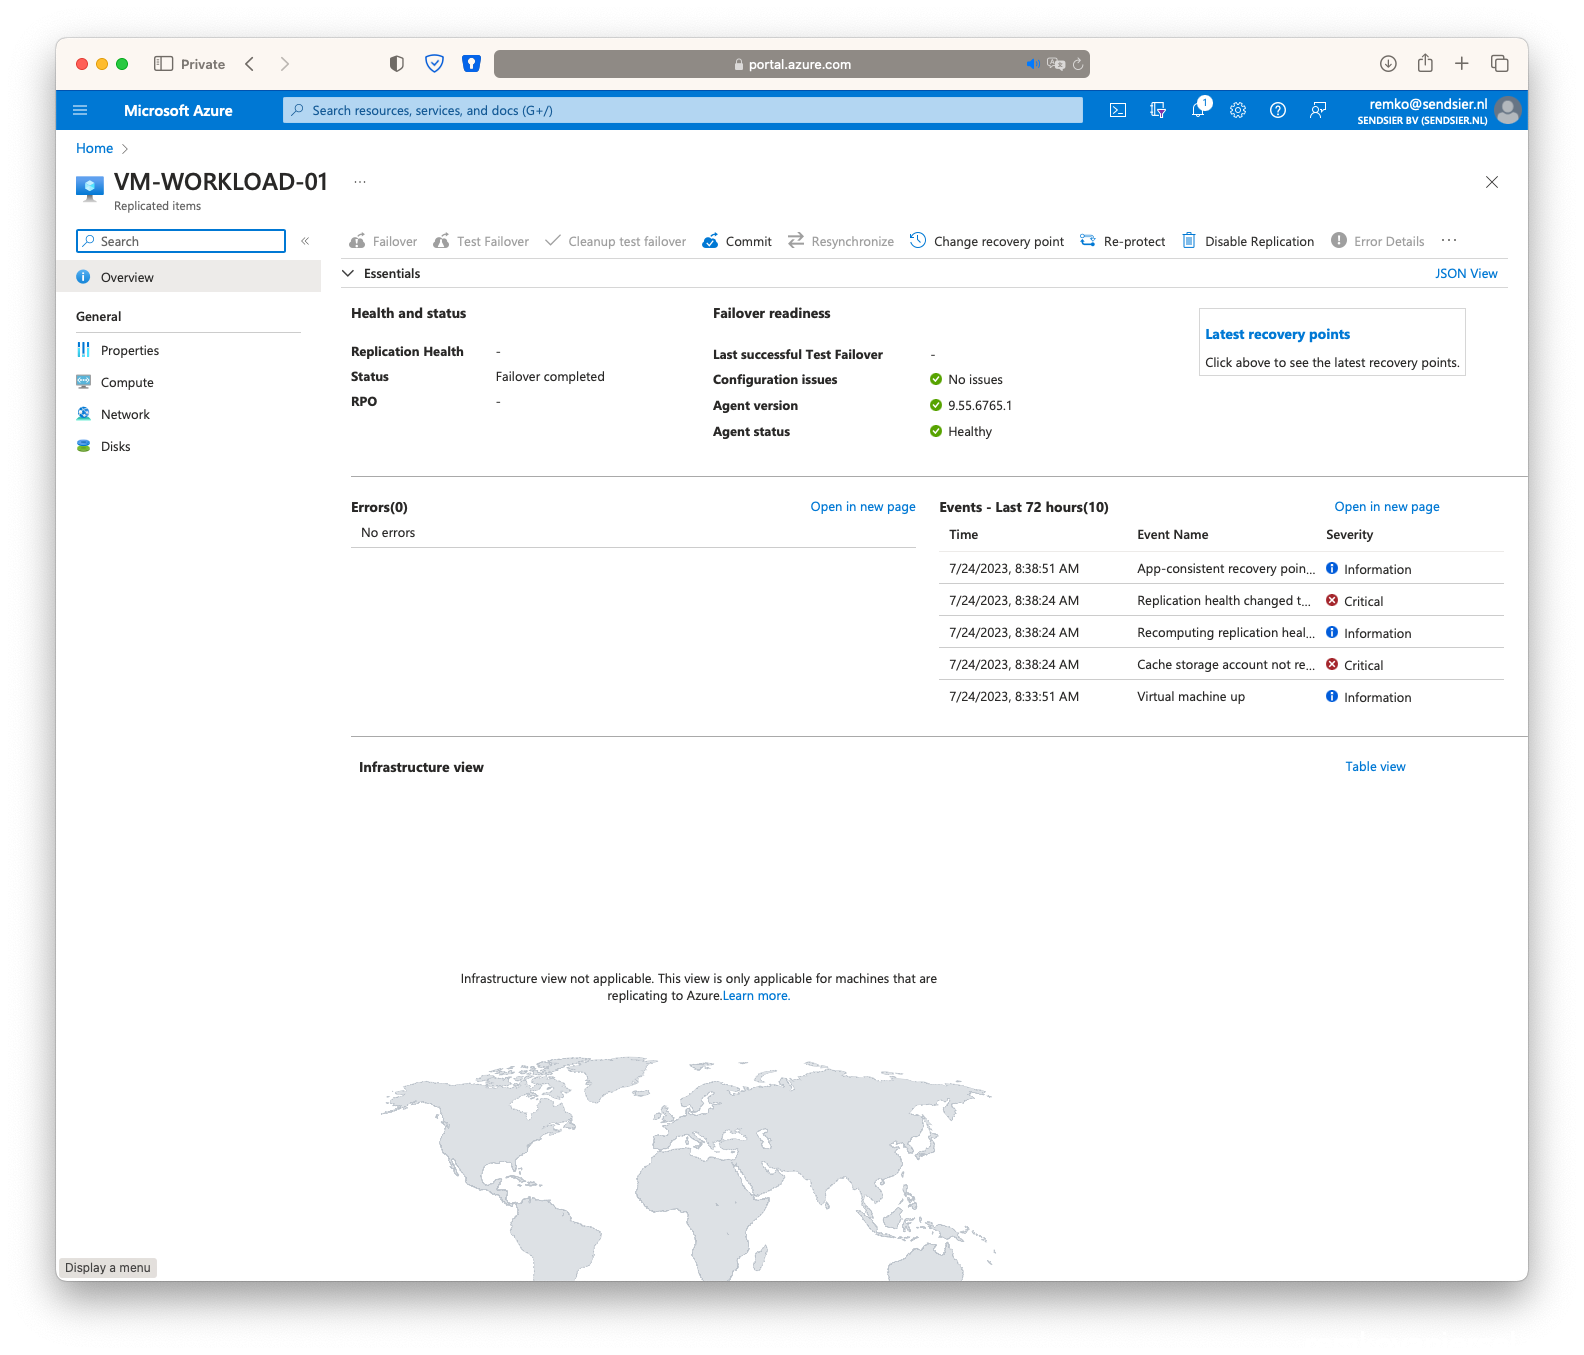
- Once the secondary VM is running in the failover site, stop the VM in the primary site
- Associate the secondary public IP again with the VM nic in the secondary site:
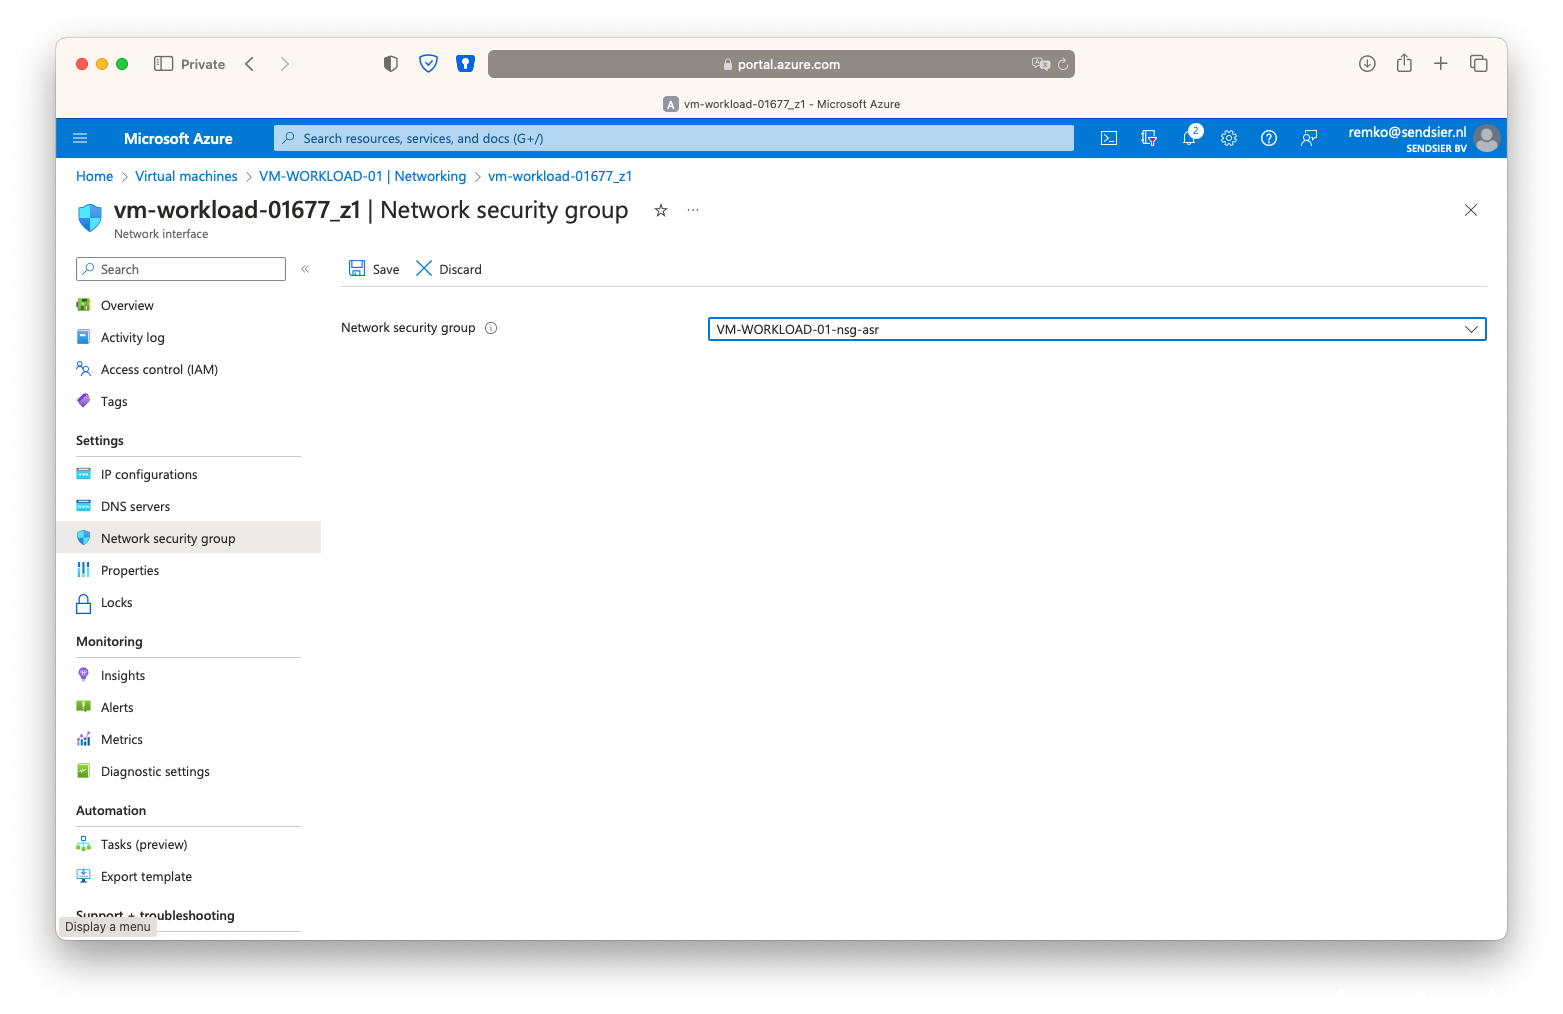
- And again, also, associate the NSG with the VM:
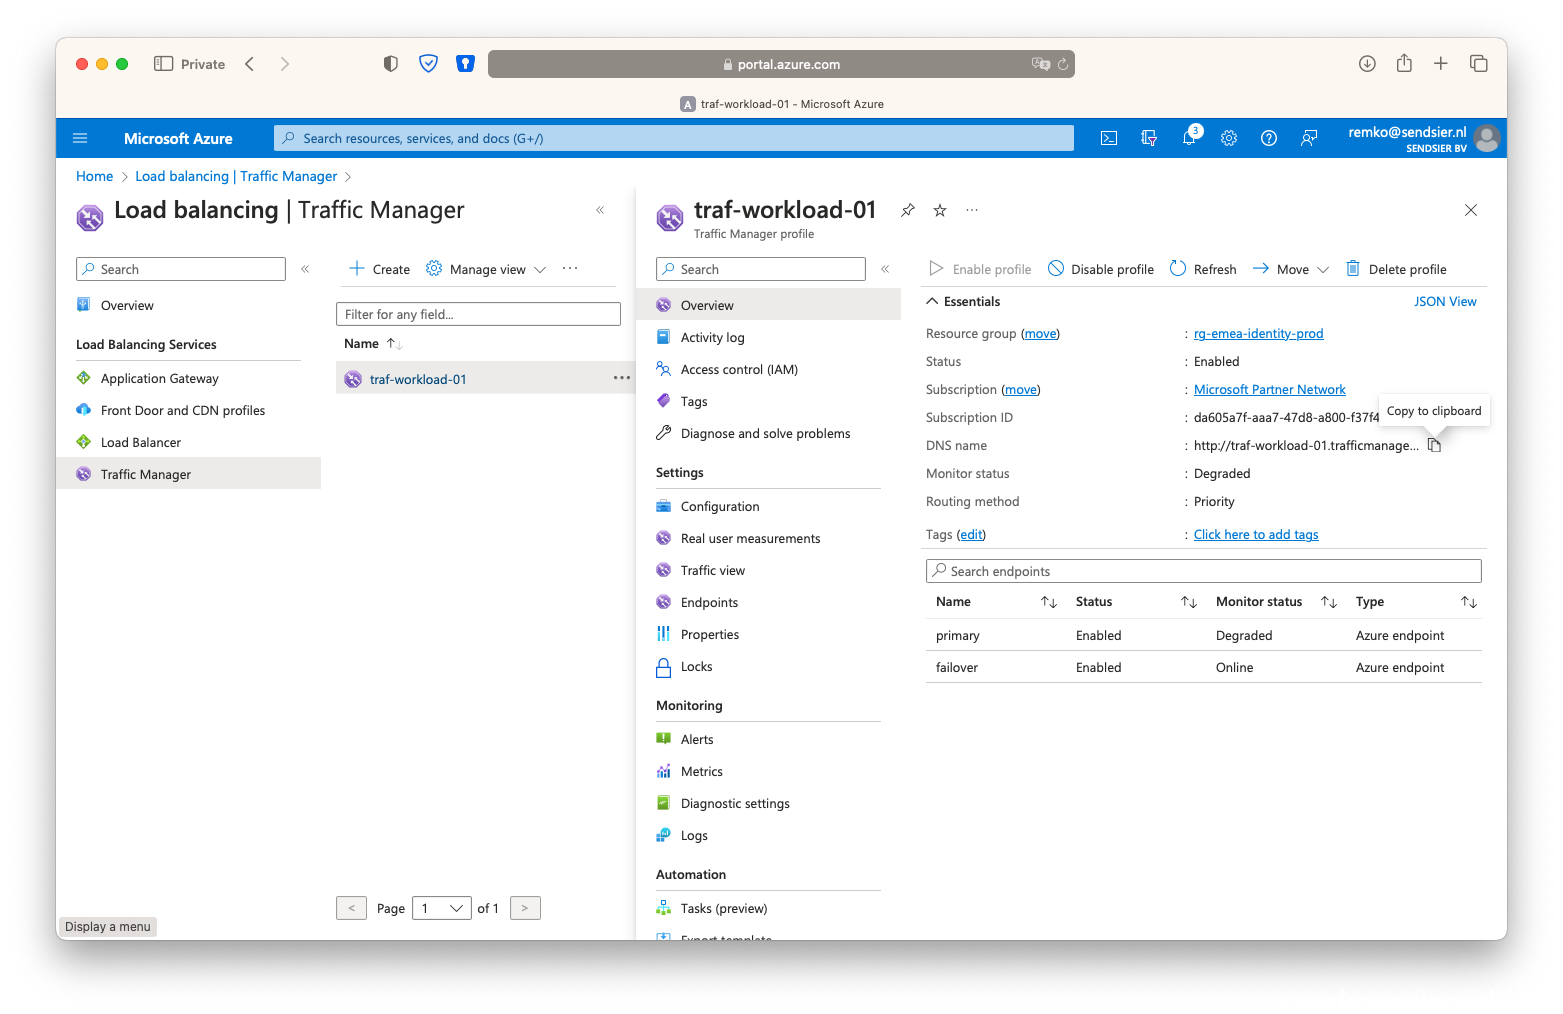
- Notice under the Traffic Manager that the second endpoint is now Online:
- Check if you can reach the website again on the secondary public IP DNS:
(eg http://workload-01-asr.germanywestcentral.cloudapp.azure.com/ )
- Now the moment suprime, check if you also can reach the website via the unique traffic manager DNS name:
(eg: http://traf-workload-01.trafficmanager.net/ )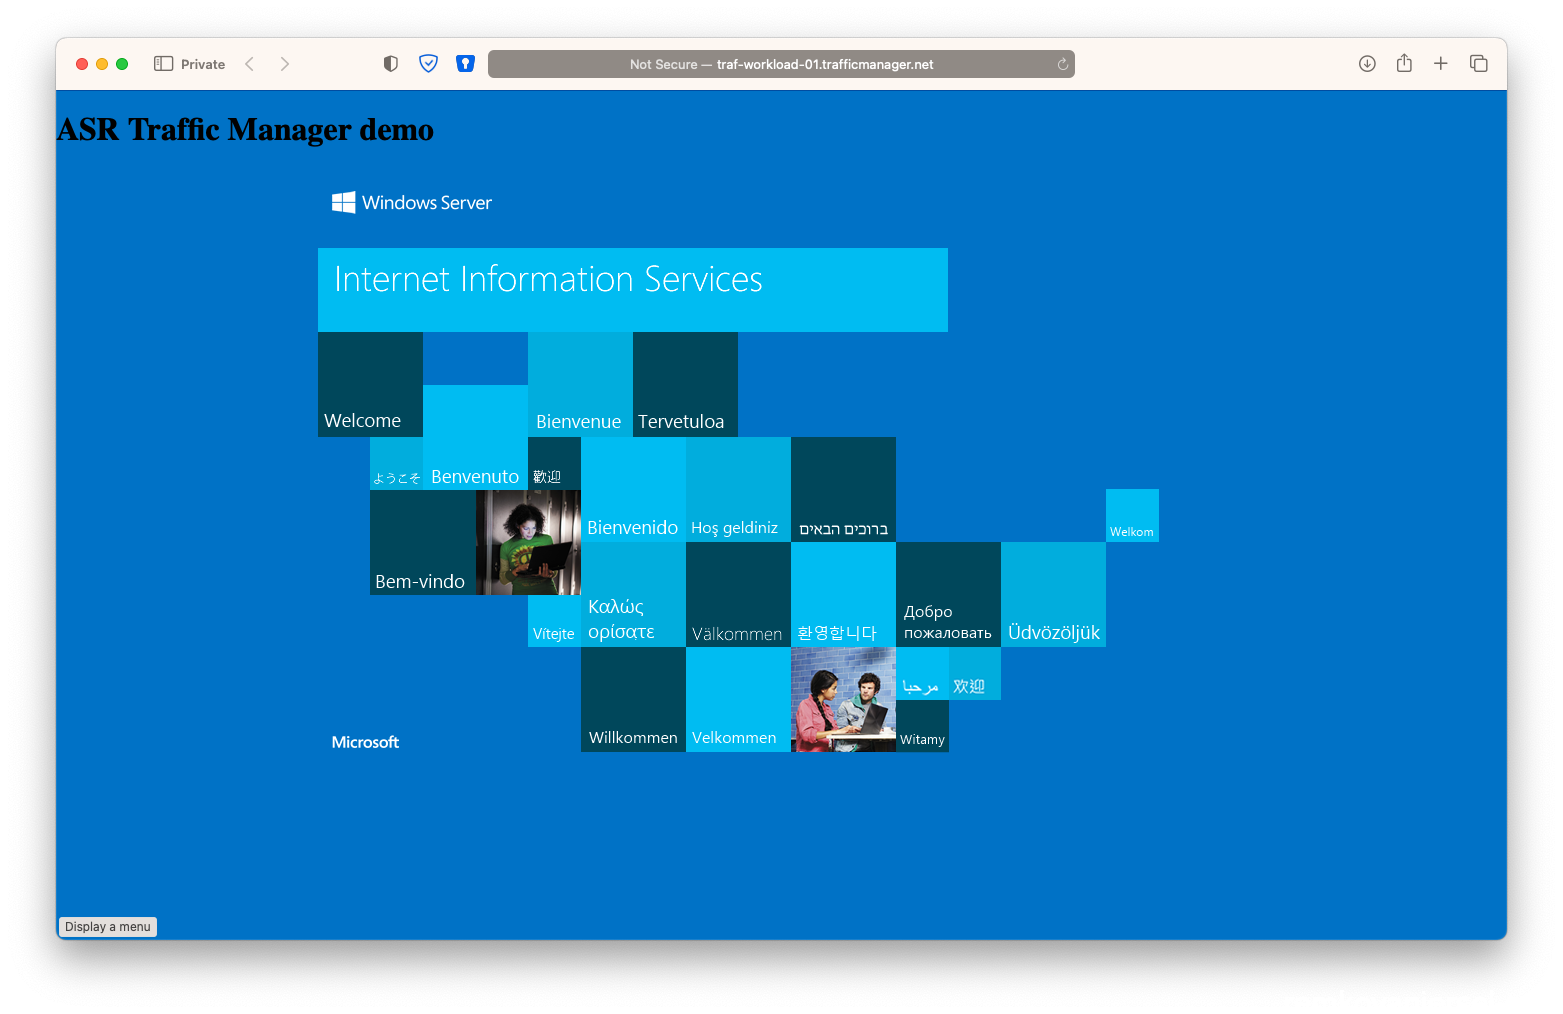
- Yes this worked!
So as you can see if you create a cname.yourwebsite.com to this traffic manager URL http://traf-workload-01.trafficmanager.net/ if will always be high available after a failover
Rollback
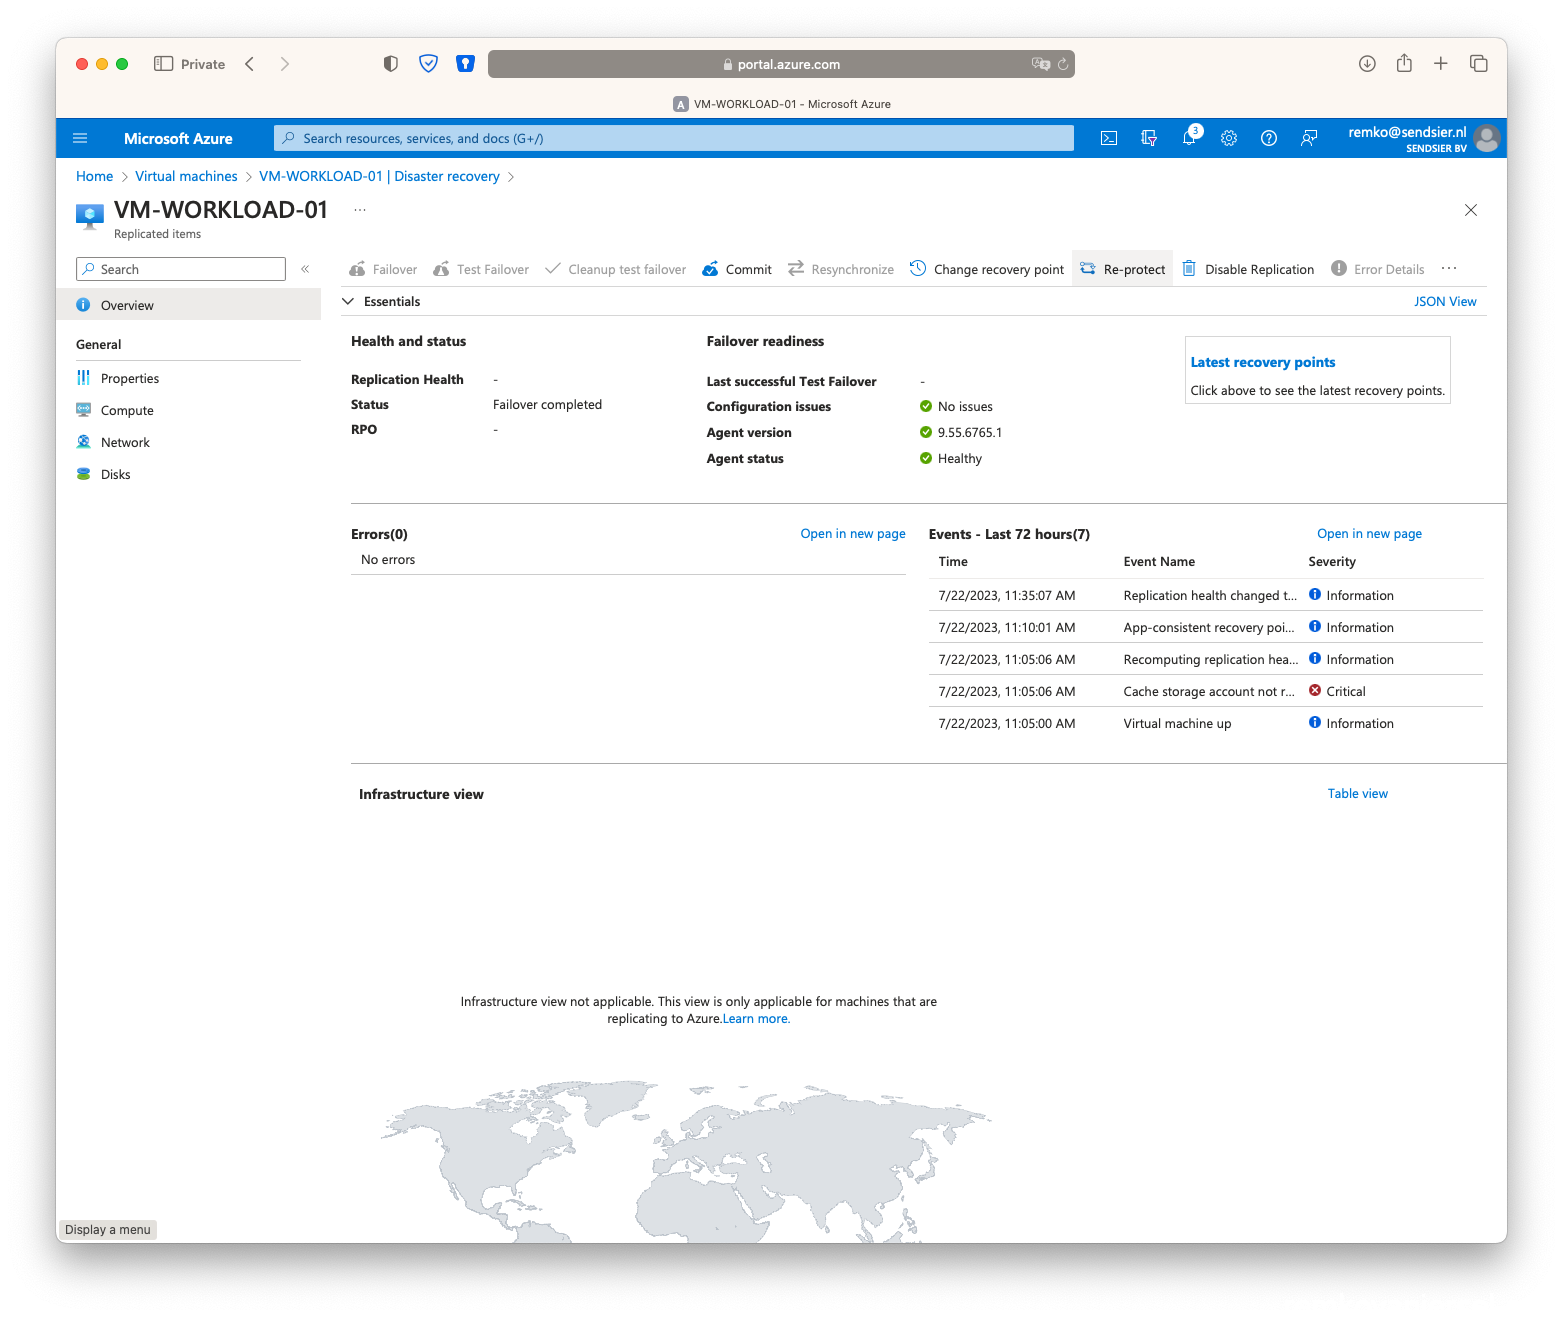
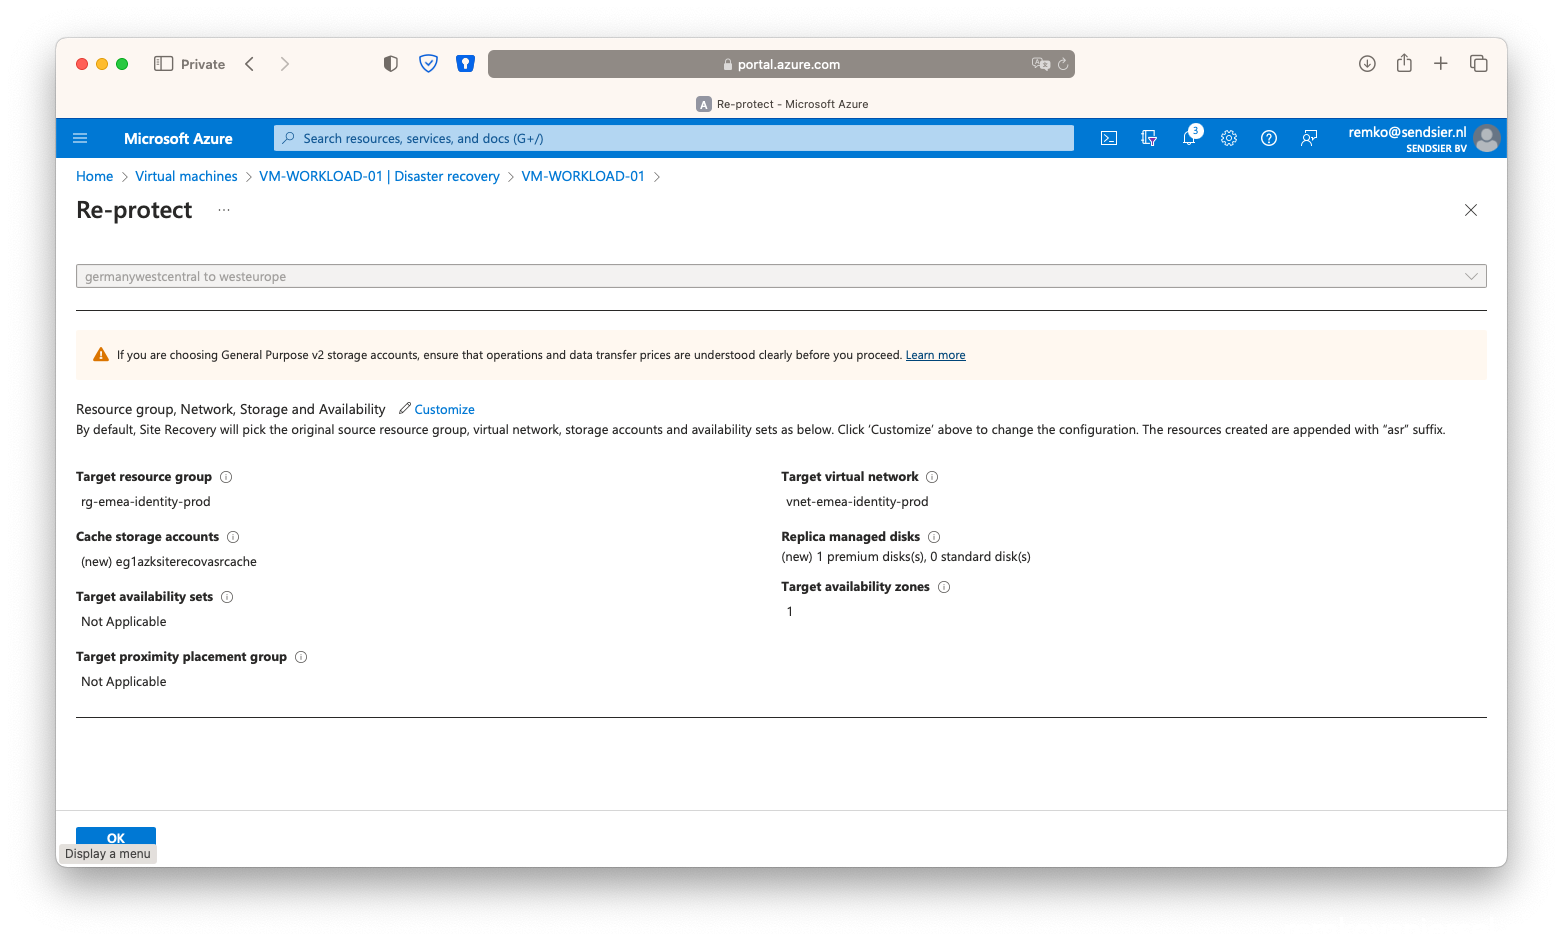
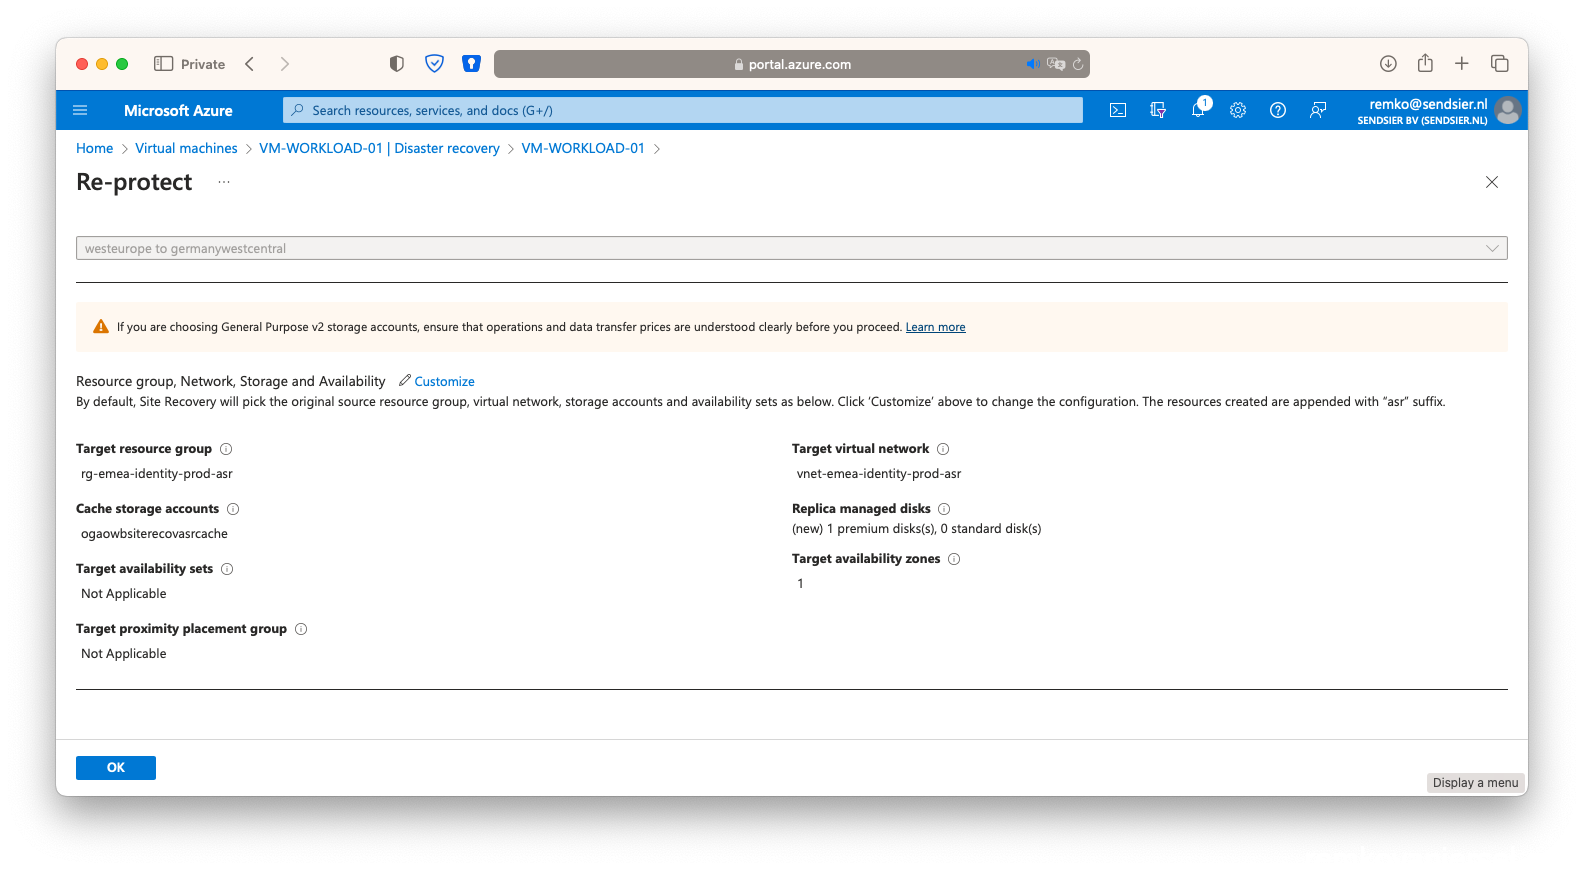
- On the running VM in the secondary site, go to Disaster recovery and click on [Re-protect]:

- Click on [Failover]
- Notice that the secondary VM is now Stopped and the primary Running again…
- Click on [Re-protect]
- After this, the secondary VM will be automatically deleted:

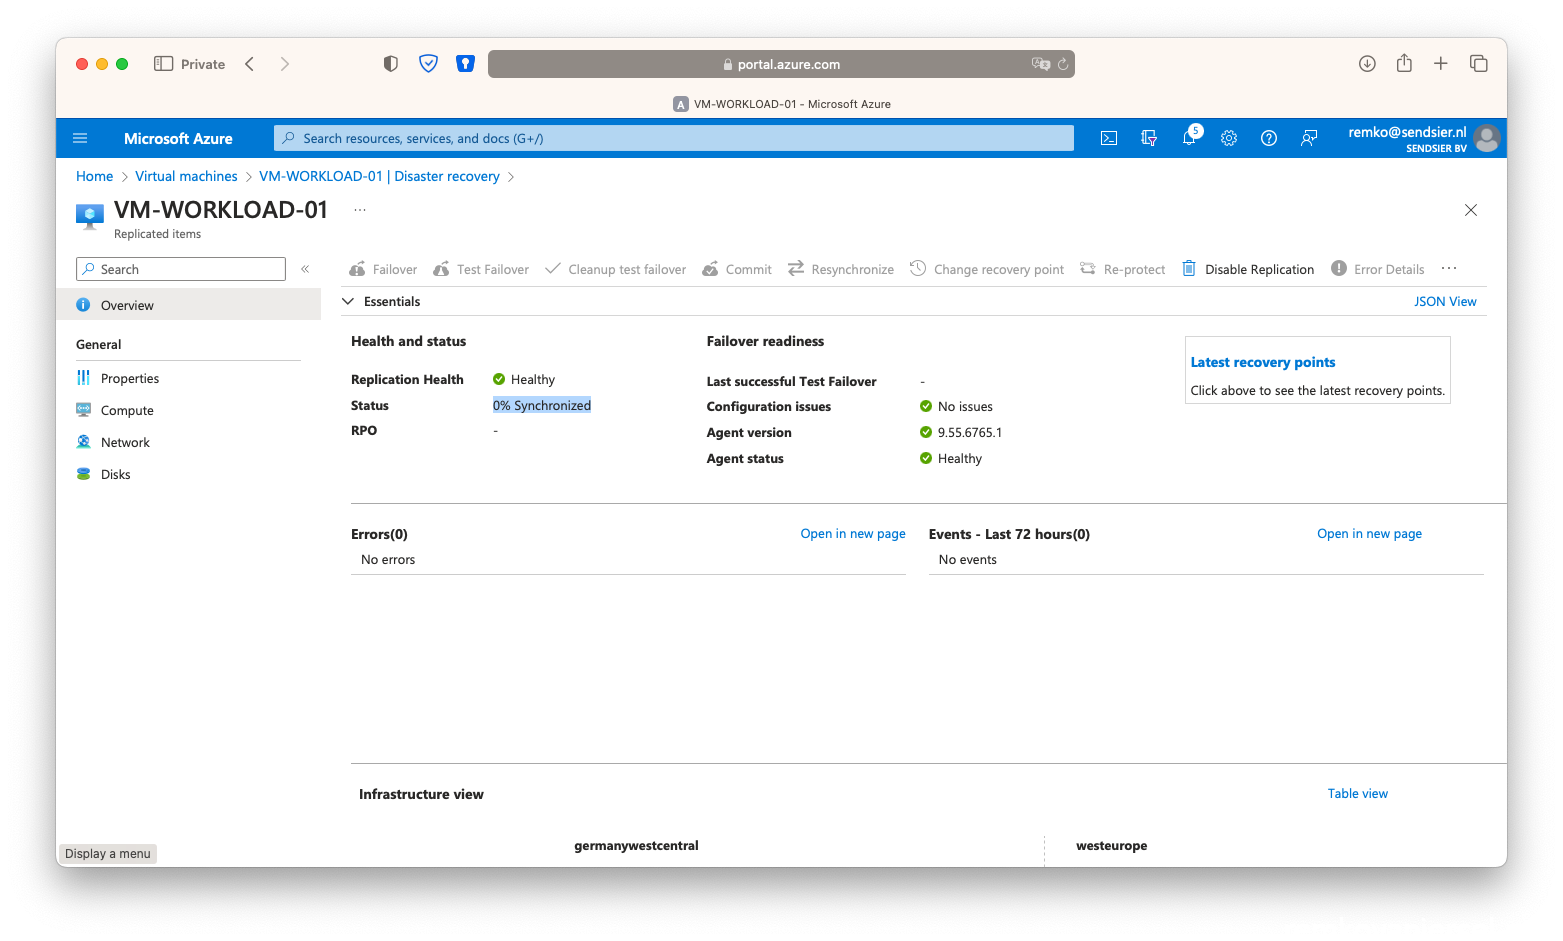
- Wait until the VM is fully protected again (takes up to 1 hour):

- Done
Managed Disk still in Germany? No:
- After the rollback, the public IP and NSG is automatically associated with the VM again:
- Website working: